Stay Connected
Ever wanted a way to stay connected to your guildies outside of event times, or want to get notified 30 minutes before one of our events start?
Why not join the [PSDH] Discord? To join our Discord server, click on the link in this message or press the Discord logo on our banner at the top.
The tactic you're describing is demonstrated in these videos: (EG)
(eS)
both videos have links to other videos of other player point of views.
Red is right in that it's uncommon, because it's not often a required tactic if you're going with a full squad, it also requires a lot more coordination to make sure everyone is on the same page with the tactic, something you often can't afford with a random group.
It is a speed clear tactic, designed for increased efficiency. When you are low in numbers (i.e. not 10 man) you want to consider ways to increase your damage as much as possible as it is easier to reach enrage with the decrease of damage due to low numbers. If you want a safe run, you take 10 people and take no chances.
By doing this, you trade one set of dangers for another set of dangers. The biggest danger doing it this way is simply if a slubling doesn't eat the right things at the right time, the run goes to pot. However, the benefits of this method are that you have increased DPS (since sloth is motionless, he essentially turns into a training golem) and that you're right ontop of the slubling spawn point and can cleave them down = no slubling pressure. You also gain more DPS as there is less downtime for players who are eating poison areas.
If you have less people, you also have the benefit of more situational clarity - there's less effects going on, less mini aoe's get spawned during his tantrum. Because of this fact, the decrease in playable space is not that big a deal but it does of course mean that people should spare their dodge rolls for when they actually need them.
As for doing this tactic "normally": Asking if this is the right way or not will receive mixed responses, because there's lots of ways to approach the slothasor fight.
I've seen groups do it this way, I've seen groups circle around the middle (which we often do) and I've seen groups circle around the edge. Each have pros and cons.
If you circle the edge (which I've seen numerous pug groups do) - you have safer poison drop offs. You don't have to care about where to take the poison, you just backtrack the route you came. The downside is that slubling pressure gets built up particularly fast because they become so distant for pulls and are in a bad spot for cleaving down, so groups end up sacrificing damage for reflects or projectile destruction, plus slothasor is a frequently moving target which means staff AoE and other large DPS vs large hitboxes gets diminished.
Of course, none of that matters if you have the DPS of say.... qT where you can kill slothasor within the space of 2-3 mushrooms (i.e. before many slublings even get a chance to spawn) but not that many people actually do.
Circling the middle is a happy balance, you effectively clear 4 quadrants, and are away from the slubling spawn point for a small period of time, where they can be pulled in. I would consider it the safest method, but it isn't the fastest. You still get a little bit of slubling pressure, but it'll come in waves - at the points you are furthest away from the spawn point of the slublings.
Anyway back to the "stay in the middle" tactic ->
When using this tactic, these are the times the mushroom eaters must eat their respective mushrooms:
Eater A 5.55, Eater B 4.57, Eater C 3.55, Eater A 2.40, Eater B 1.40, Eater C 0.35
Note: you only need 3 mushroom eaters due to the spacing of the eating times. EG have a very prescribed and specific poison dropping strategy which can be seen here: http://imgur.com/a/cwsNr but we used a somewhat simplified version of this, that still works out (we did a LOT of measuring).
Poison dropping locations are specific due to the relative safety of reaching the extents of the arena and where the 'safe spot' will be when the party briefly move off the centre spot to allow the slubling to re-eat the middle. i.e. you don't want to roll into a poison circle.
The poison circles should just about reach the middle, but not quite. Also note, circles don't need to be fully dropped off at the very edges in some circumstances - like towards the end of the fight, if you're dropping off near the starting location - they don't need to be further than the mushroom than the slubling eats because their radius simply won't reach the middle.
Here is an exact breakdown of who eats what, and when posions go places the way we were doing it:
Eat X at 6.45 Poison Start 6.35 Poison Start 6.10 Imbued Mushroom 2 at 5.55 Eat 3 at 5.53 Eat 4 at 5.50 Poison Arrow 5.45 Eat X at 5.45 Poison Circle 5.20 Imbued Mushroom 3 at 4.57 Eat 5 at 4.55 Poison Heart 4.55 Eat 6 at 4.52 Eat 7 at 4.48 Eat X at 4.45 Poison Square 4.30 Poison Star 4.05 Imbued Mushroom 4 at 3.55 Eat 8 at 3.52 Eat 9 at 3.49 Eat X at 3.45 Eat 10 at 3.42 Poison Swirly 3.40 Poison Triangle 3.15 Poison Start 2.50 Imbued Mushroom 2 at 2.50 Eat 3 at 2.48 Eat 4 at 2.45 Eat X at 2.42 Poison Arrow 2.25 Poison Circle 2.00 Imbued Mushroom 3 at 1.50 Eat 5 at 1.49 Eat 6 at 1.46 Eat 7 at 1.43 Eat X at 1.40 Poison Heart 1.35 Poison Square 1.10
You'll also observe we skip Imbued Mushroom 1 the second time around, the eating times are spaced such that X gets eaten just when it needs to be - but as a side effect only 3 mushroom eaters are required because we delay taking the imbued mushrooms.
This method undeniably tricky to pull off because it requires people to be in concert, but has benefits - you get increased focus on just damaging slothasor and it forces the stack due to space - which means everyone gets benefits of quickness and alacrity as well as easy heals/grace of the land (a druid's hell is a group not stacked - they just can't heal all of you spread out). Additionally, it means the group is in range of the chronomancer for distortions too - which helps during the shakes. A group going exploring around the arena means a slower time beating up slothasor.
Anyway, hope that helps / clarifies that specific tactic.
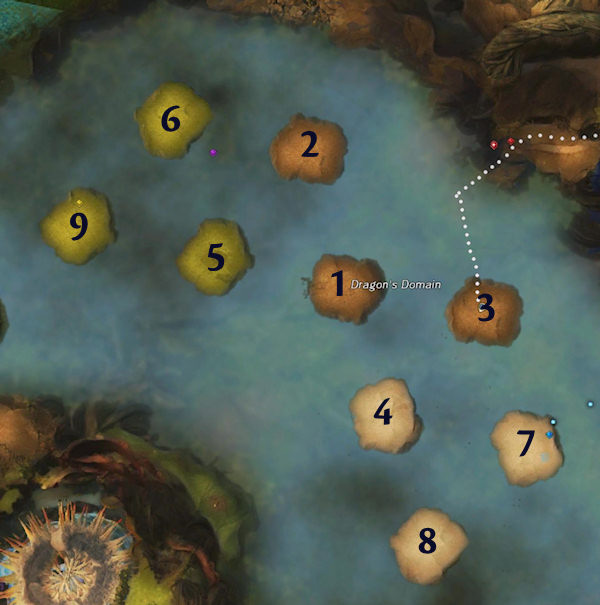
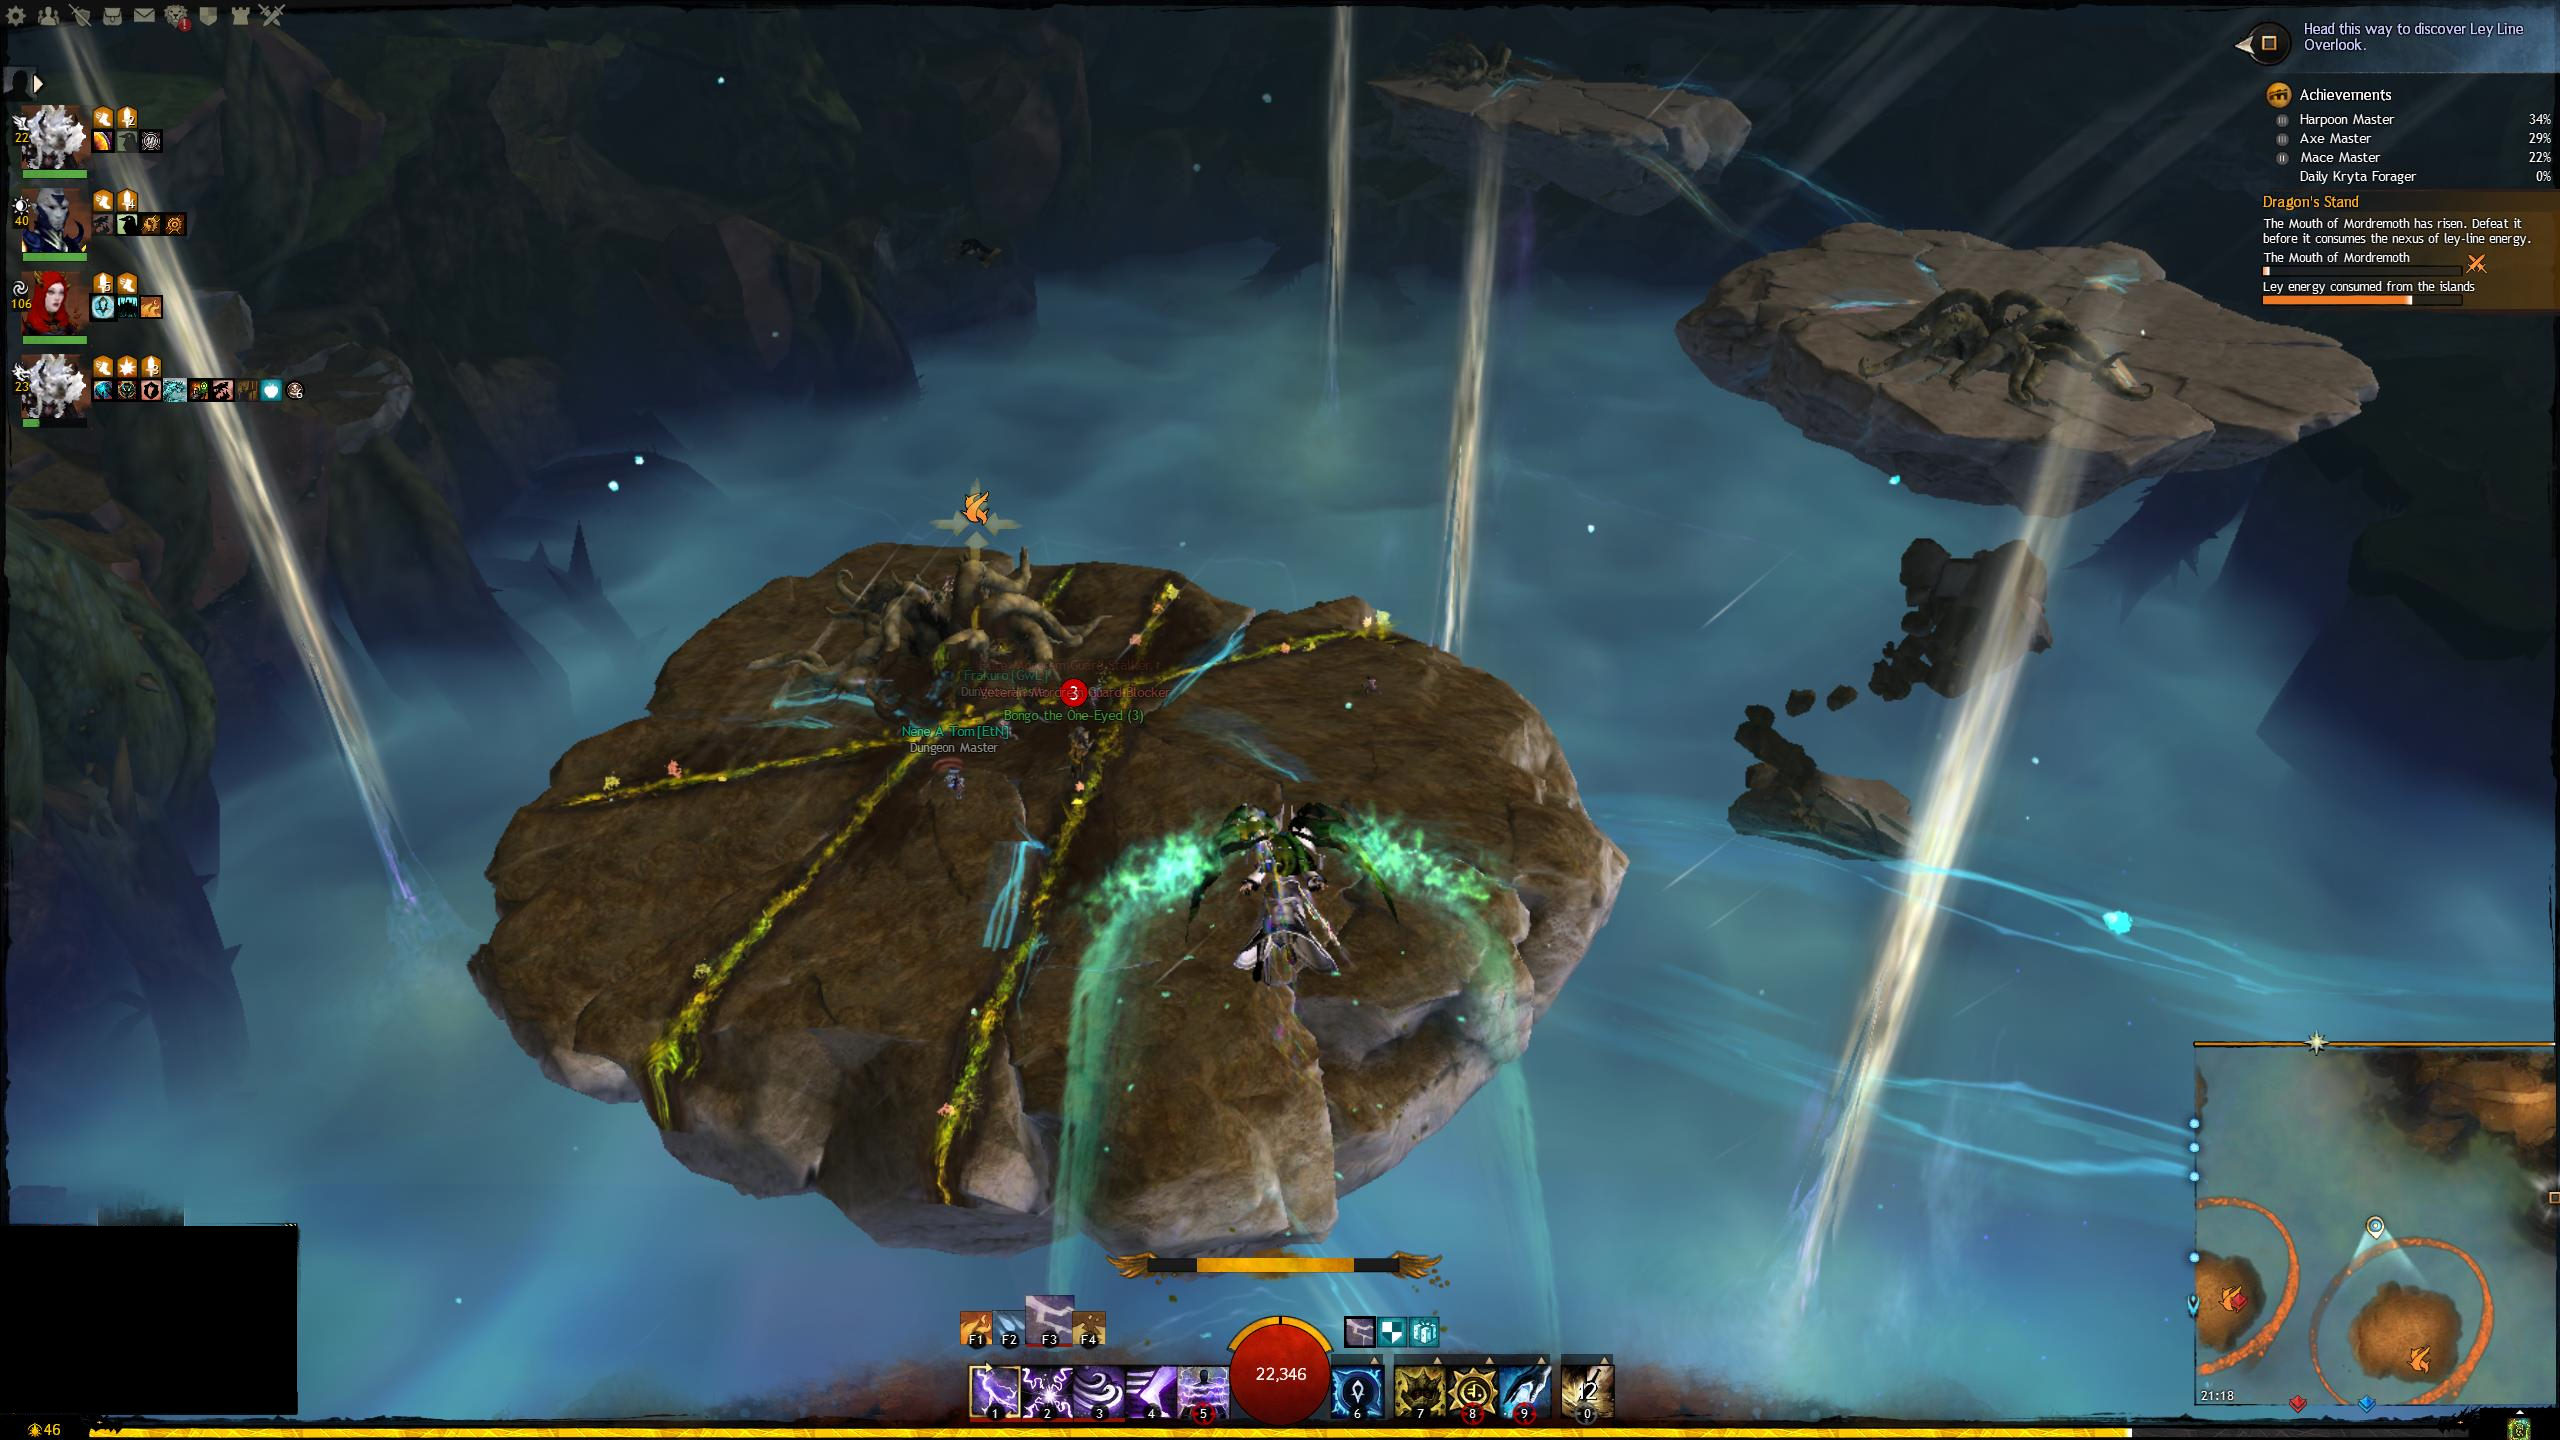
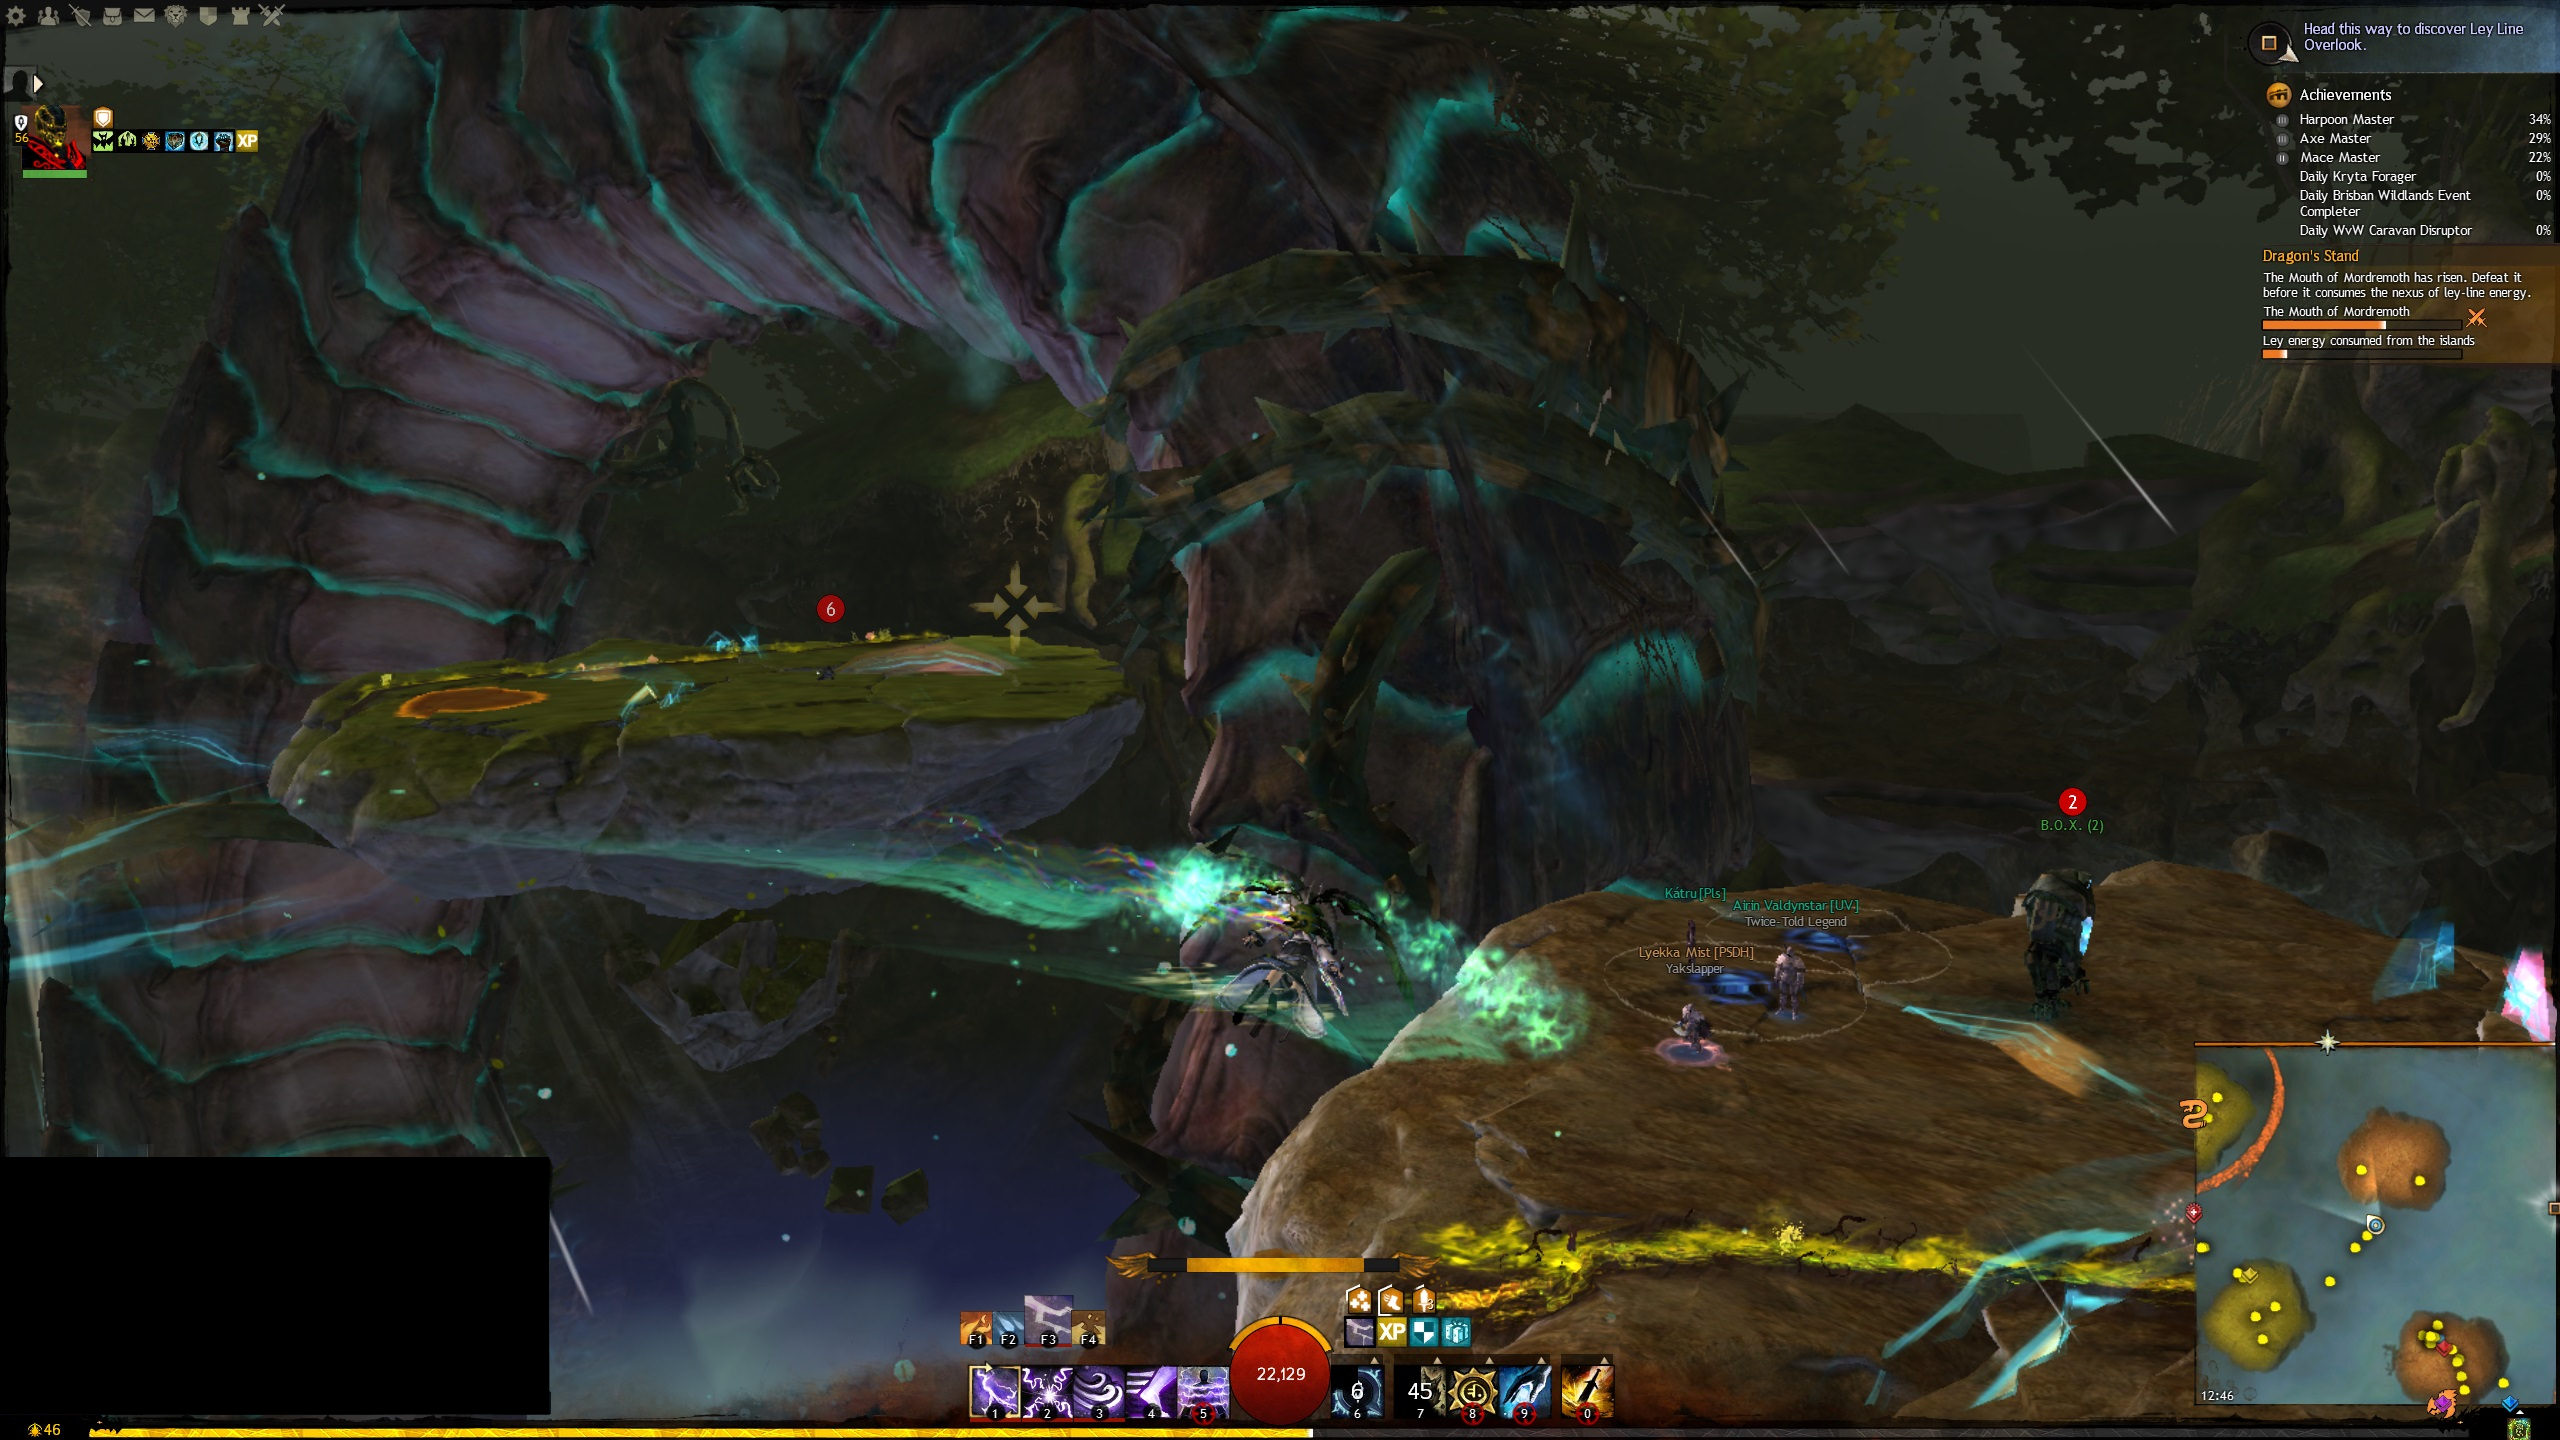
The boss encounter takes place on nine floating platforms in the sky, linked by leylines and interposed with updrafts. There are a number of events that happen on random platforms that need to be performed to whittle down the health of the boss. Platforms have the concept of 'health' - health on a platform decreases if an event on the platform fails (at least, for most events), it also decreases after the main burn phase event.
Health on a platform decreases by 50% and you can see it by checking the number above the head of the numbered NPC that is on each platform. A platform can be at full health, half health or completely destroyed. When the platform is destroyed it is removed from the map completely, so it's important to spread out and clear out events as quickly as possible.
Each event lasts for around 30 seconds (though some are longer than this) - so it's key to finish them as quickly as possible.
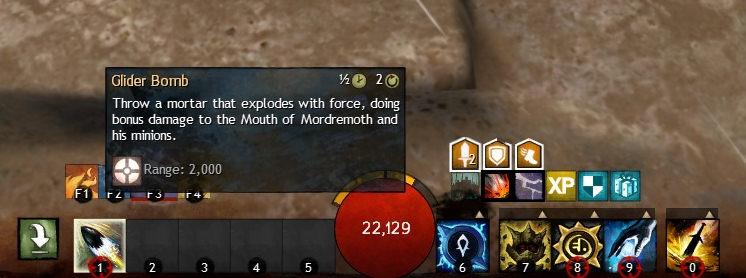
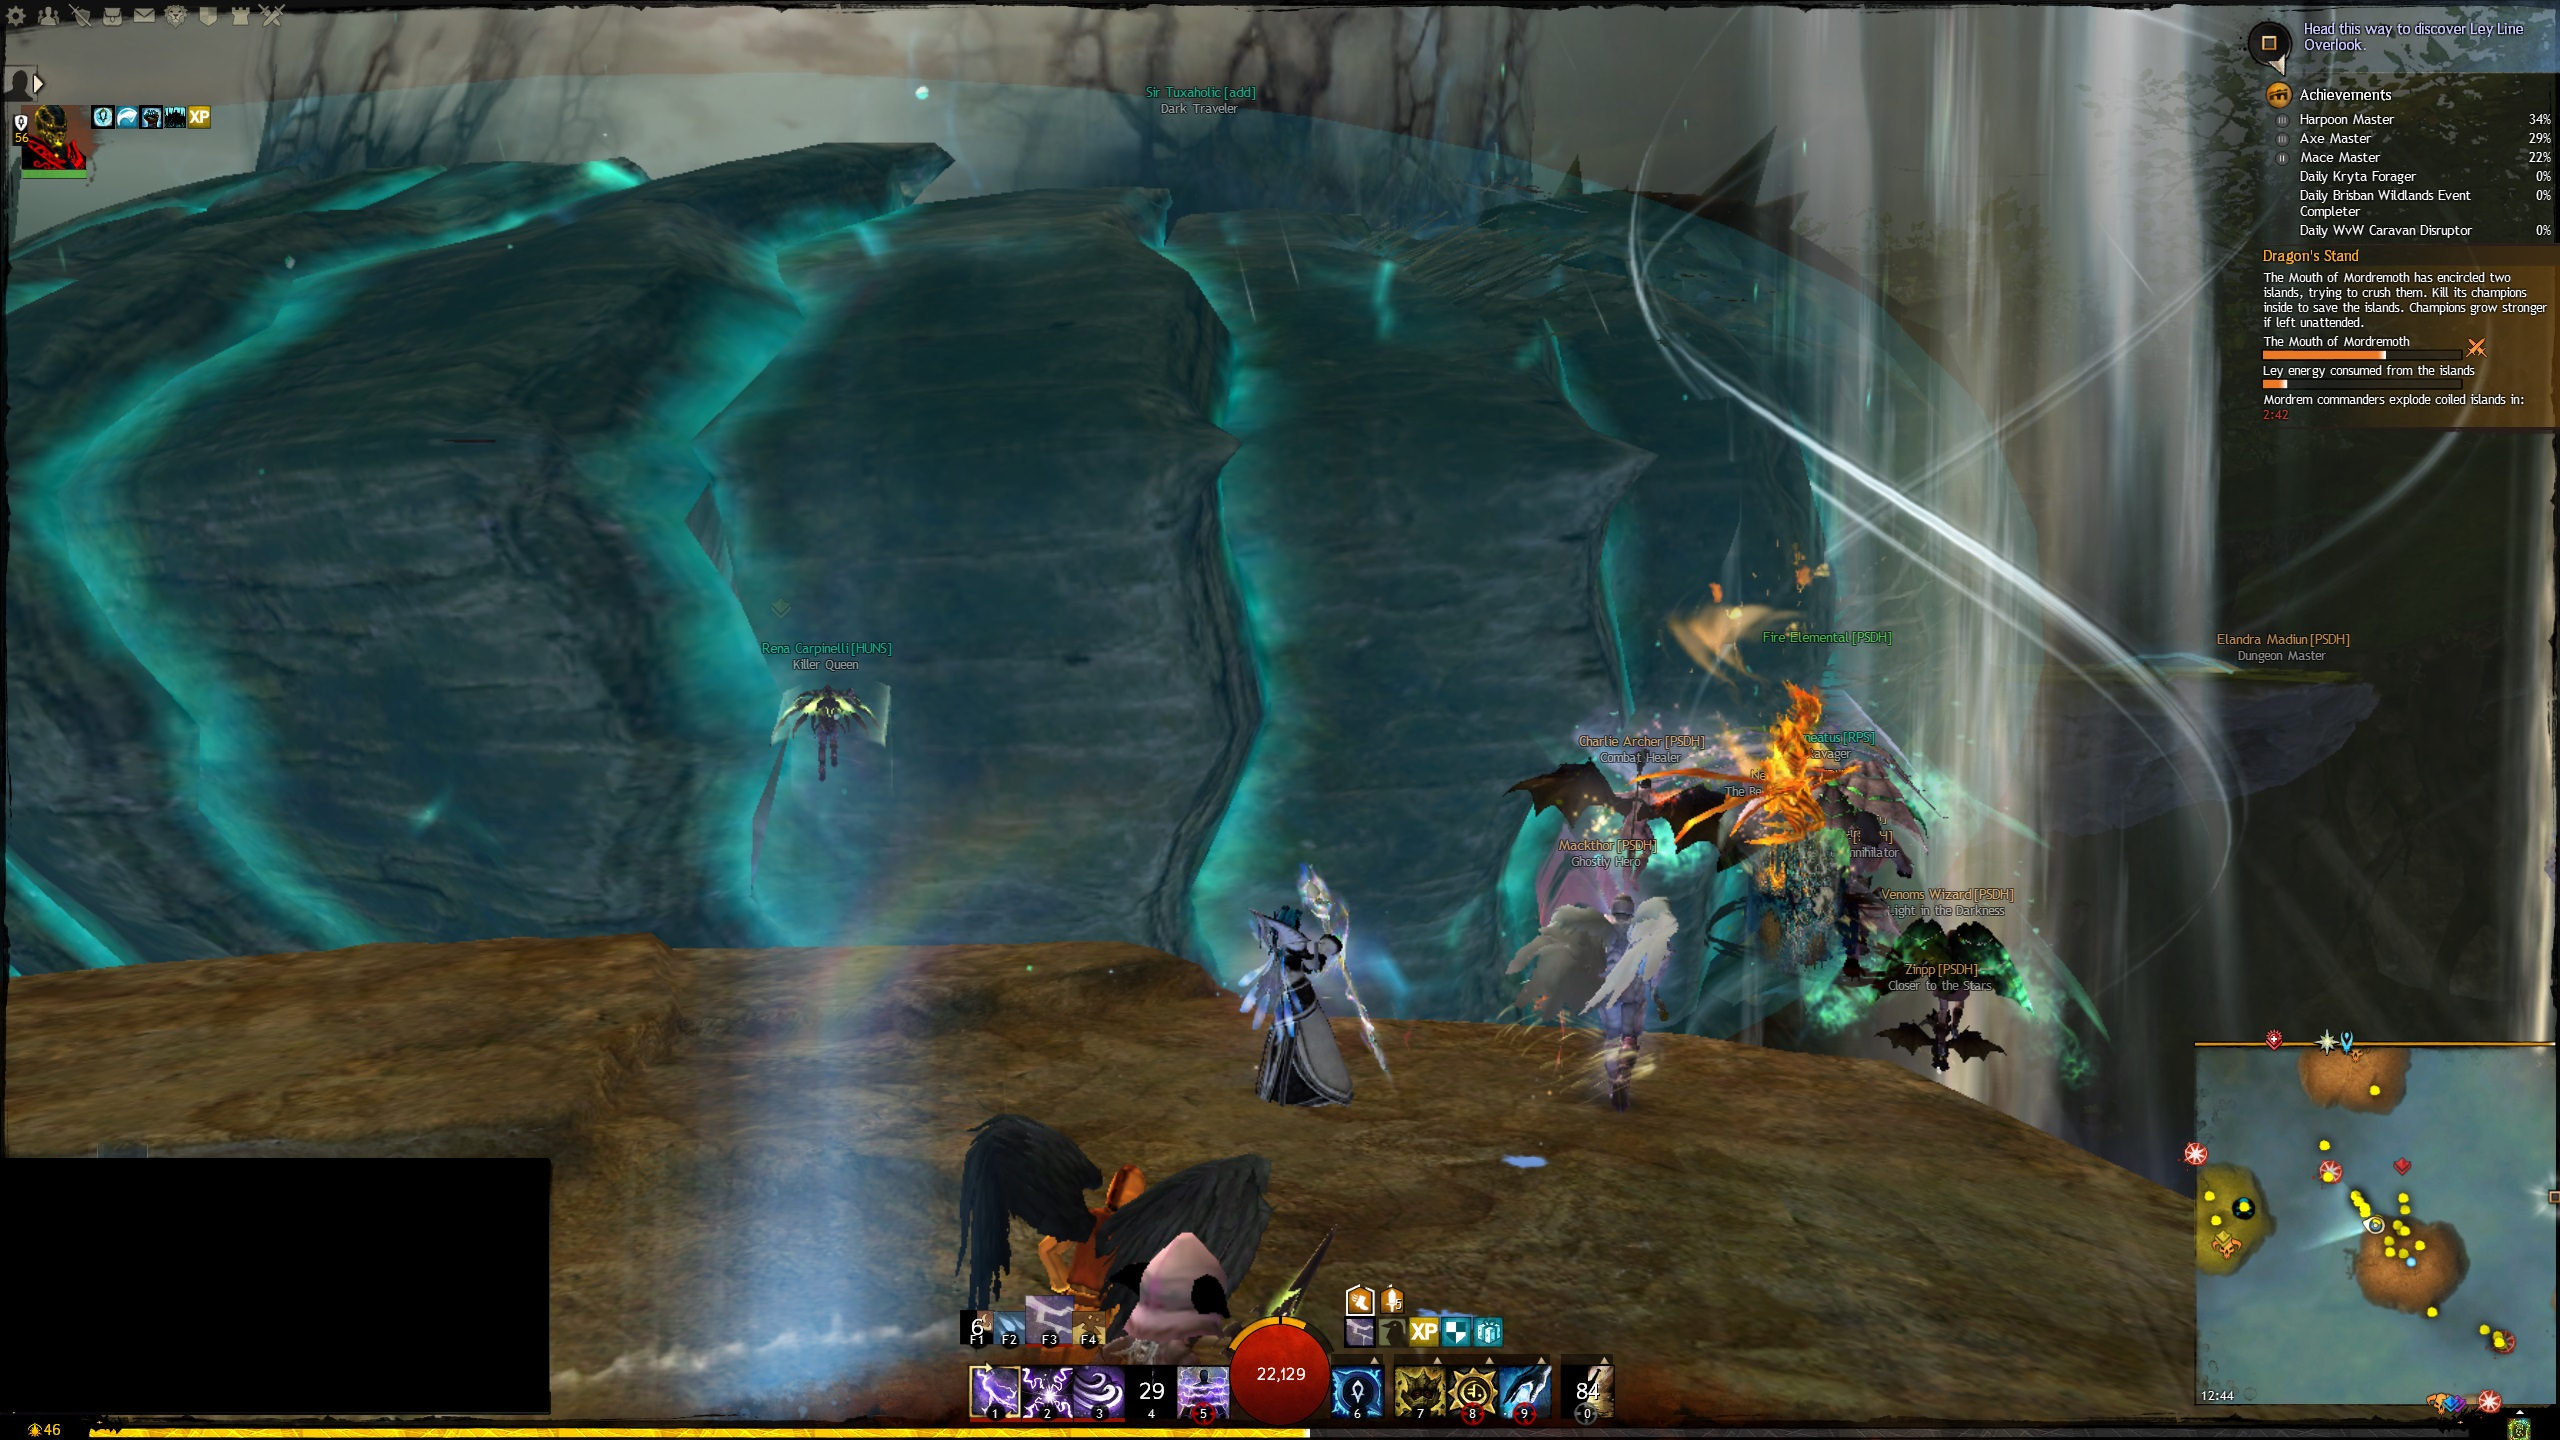
Main Burn - The mouth of mordremoth is biting a platform!
With this event there are two platforms that take part. There's the head and there's the helicopter. The general idea is to get bombs from the helicopter and drop them onto the head. One group will take bombs from the helicopter and do the drop while the other team stun the head (up to three times).
To stun the head, simply use crowd control and break the bar.
If you're carrying a bomb, drop it from above, and be careful going through wyvern fire as the bomb will explode in your hands. This phase does the most damage.
When the time runs out for the burn phase, the boss head will rear up and take a really large bite out of the platform (up to now it's been small chomps) when this happens, the platform will collapse and you'll fall through it. Glide to safety.
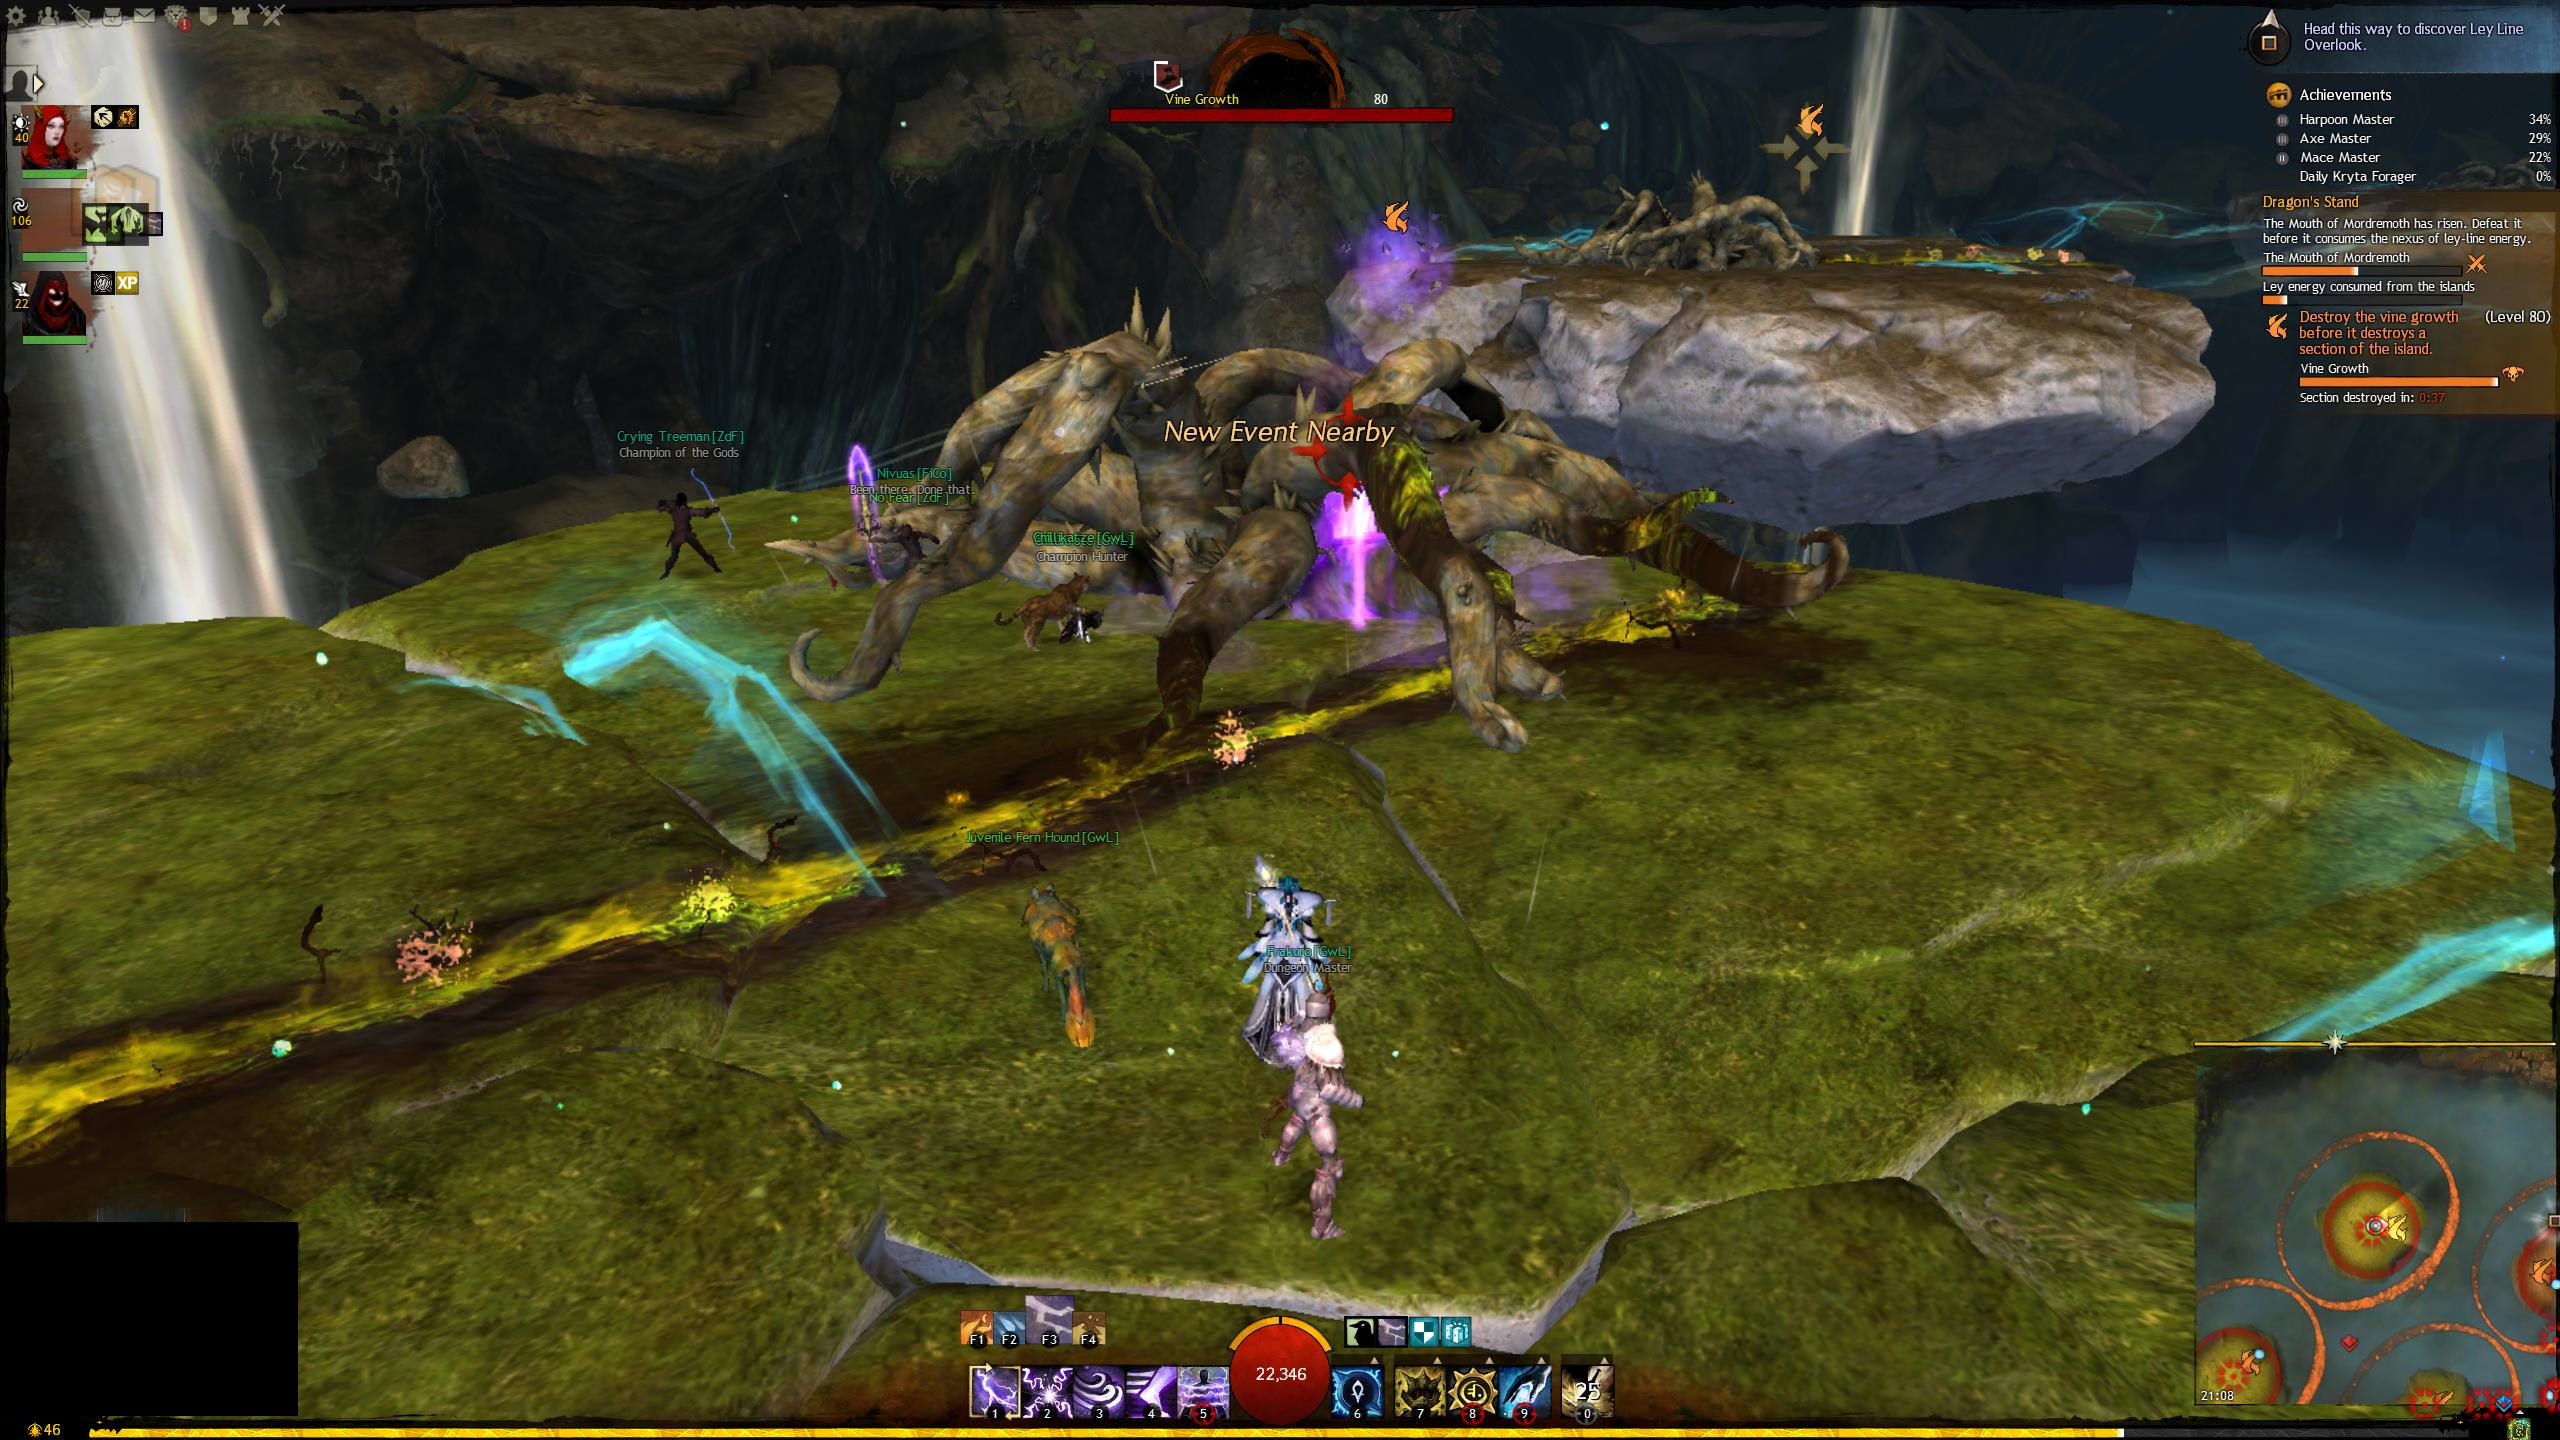
Destroy the vine growth before it destroys a section of the island.
Unlike the leyline pods, the vine growths will deal damage to a platform if left unattended. Much like the Leyline Disruption Pods, simply DPS them before the time runs out. These spawn across all platforms, which is why spread of players is important.
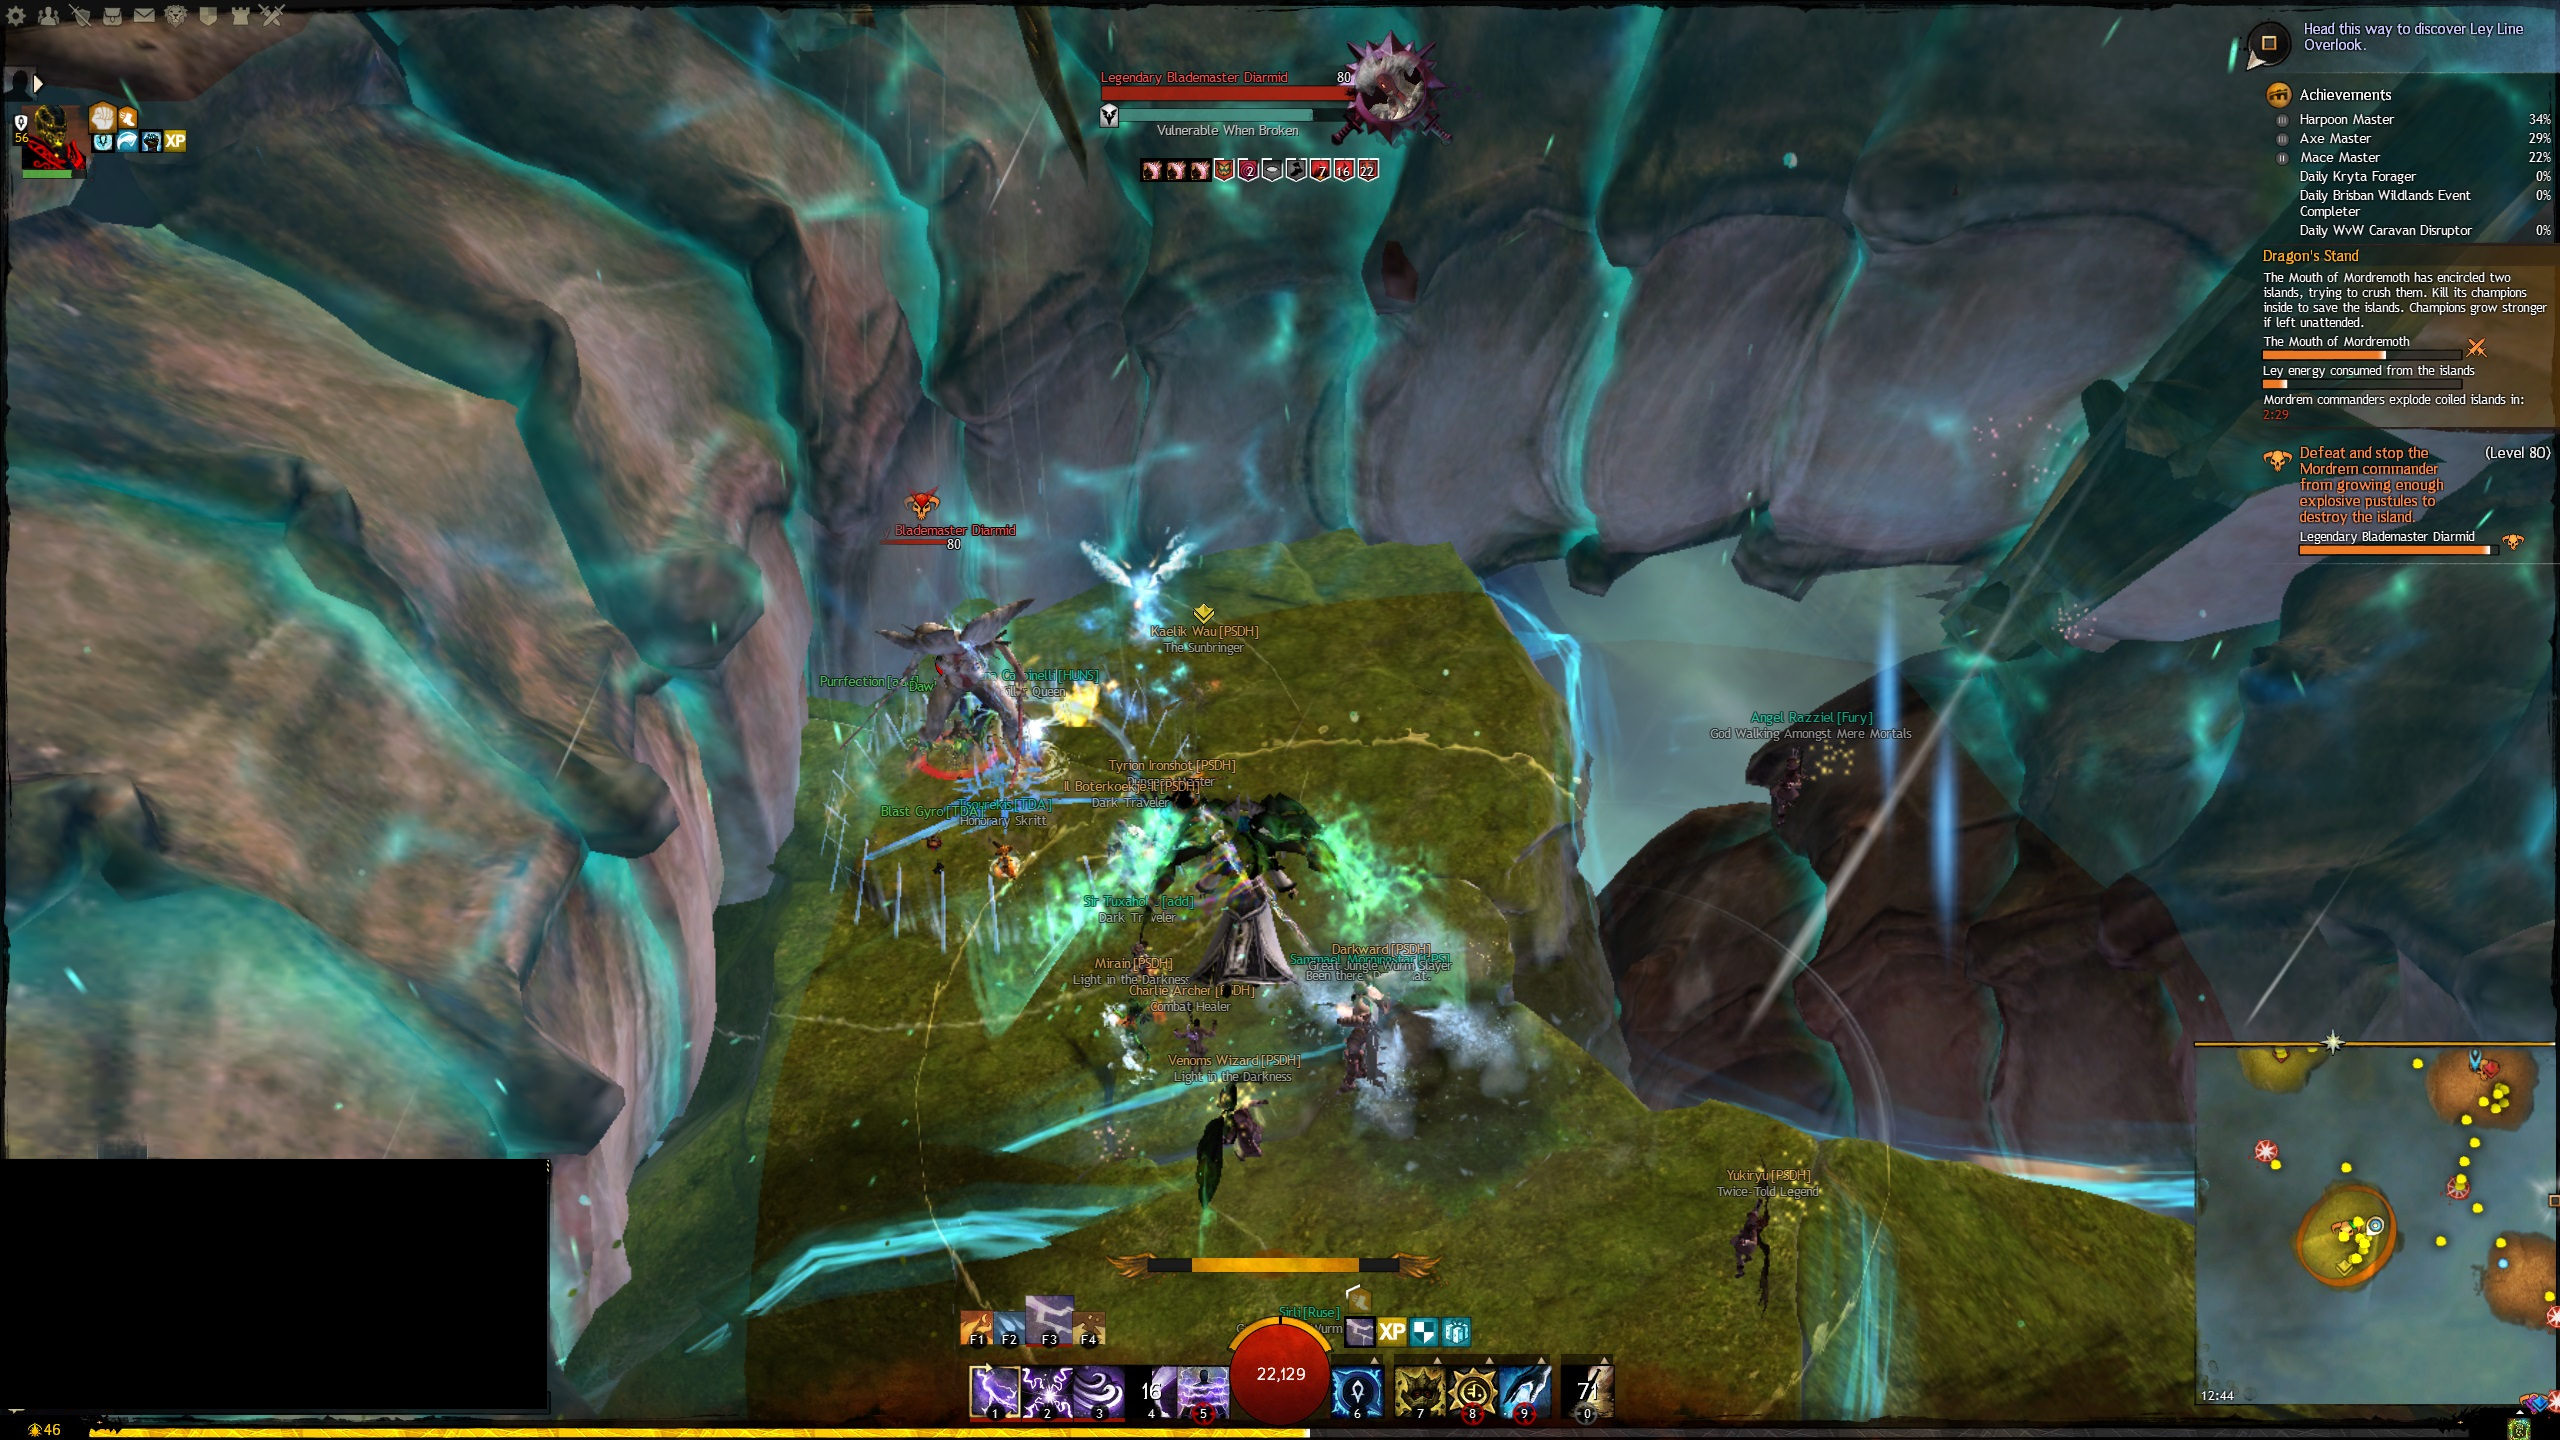
In this event, two of the islands are coiled around by the mouth of mordremoth and two of the previous Legendary bosses encountered at the towers will appear that need to be defeated. Defeat them the way you always have - break their bars using crowd control then DPS.
The head can rear up and prepare to headbutt the platform from above several times. If you're still on the platform when it does this, you will get downed on the first headbutt and then killed on the next. The safest approach is to jump off the platform and glide back onto it. If you see red all across the platform, get off it.
He can also do a fear in this phase, which will send you off the edge of the platform plummeting to your doom.
Upon completion
Once the boss has been defeated a cutscene will play and a new updraft will appear and you can claim your reward chest, then you have about 30 minutes to run around the map to explore or loot noxious pods that have become available.
Loooooooot
Main Chest After completing the final boss, there will be a boss chest near the head of the dragon you saw in the cutscene. Follow the red arrows marked on your map and glide up the large updraft that has appeared to reach the chest.
New areas of the map will open up, three key points contain a number of Noxious Pods to crack open, one of which requires Leyline gliding to reach. These are also marked on your map using red arrows. Check the videos below to find out how to get to them.
Northern Advance Camp
This area has the most amount of noxious pods, and should be the first stop. You will need updraft mastery and bouncing mushrooms to get here.
Central Advance Camp
This area has a modest amount of noxious pods, take care not to fall into the tangling vines on the way in and be careful of the mushroom boss (it packs a punch). You will need basic gliding to get here and bouncing mushrooms to get up to places inside the room.
Southern Forward Camp
This area has a couple of pods, but requires leyline gliding (or a kind mesmer with leyline gliding) in order to reach.
All towers have the same core mechanic - it's only the boss that differs. In the northern tower you will have to fight Stavemaster Adryn, in the central tower you will have to contend with Blademaster Diarmid and the southern tower has to battle with Axemaster Hareth.
The following example is from the Central tower - the same rules and mechanics apply even if you're fighting in the Northern / Southern towers.
Central Tower
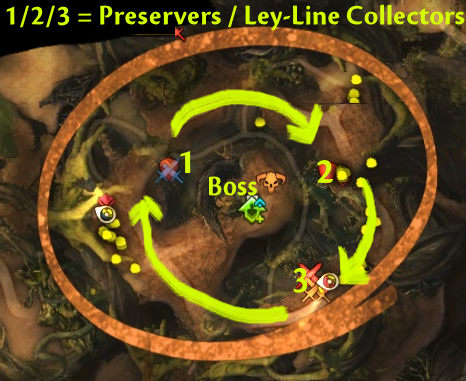
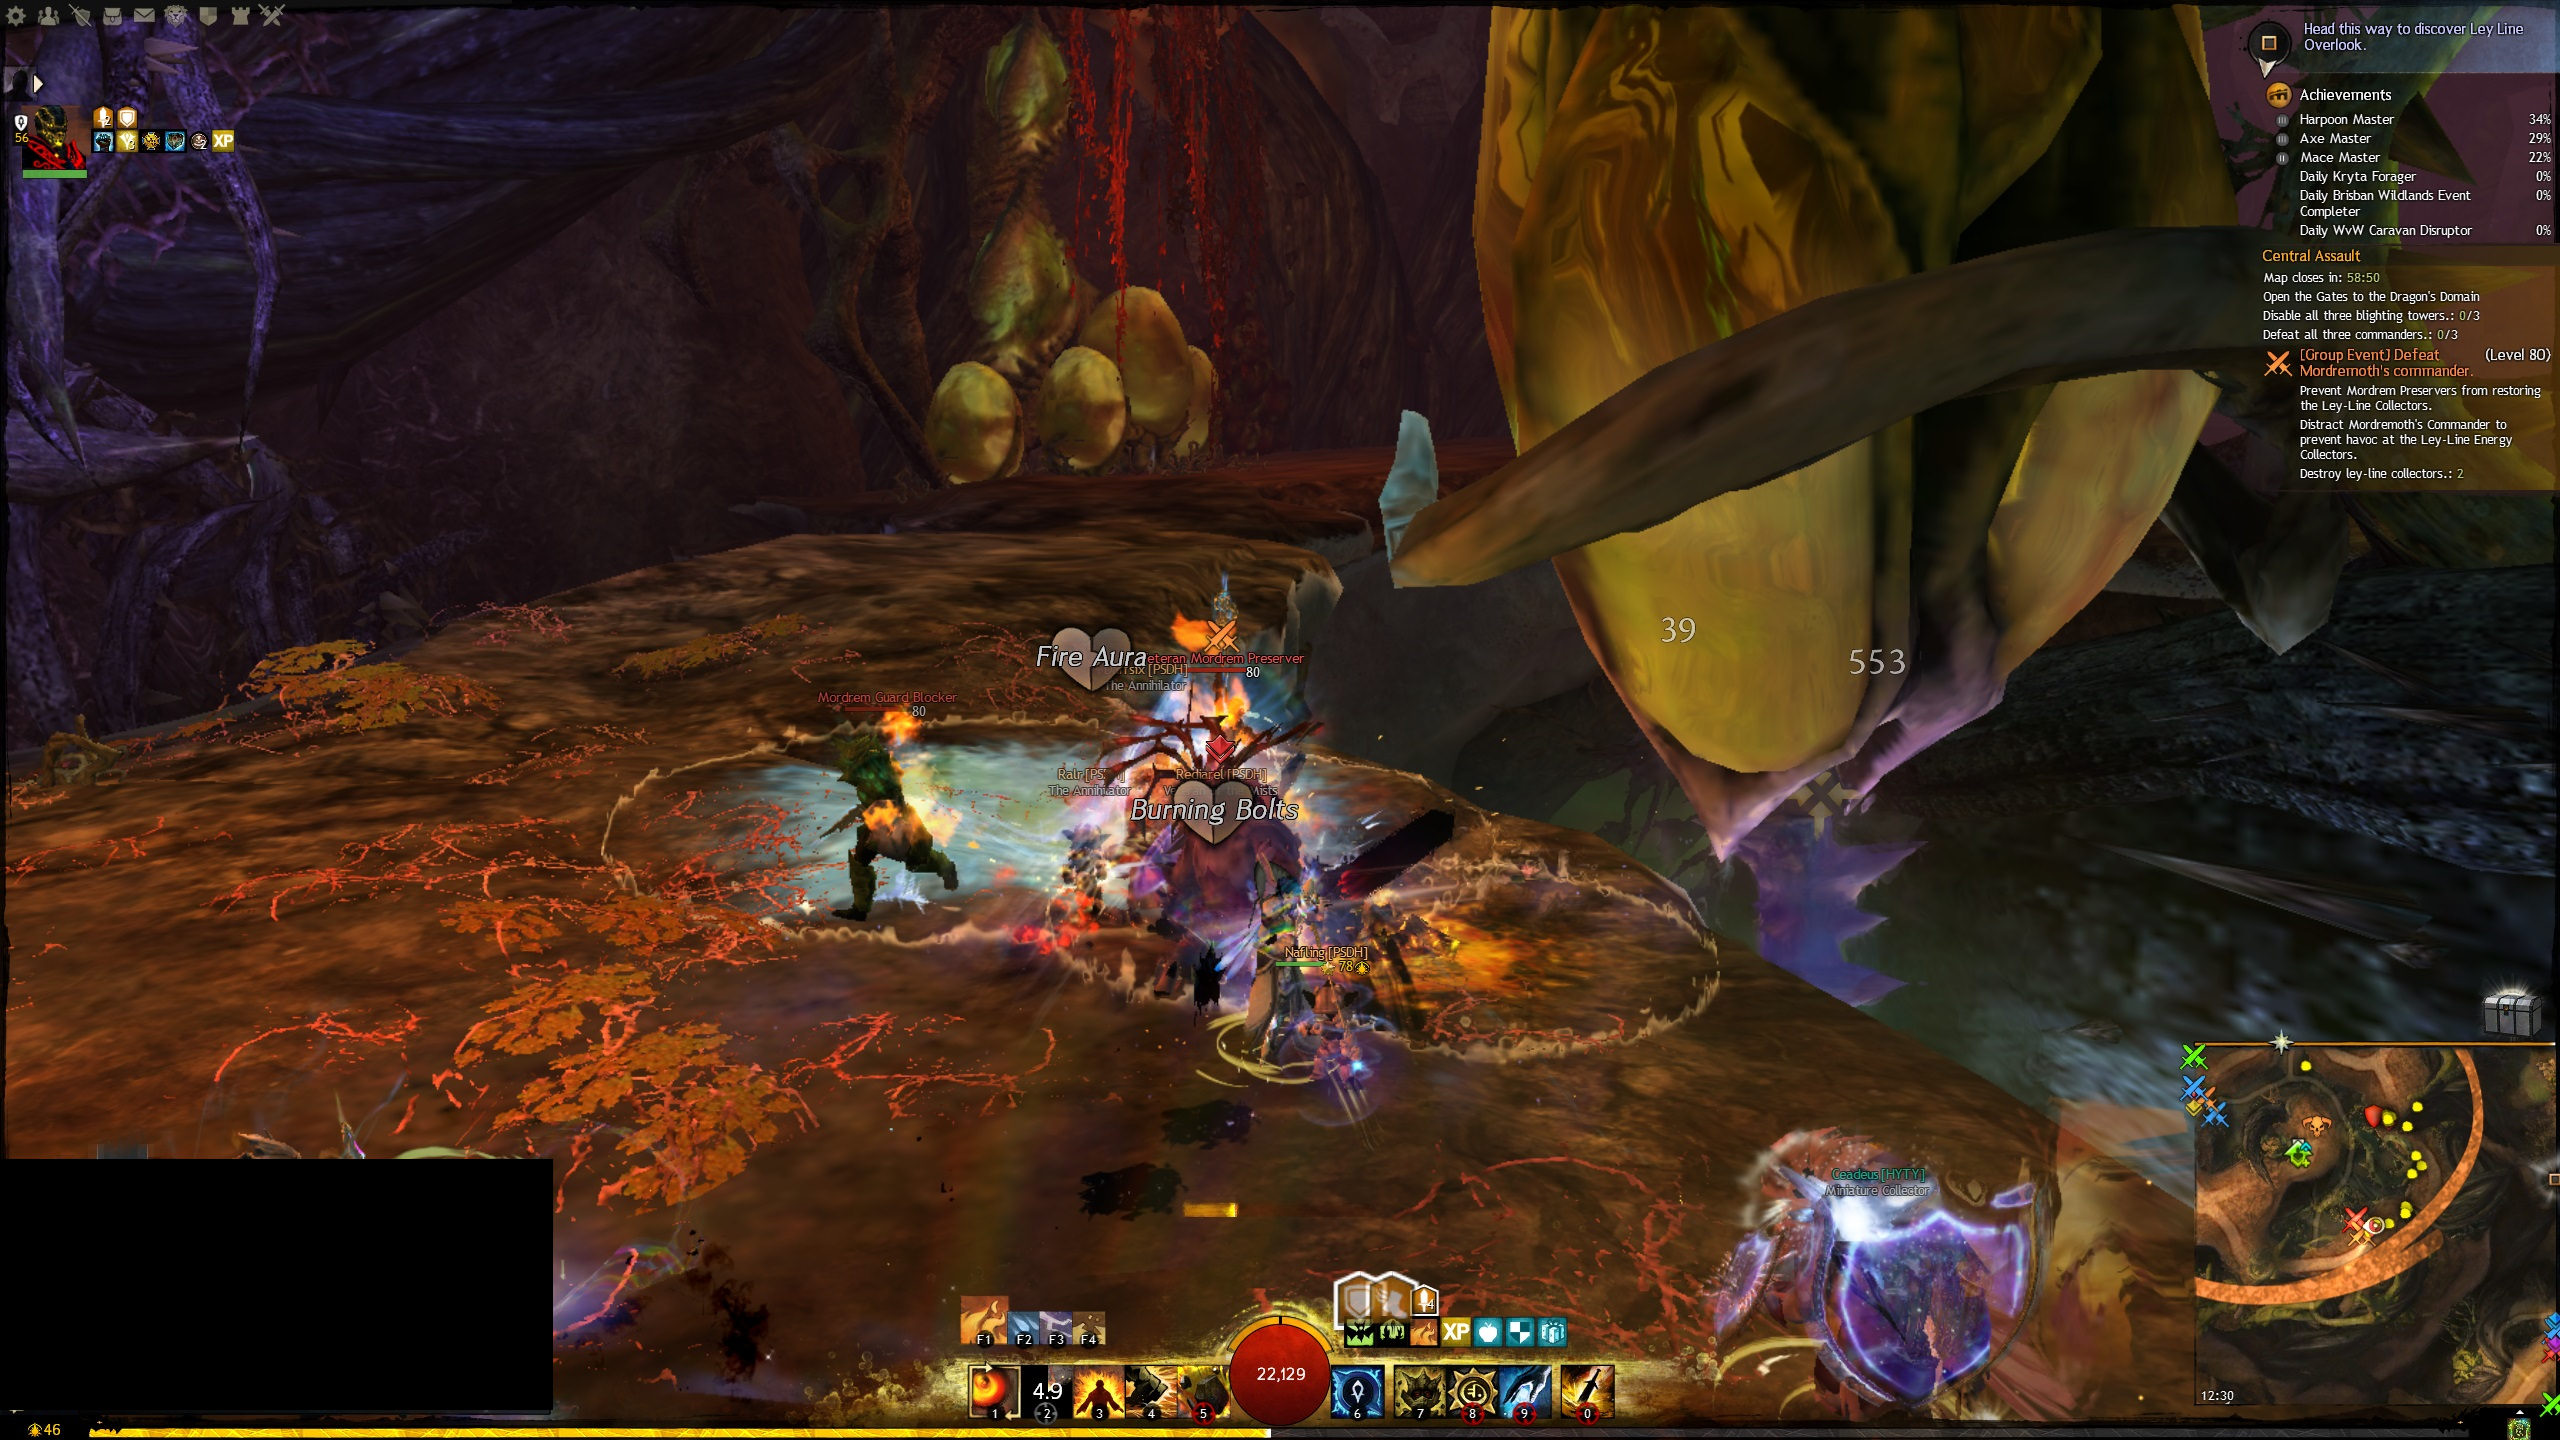
As mentioned at the end of the escort, our group will split into two. One group will be the boss group and comprises of no more than 10 people. The rest are the preserver group, who follow the main tag. The preserver's group is to take out the preservers and ONLY the preservers. There is no need to attack the Ley-Line collectors (and infact will make the zerg too slow).
The tower's boss cannot be harmed while the Ley-Line collectors are active. The Ley-Line collectors are restored to full health if a preserver reaches them. Preservers respawn on a timer.
If a ley-line collector is revived by a preserver, the boss is shielded again. If the boss was already dead, it is respawned. All three bosses on all three lanes must be defeated before the meta event can proceed.
Preserver group
The job of the preserver group is to simply circle around and kill preservers as quickly as possible. Use crowd control skills to break it's bar and then DPS it fast. There's very little time to wait, you will want to use swiftness to get to the next spot rapidly. Do NOT agro the boss, the other group will take care of it.
It's important to maintain a steady pace else the preservers will respawn and successfully restore a tower. Don't linger at any point after the preserver has gone down, move onto the next one.
If the unthinkable happens and your commander dies, try to stay together and continue to do the preservers. If a preserver respawns and restores a ley-line collector it can be very hard to recover, often requiring us to fully exit the tower and start the rotation again from scratch.
If the absolutely and totally impossible situation happens where you should happen to die - use a waypoint. There is absolutely zero time to res anybody during this event.
The boss group will initially run behind the preserver group. Your job will be to take down the Ley-line collectors while the preserver group continues ahead to take down the preservers and start a steady rotation. Once all of the ley-line collectors are destroyed, head to the middle and fight the boss. In central, it'll be the Diarmid that you encountered in the escorts, except that it cannot be defeated if any ley-line collector is still up or is restored by a preserver.
Once all the towers have toppled, you have the opportunity to quickly grab the commune point if you don't already have it, then move on to the final Dragon boss. We will no longer be split, so in teamspeak we'll also join the main channel at this point.
South Tower
Read about the central tower, the only difference is that the boss group fights Axemaster Hareth.
North Tower
Read about the central tower, the only difference is that the boss group fights Stavemaster Adryn.
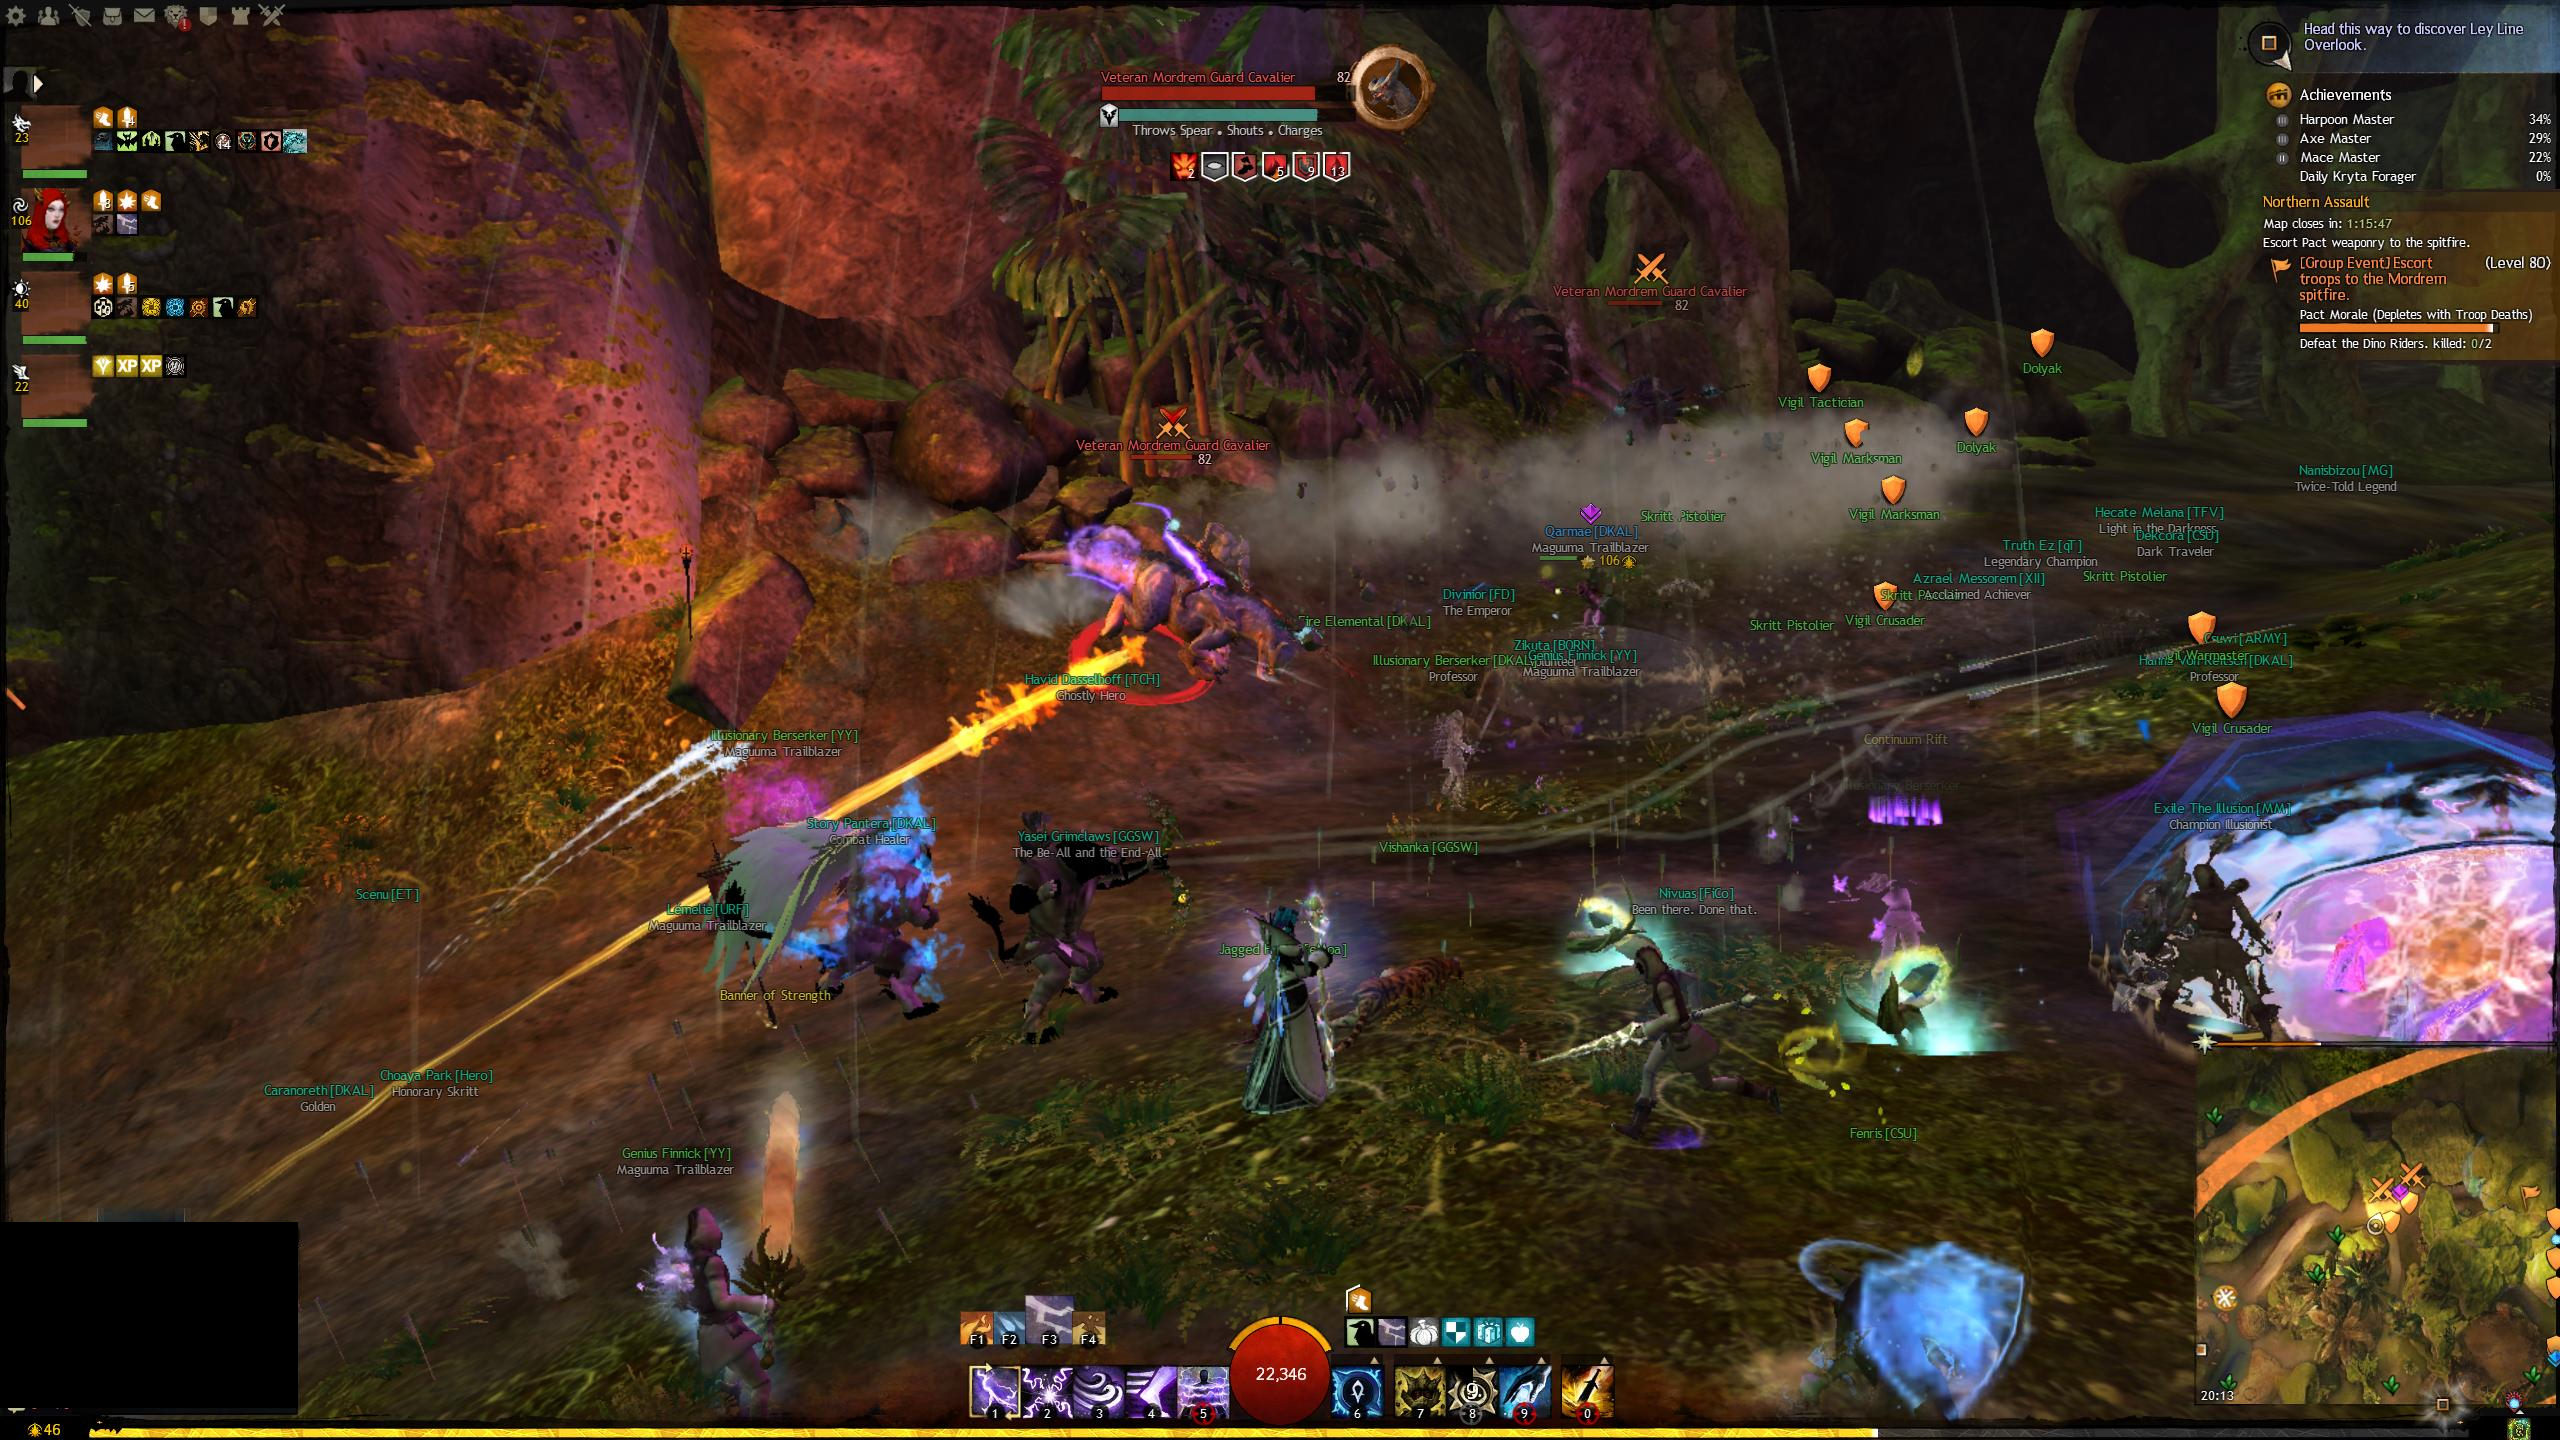
For this part of the meta, we are simply escorting NPC's through the central part of the map. There's a few events that we stop off to do mid-way, as well as some bosses that we will encounter during escort phases.
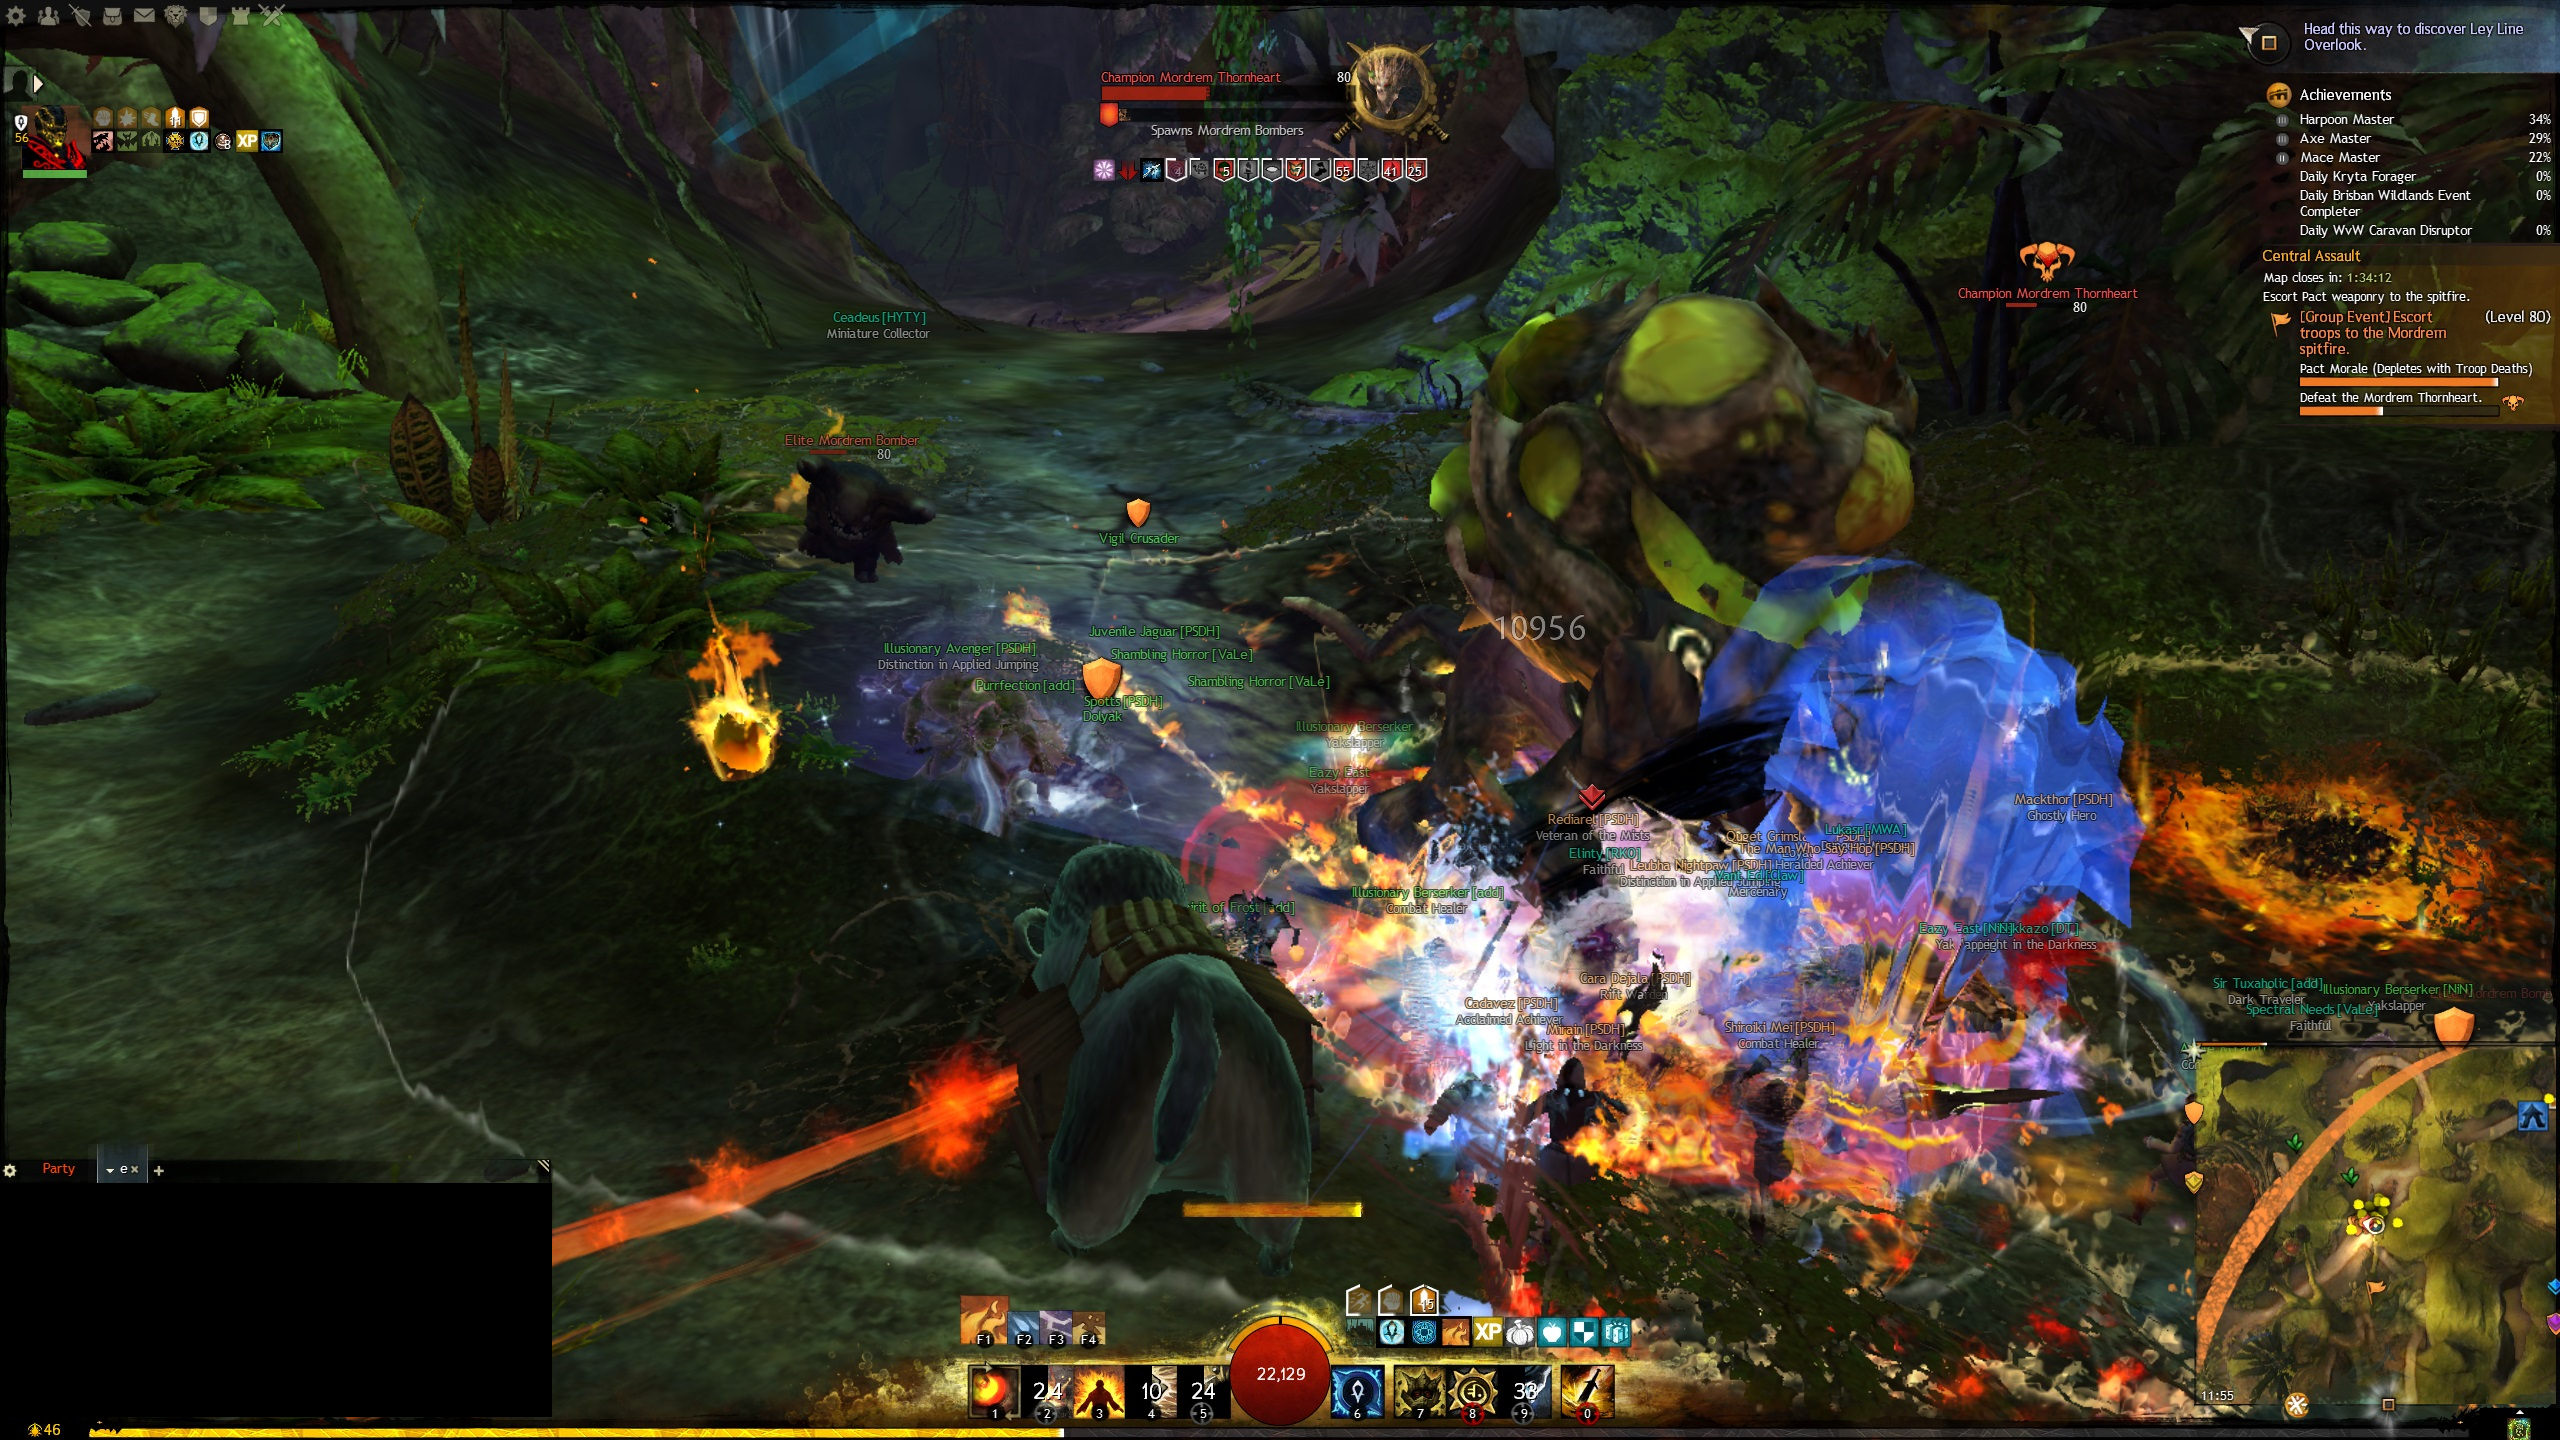
Thornheart Shortly after the escort begins and you've taken out a few mobs you will encounter a thornheart. This is the first boss character you'll encounter several times across the entire escort. There's not much to worry about other than taking it down as quickly as possible. Use crowd control skills to break the defiance bar and then simply DPS the thornheart to take it down.
Shortly after the thornheart, the escort will update to include defeating the dino riders. Simply take them out and continue pressing forward. View Full Size Image
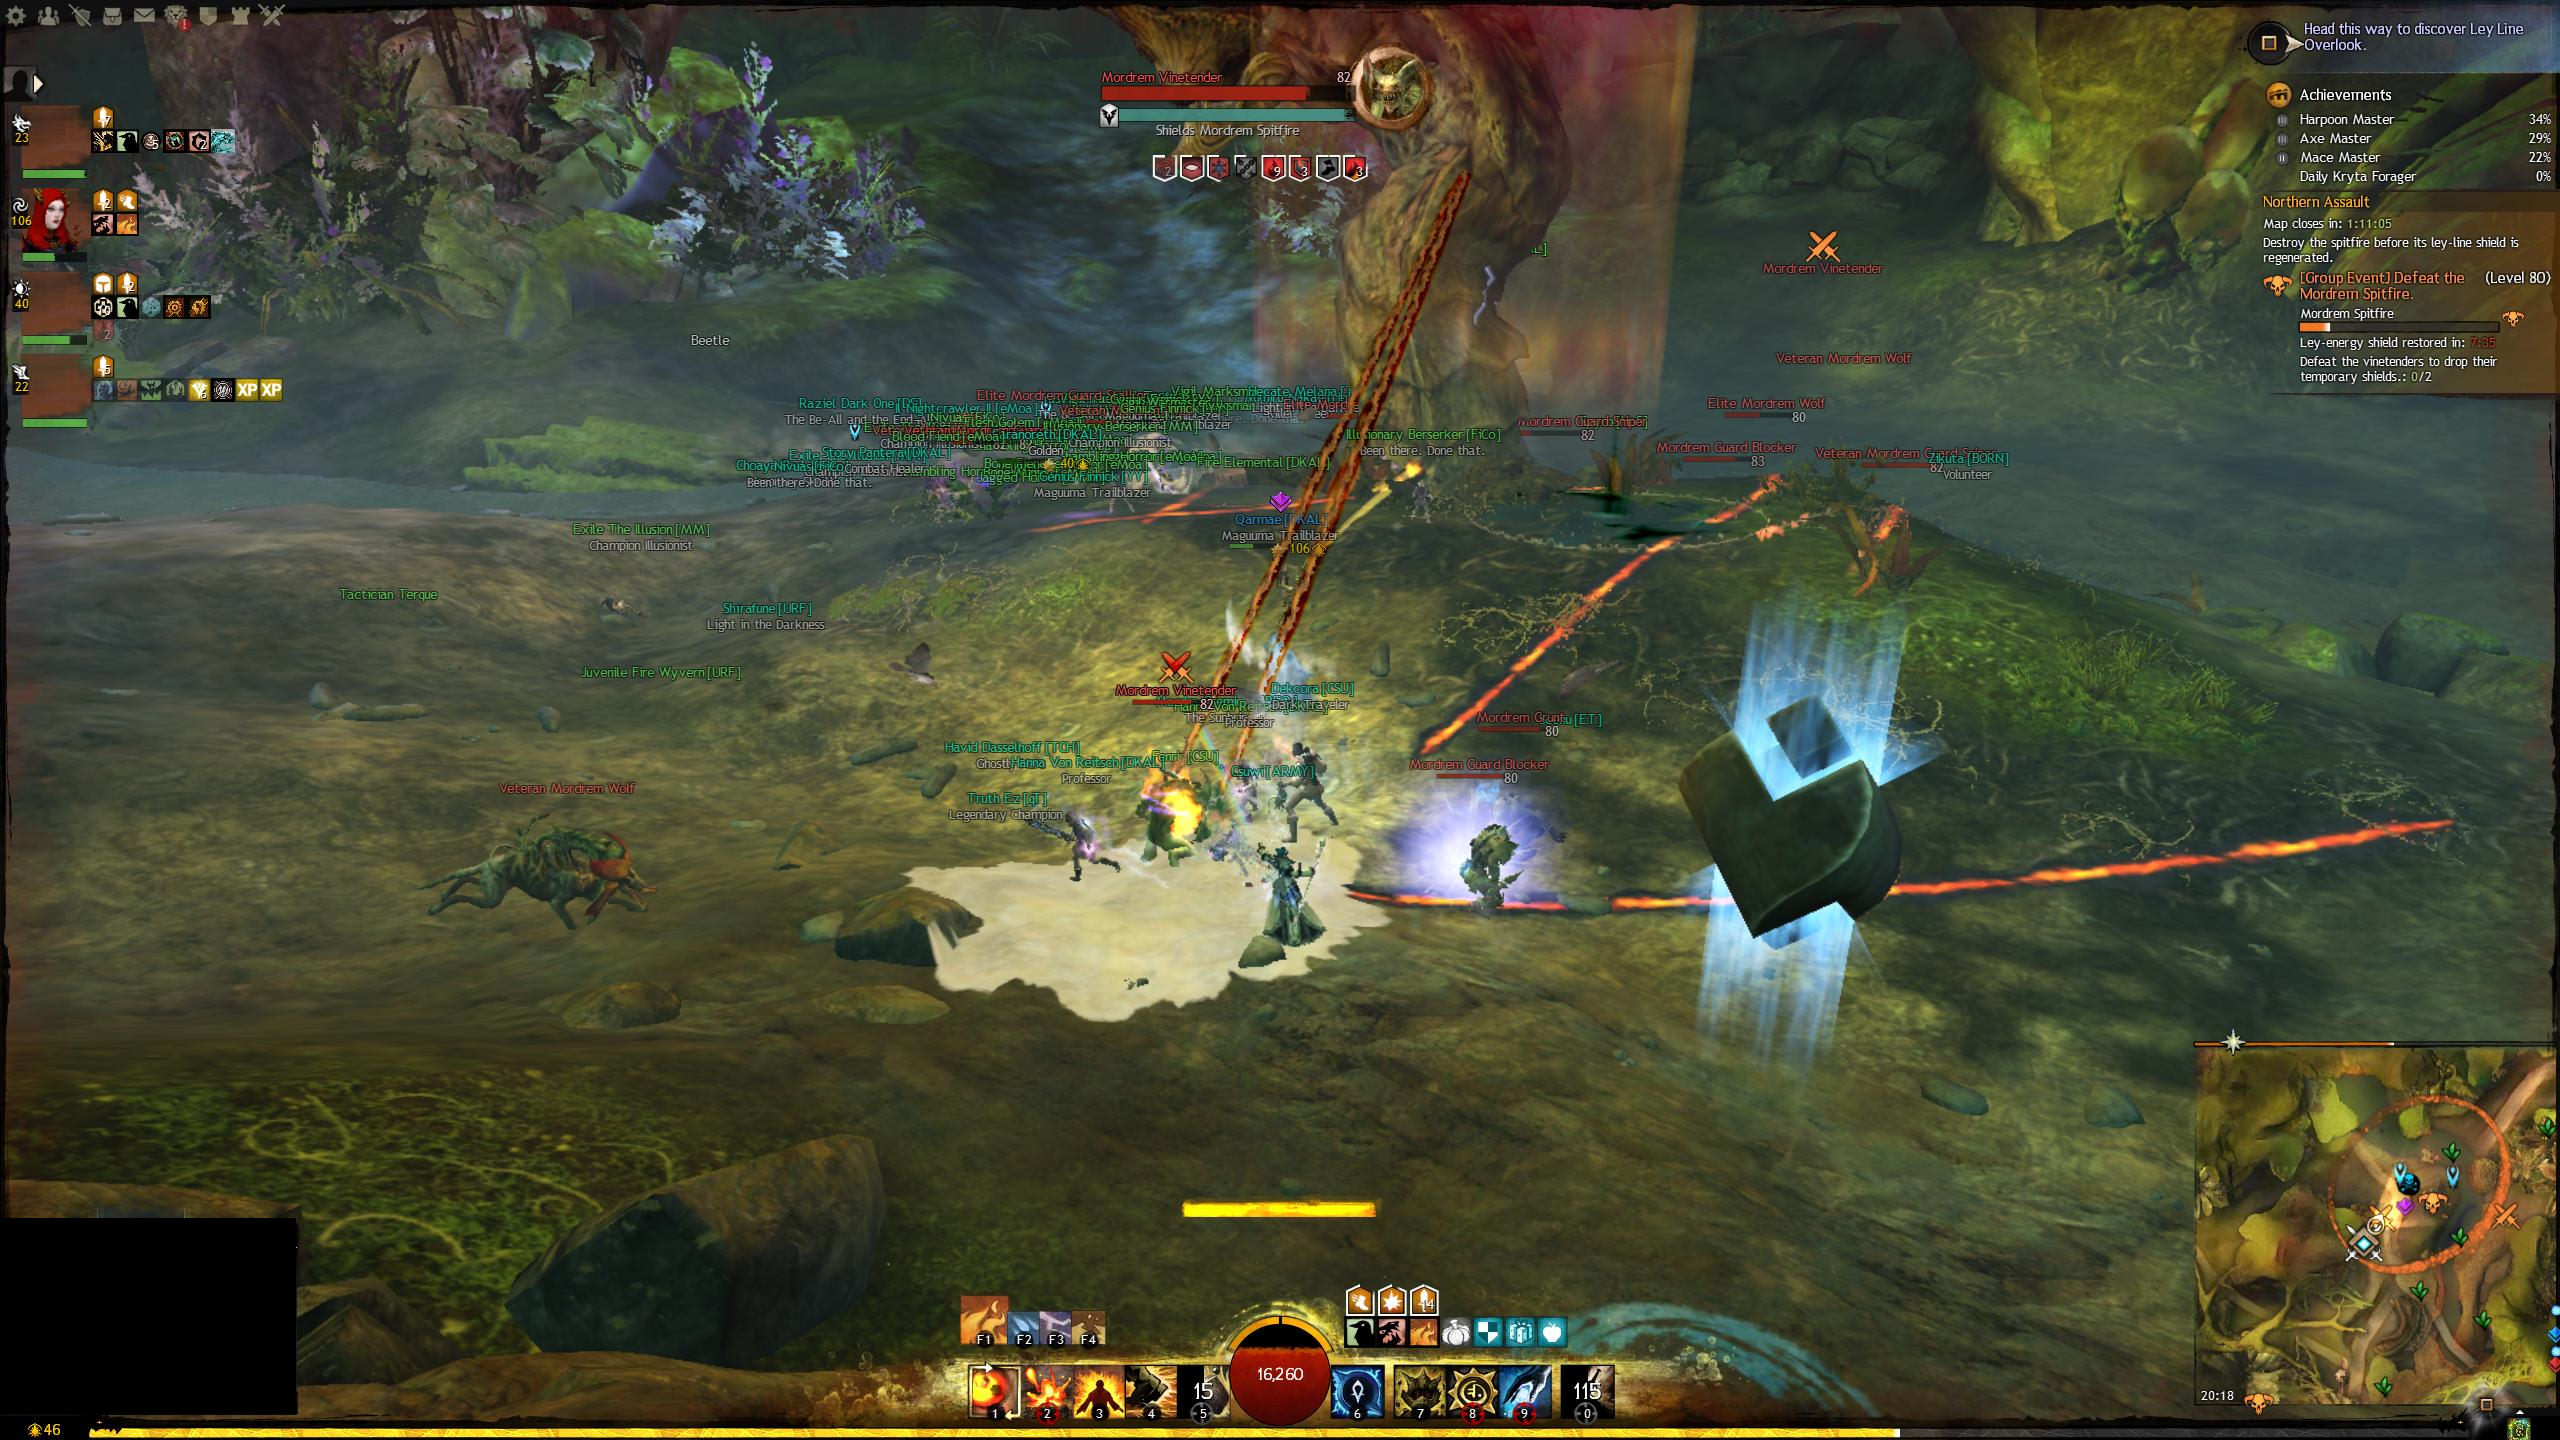
Mordrem Spitfire The Mordrem Spitfire will initially be shielded, when the shield goes down you can start dealing DPS. Almost immediately two Vinetenders will spawn and continue respawning throughout the event. Split and take these out and then continue DPS on the Spitfire. The vinetenders restore the shield, so you'll need to take them down to deal damage to the spitfire.
Once the spitfire has been taken down, there will be two events to do, there is a mini timer of 7 minutes to do these events.
Destroy the Mordrem prisons and get the soldiers to their chopper alive
Jump down into the valley below and escort the NPC's to safety. Use jumping mushrooms to get back up to the main escort.
Toss salvaged scrap to Overseer Braeden so that he can build barricades.
You will need poison mastery to do this. Use the nearby bouncing mushrooms to jump up to the area above, the area will be covered in poison. Grab scraps and bring them back to the collection NPC.
The escort will resume once both missions are done, or if the mini-timer expires (whichever comes first).
Central escort continued
By this time you should see a Legendary Blademaster Diarmid. Depending on the commander, you'll either rush this or you'll hold back as another Thornheart will spawn shortly (and can end up behind the group). The priority should always be to take out the Thornheart first.
Much like the thornheart, the general tactic is to break the breakbar using crowd control and then DPS. Be aware that this boss will do a spin attack that can reduce your health quite rapidly (so it's generally safer at range). When it gets below 25% health it will split into three and should burn a little quicker. Shortly after you'll reach another Spitfire.
Second Spitfire
The second spitfire works in essentially the same way as the previous encounter except this time you'll have preservers. Preservers must be taken out as a priority as they'll heal the spitfire.
After taking down the second spitfire, more events will happen before we move on.
Defend Alara the Wolf as she builds turrets. To do this event, you simply have to follow Alara and defend her from waves of mobs that spawn. It's possible that a Legendary Diarmid may wander into you during this event.
Climb up and retrieve the flamethrower supplies. Climb up to the highest point and collect all of the flamethrower supplies (they're not a bundle) then glide down and deliver them to Ploobak.
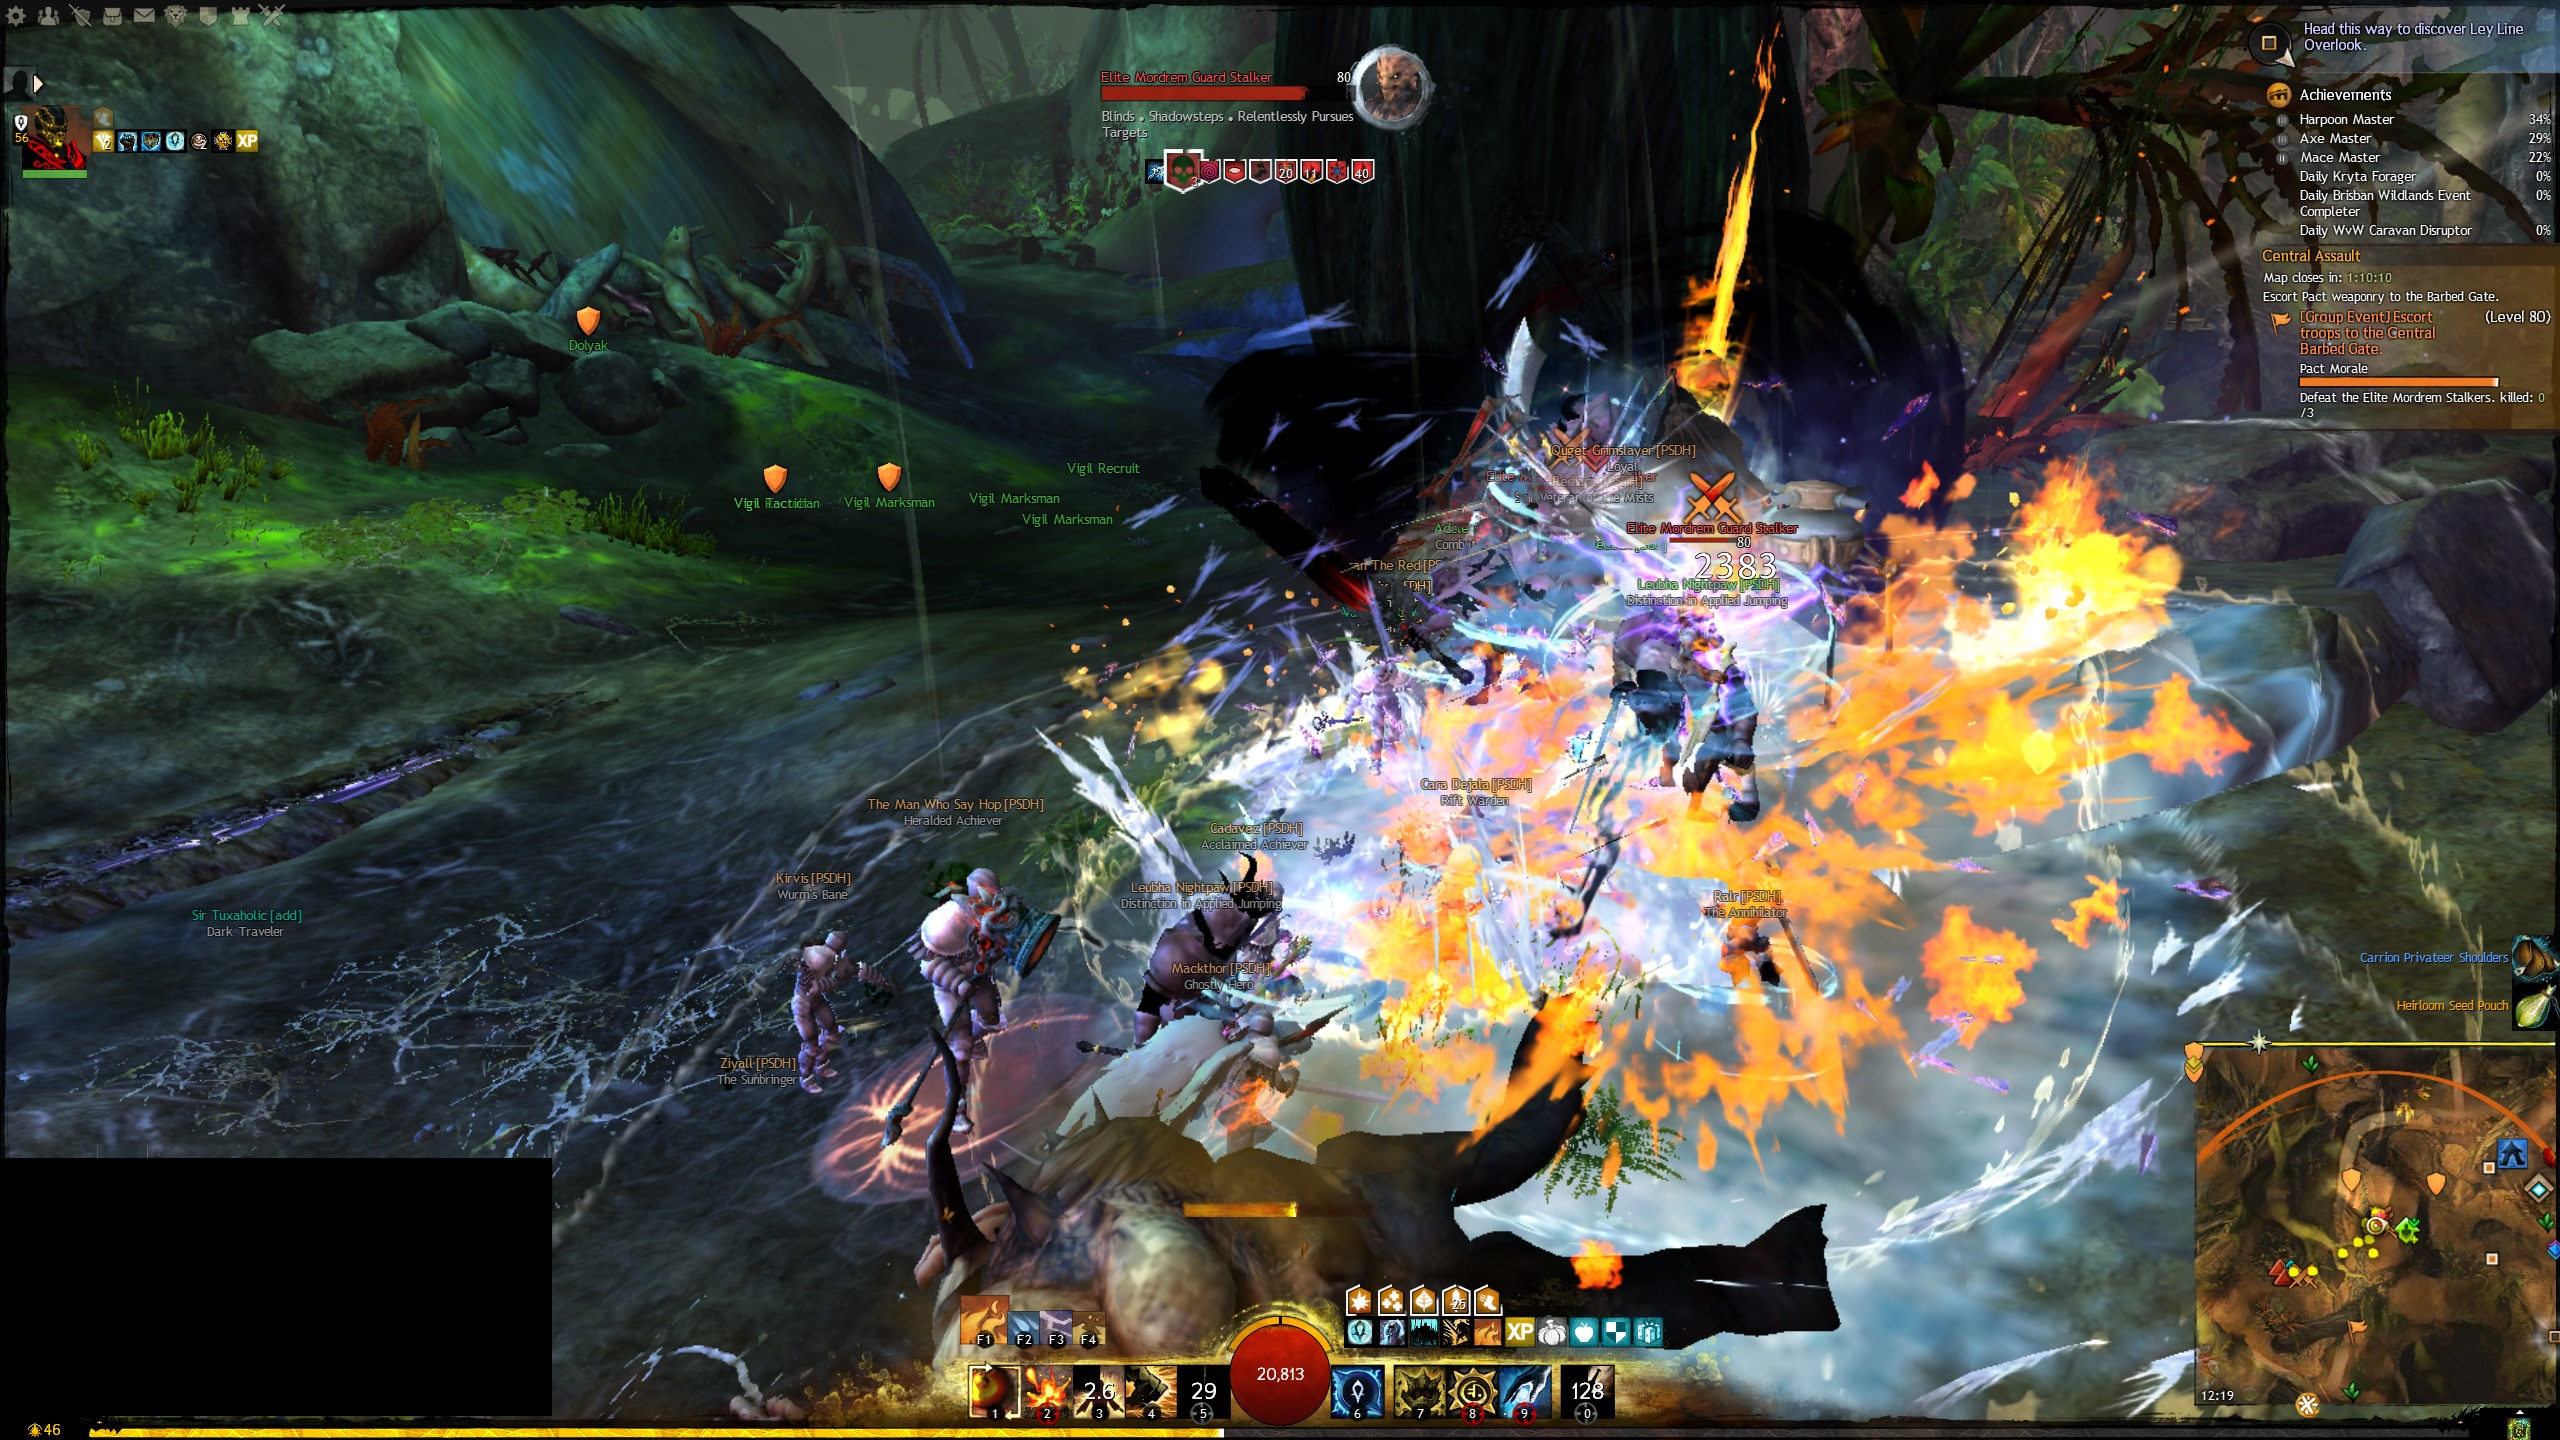
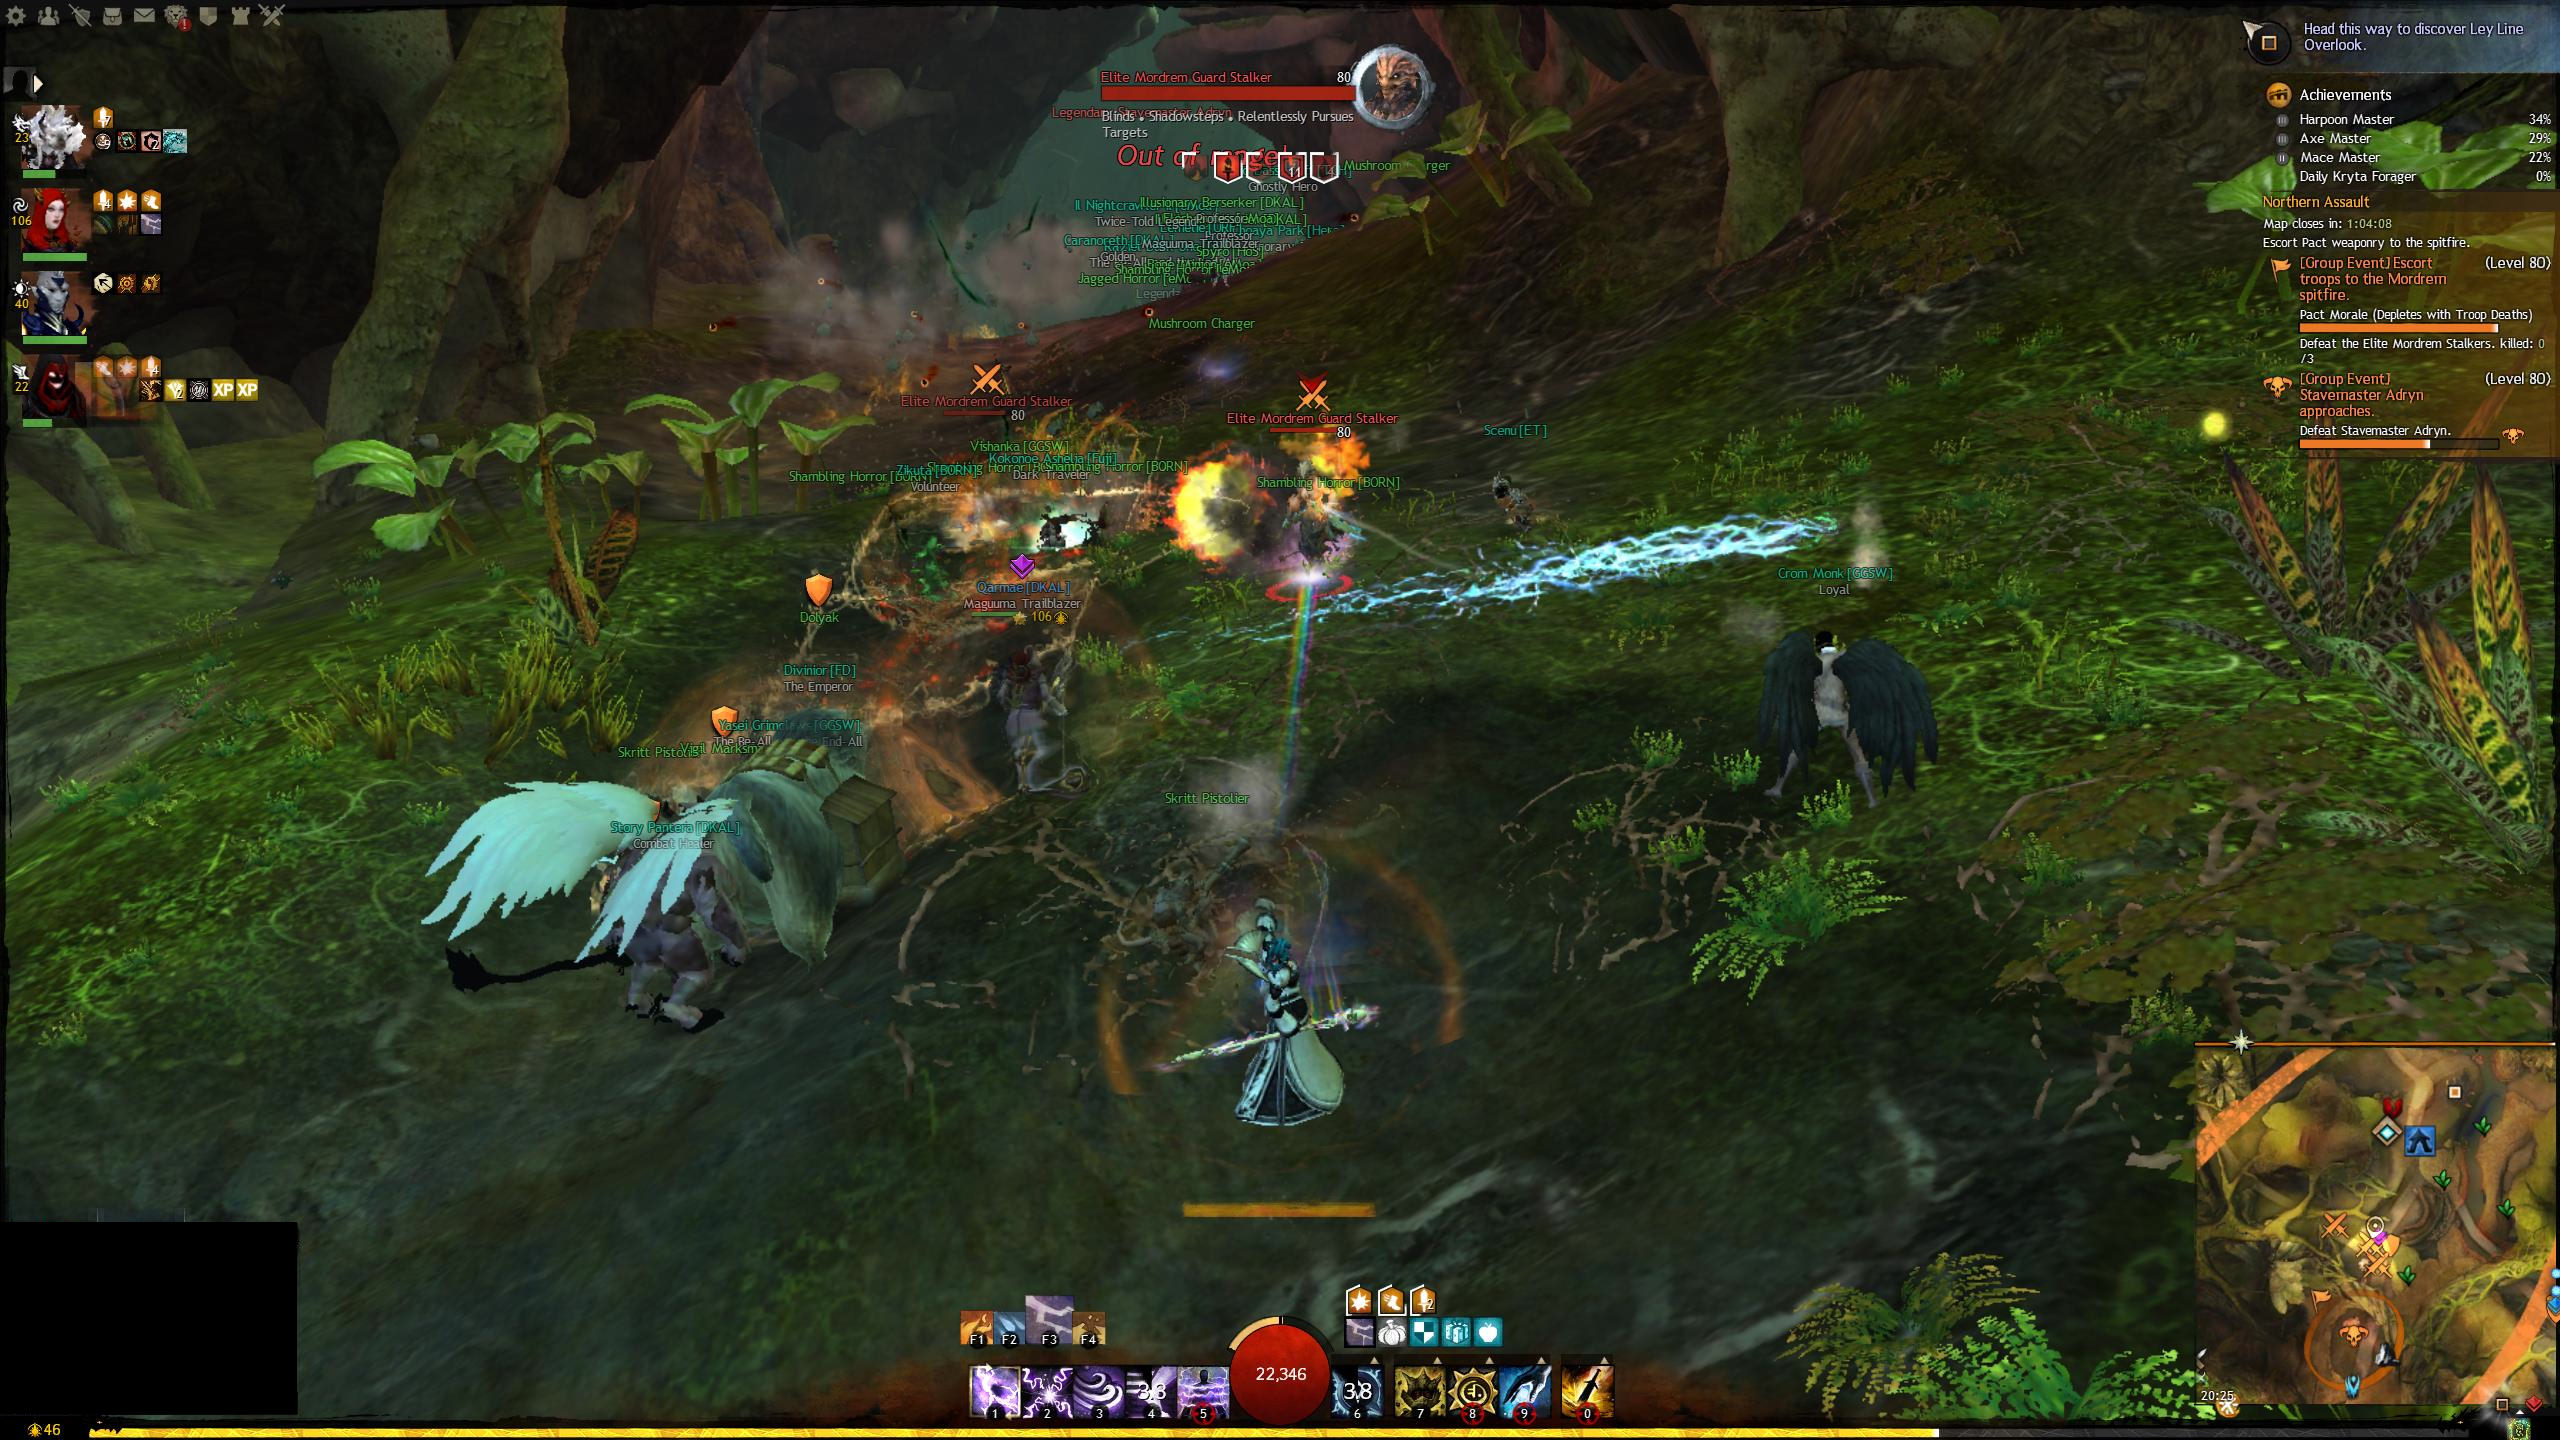
The escort will continue on, with more waves of enemies to defeat until you reach the gate (A big green blob). The event will update as you go and you'll have to take out three Elite Mordrem Stalkers and shortly after you'll have to take out the final Thornheart and then defeat the Assaulting Mordrem.
That's the end of the central escort - the next thing to do is the central tower. At this point, your commander will start preparing for this by splitting the group. 10 People will follow a second tag, the rest will stick to the commander like glue.
Continue reading the Tower section for information on what happens next.
Dragon's Stand is a map that's essentially dedicated to an event chain meta. It requires a modicum of organisation, but map/event familiarity is all you really need. You will need Heart of Thorns to play this content.
The general flow of the map has three escorts traverse the map, doing events along the way until they reach three towers. Each tower must fall at the same time and then there is a final boss. The best way to read this guide is to pick a route (north/central/south) and read the sections pertinent to that for the pre events, escort phase and tower, before the final boss.
You optionally need: Bouncing Mushrooms (Itzel Lore 1 - Helps you get places) Itzel Poison Lore (Itzel Lore 4) Leyline Gliding (Gliding 6 - Required for one of the loot phase locations)
General Event Progression There are several stages the event progresses through categorised as so:
Preparation
Pre-events (before the main event starts)
Pact Escort
Tower Bosses
Dragon Boss Phase
Loooooooot
Preparation / General Info The main escort / pre events of this map split in three directions. The general route follows the arrows as below. View Full Size Image
Before the event starts, commanders will form three groups to do the pre events and the main escort. They'll also ensure that there is a split of people with poison mastery so that all three routes can do events that are in poison areas (over time, this'll become less necessary as people gain their masteries, just be mindful to not jump into a poison event if you lack the mastery or you'll taste a LOT of pain). The escort and pre-events are on a timer, with the escort phase having a total of 2 hours to complete, so the guild will jump into the map as the timer resets.
Pre-Events
Each route have their own pre-events
Northern - Glide up to gather mordrem vine pods and return them to Briallen
From the NPC, simply glide on up to the platform above, grab a vine pod and return it back to Briallen the collector.
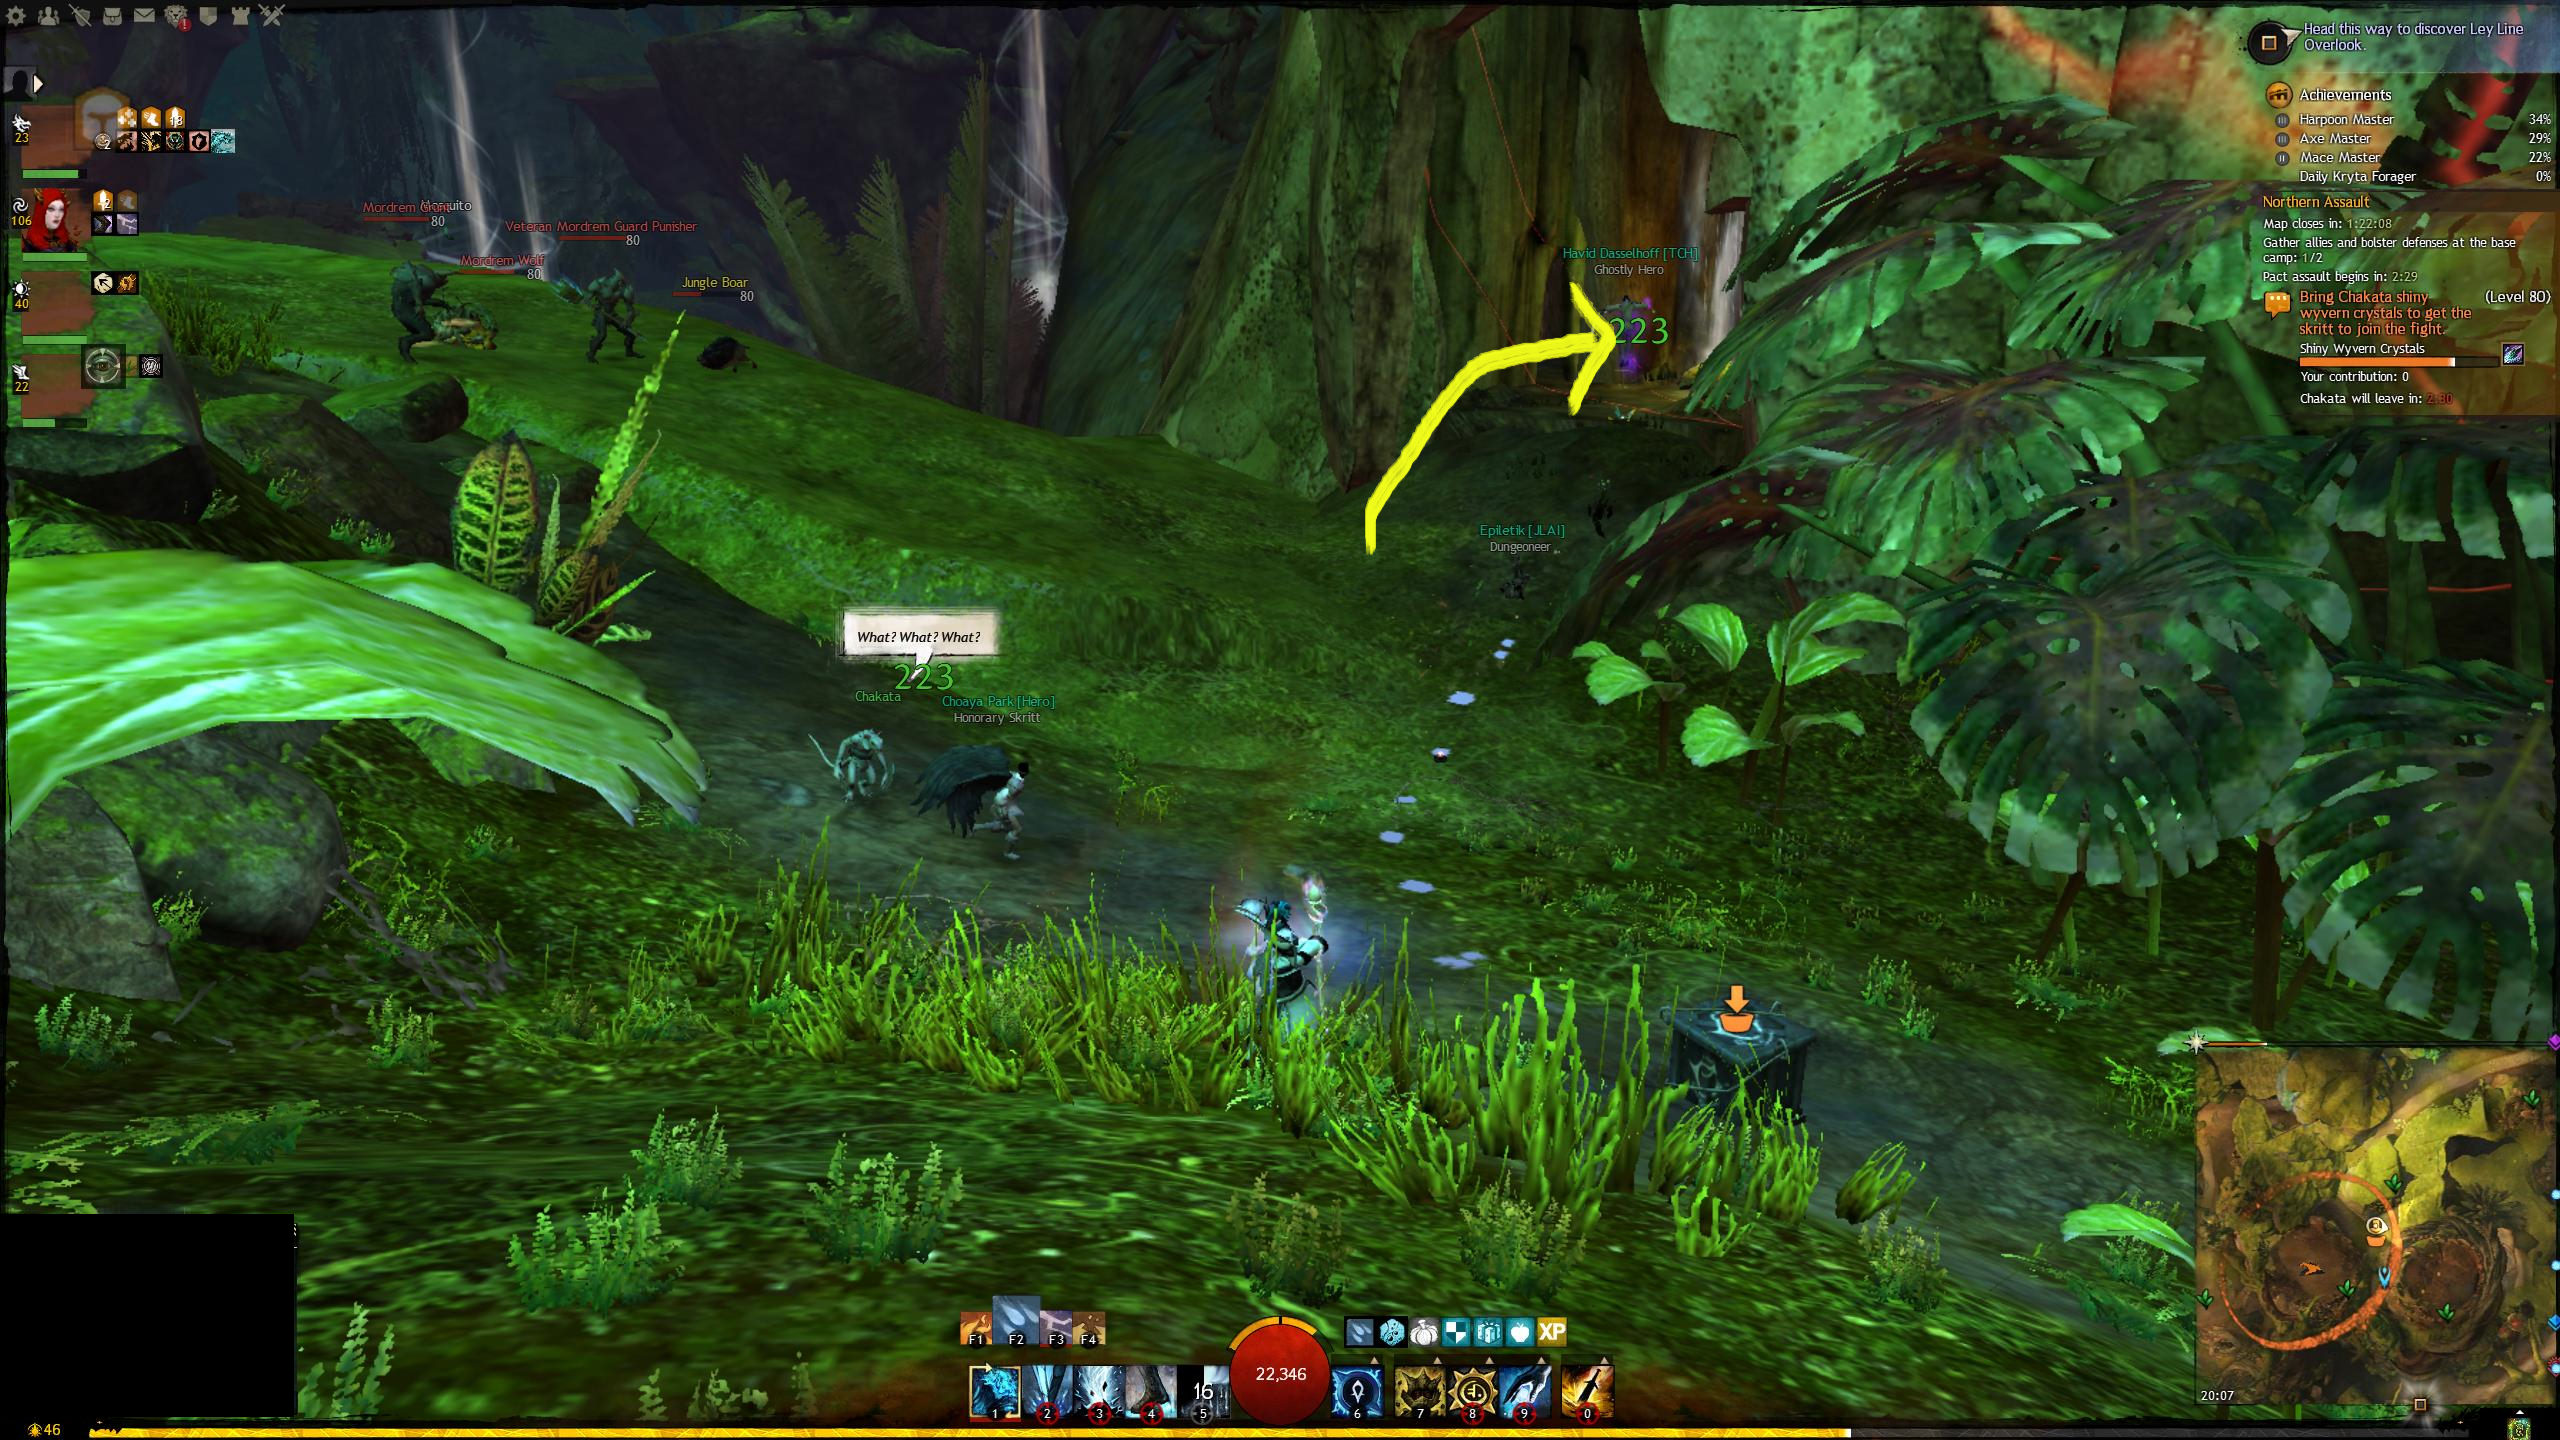
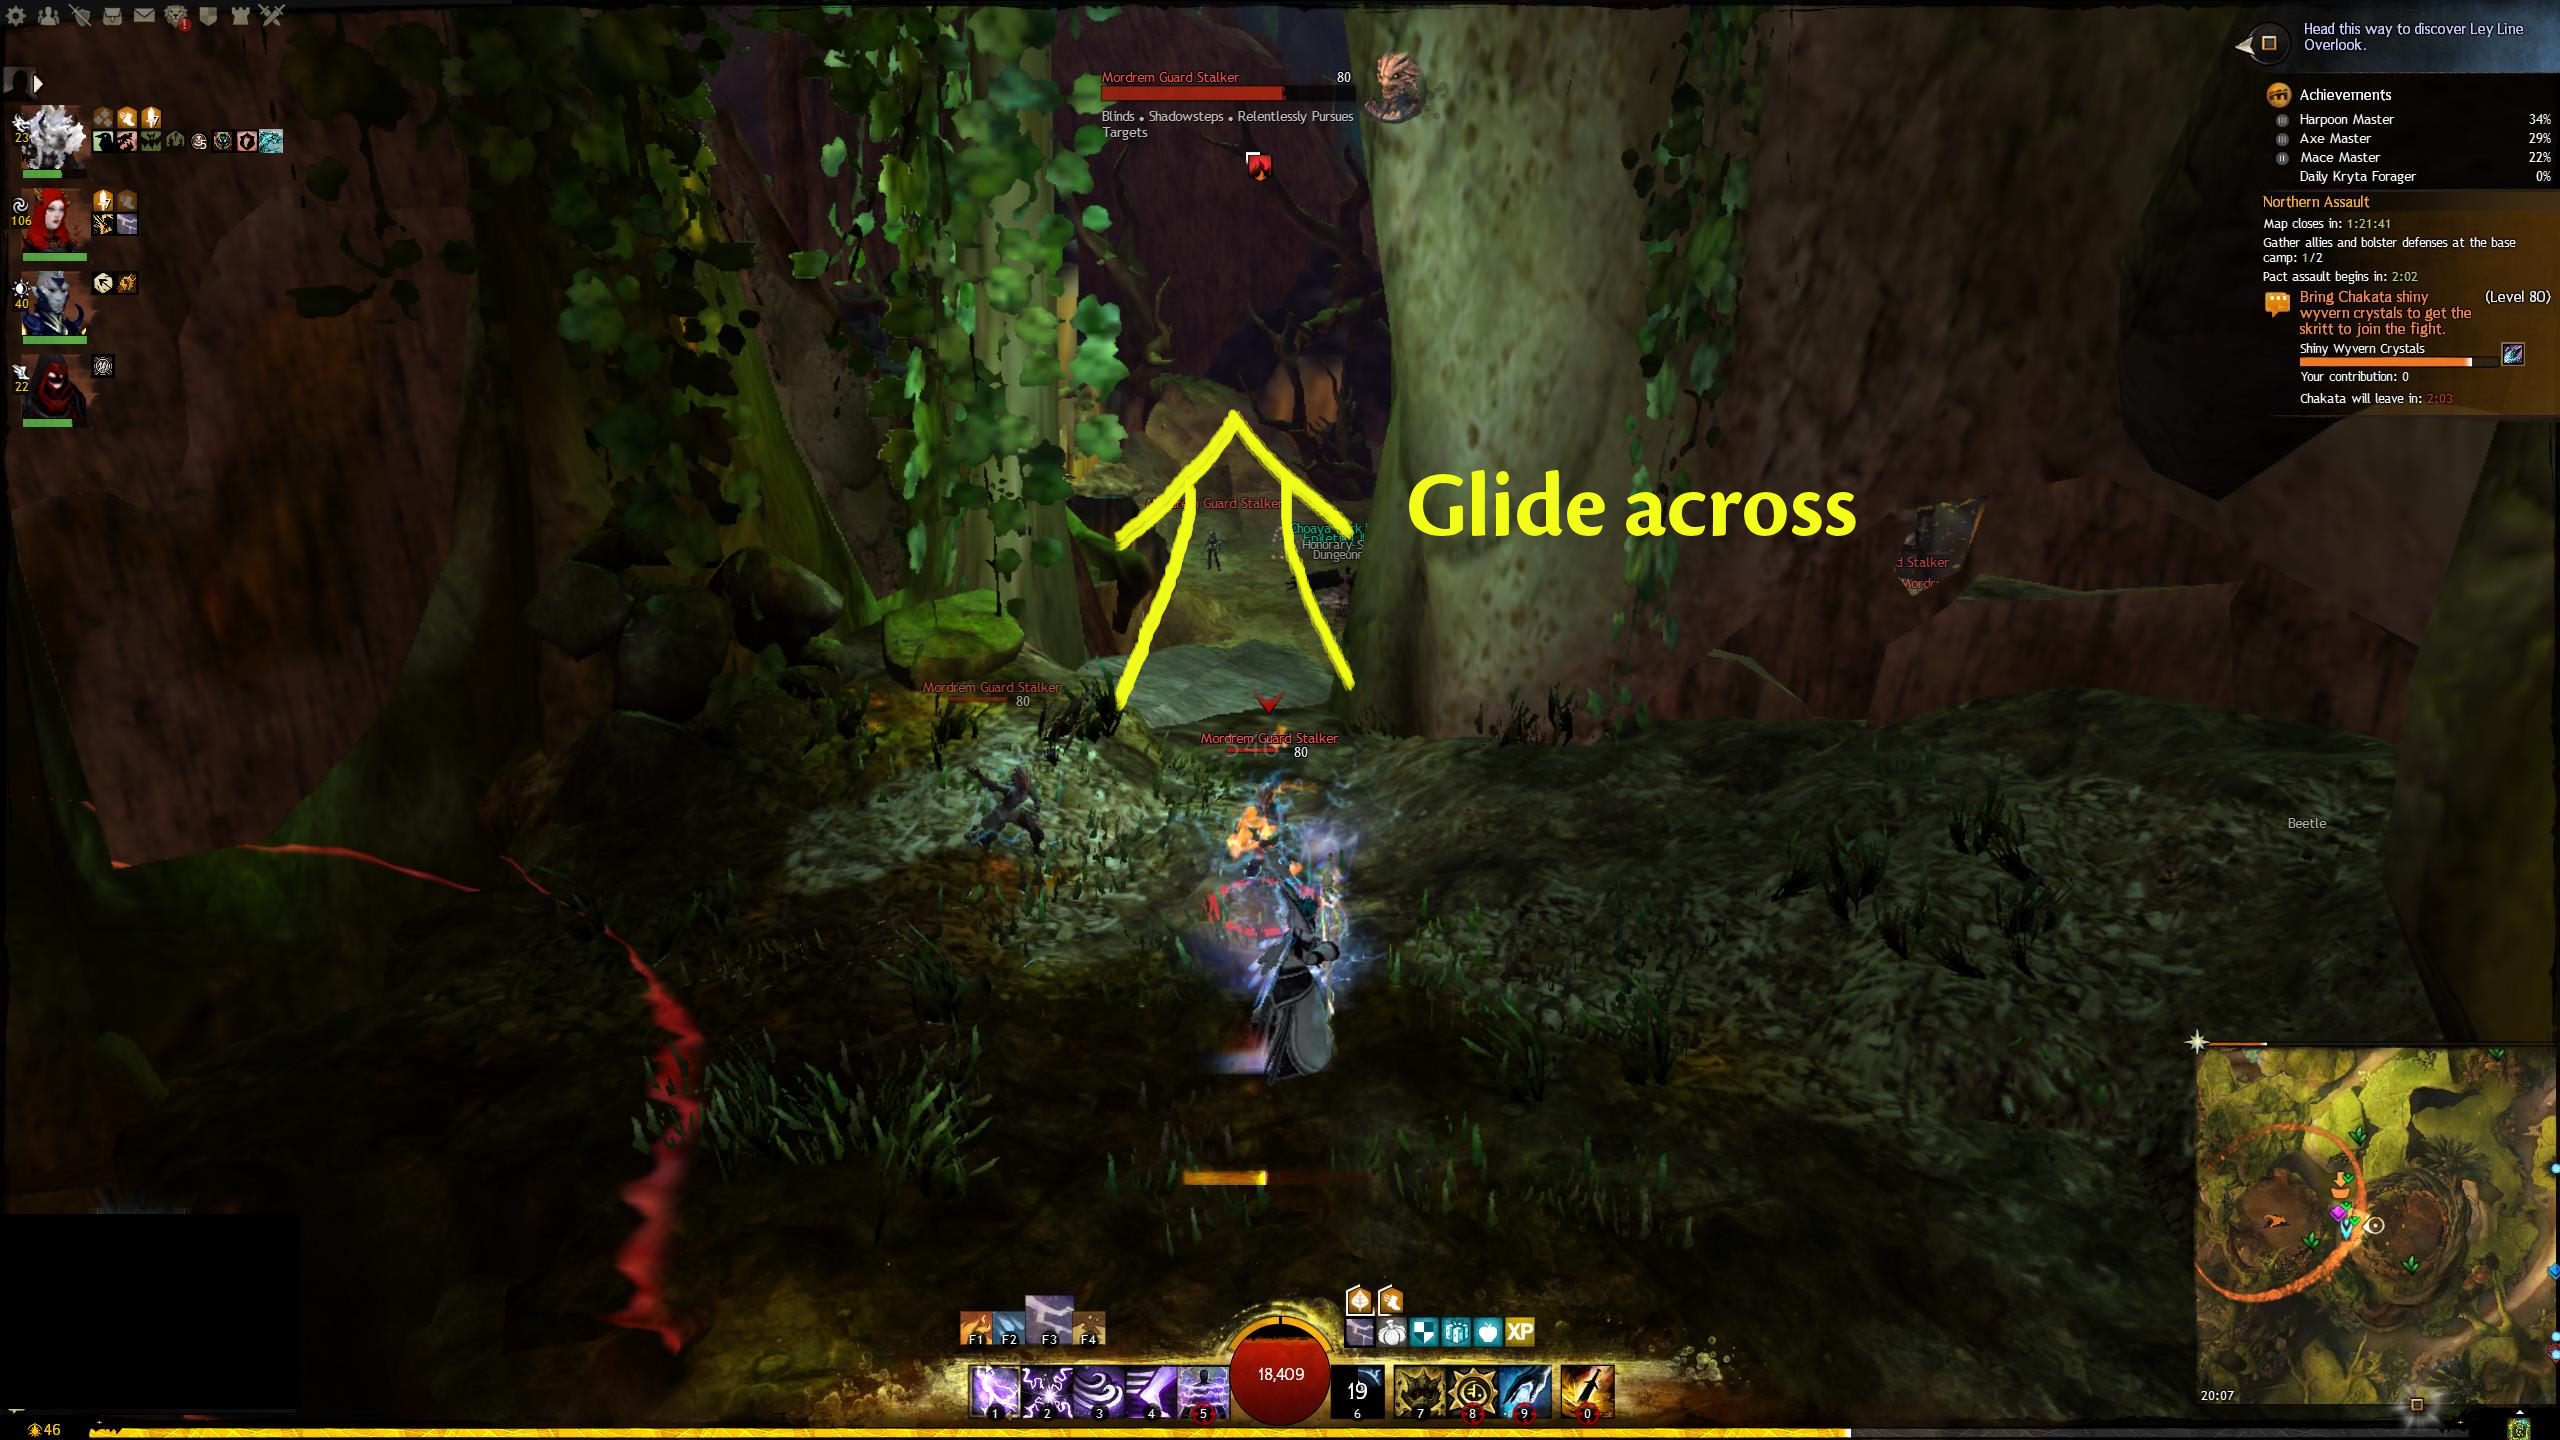
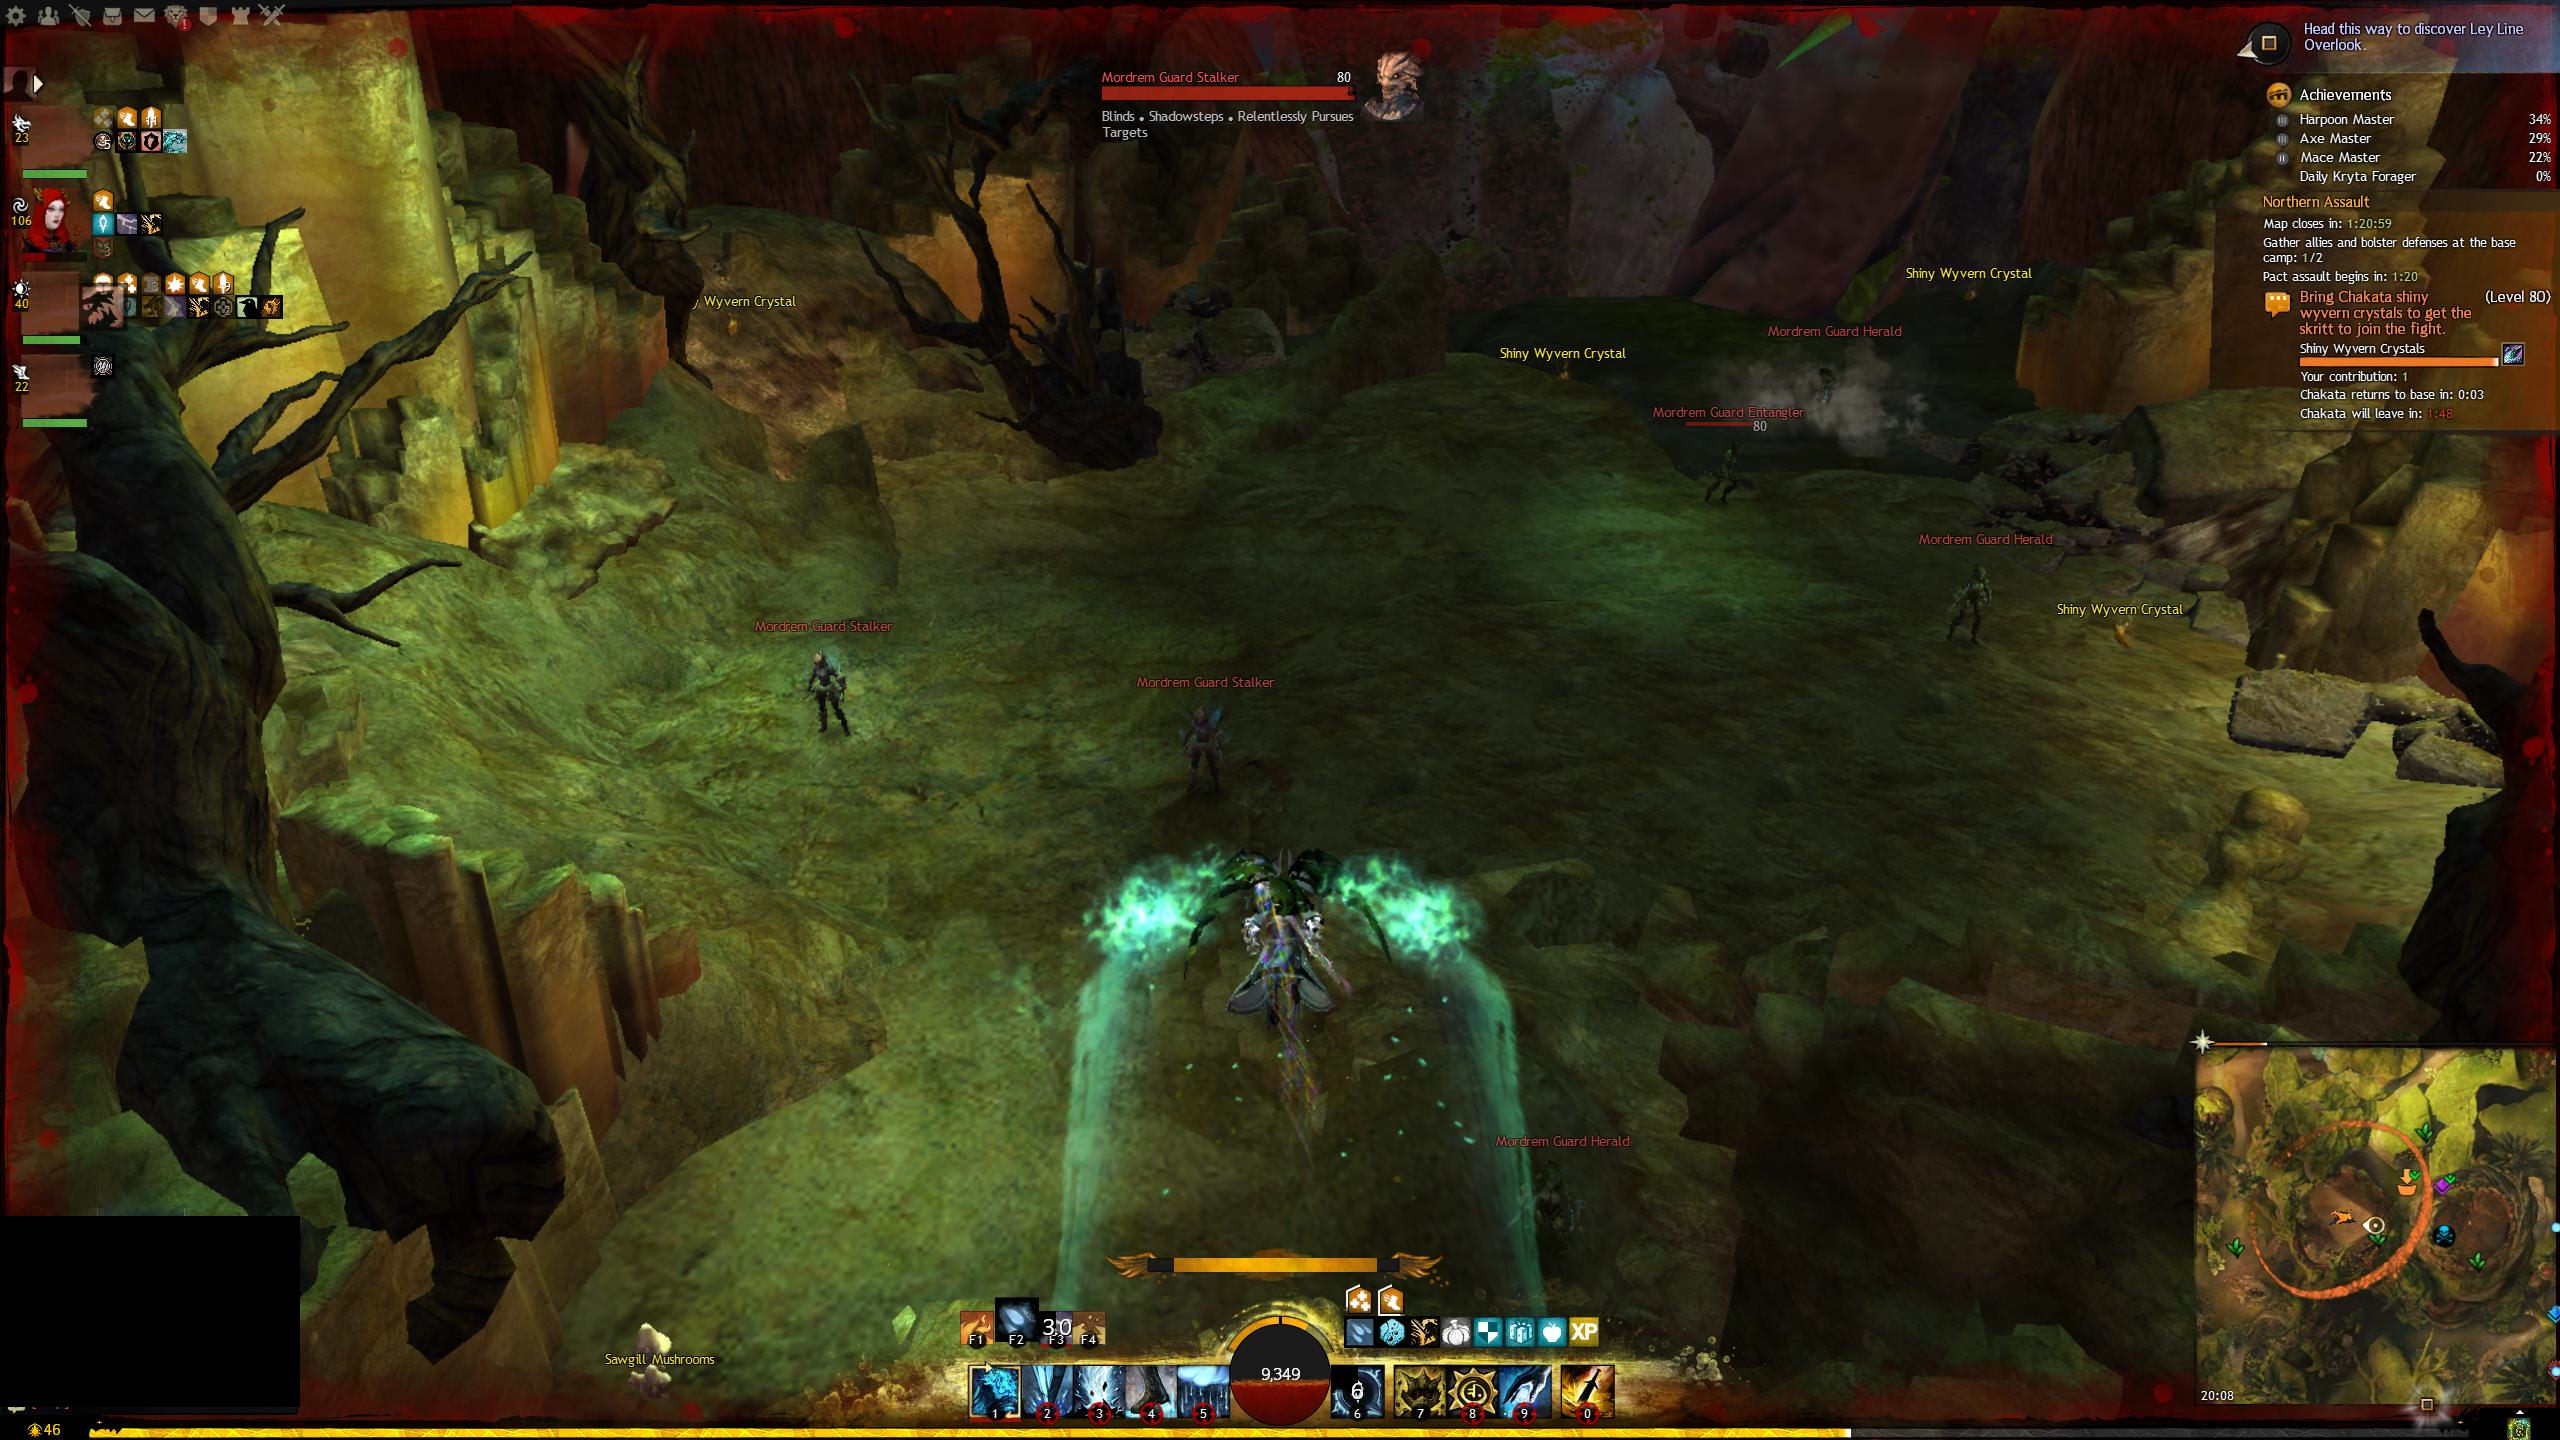
Northern - Bring Chakata shiny wyvern crystals to get the skritt to join the fight
Jump up the bouncing mushrooms in the tree nearby to Chakata and the collection crate. When at the top, glide across to a platform where you can find shiny wyvern crystals. Grab one and drop down to deliver it to the collection crate.
Central - Retrieve engine parts to keep the canons online
How to get there from Pact Base Camp Waypoint:
When you get to the collector, simply use updraft on the vent to get to the ledge above to get the parts they're after. View Full Size Image
MORE COMING SOON
Escorts
North Escort
For this part of the meta, we are simply escorting NPC's through the northern part of the map. There's a few events that we stop off to do mid-way, as well as some bosses that we will encounter during escort phases.
Thornheart
Almost immediately after the escort begins, a thornheart will spawn to the right. You'll encounter this boss several times across the entire escort. It should always be a priority over any other boss in the area. Use crowd control skills to break the defiance bar and simply DPS the thornheart to take it down.
The Mordrem Spitfire will initially be shielded, when the shield goes down you can start dealing DPS. Almost immediately two Vinetenders will spawn and continue respawning throughout the event. Split and take these out and then continue DPS on the Spitfire. The vinetenders restore the shield, so you'll need to take them down to deal damage to the spitfire.
Once the spitfire has been taken down, there will be two events to do, there is a mini timer of 7 minutes to do these events.
Bring meat from the dino nests to build a pile to attract wyverns
A short way north of the collector are some nests with meat in them. The meat is a bundle that you can take back to the collector, it does have a collection time when you grab it which is interruptible. Clear enemies or otherwise keep them away while you collect the meat.
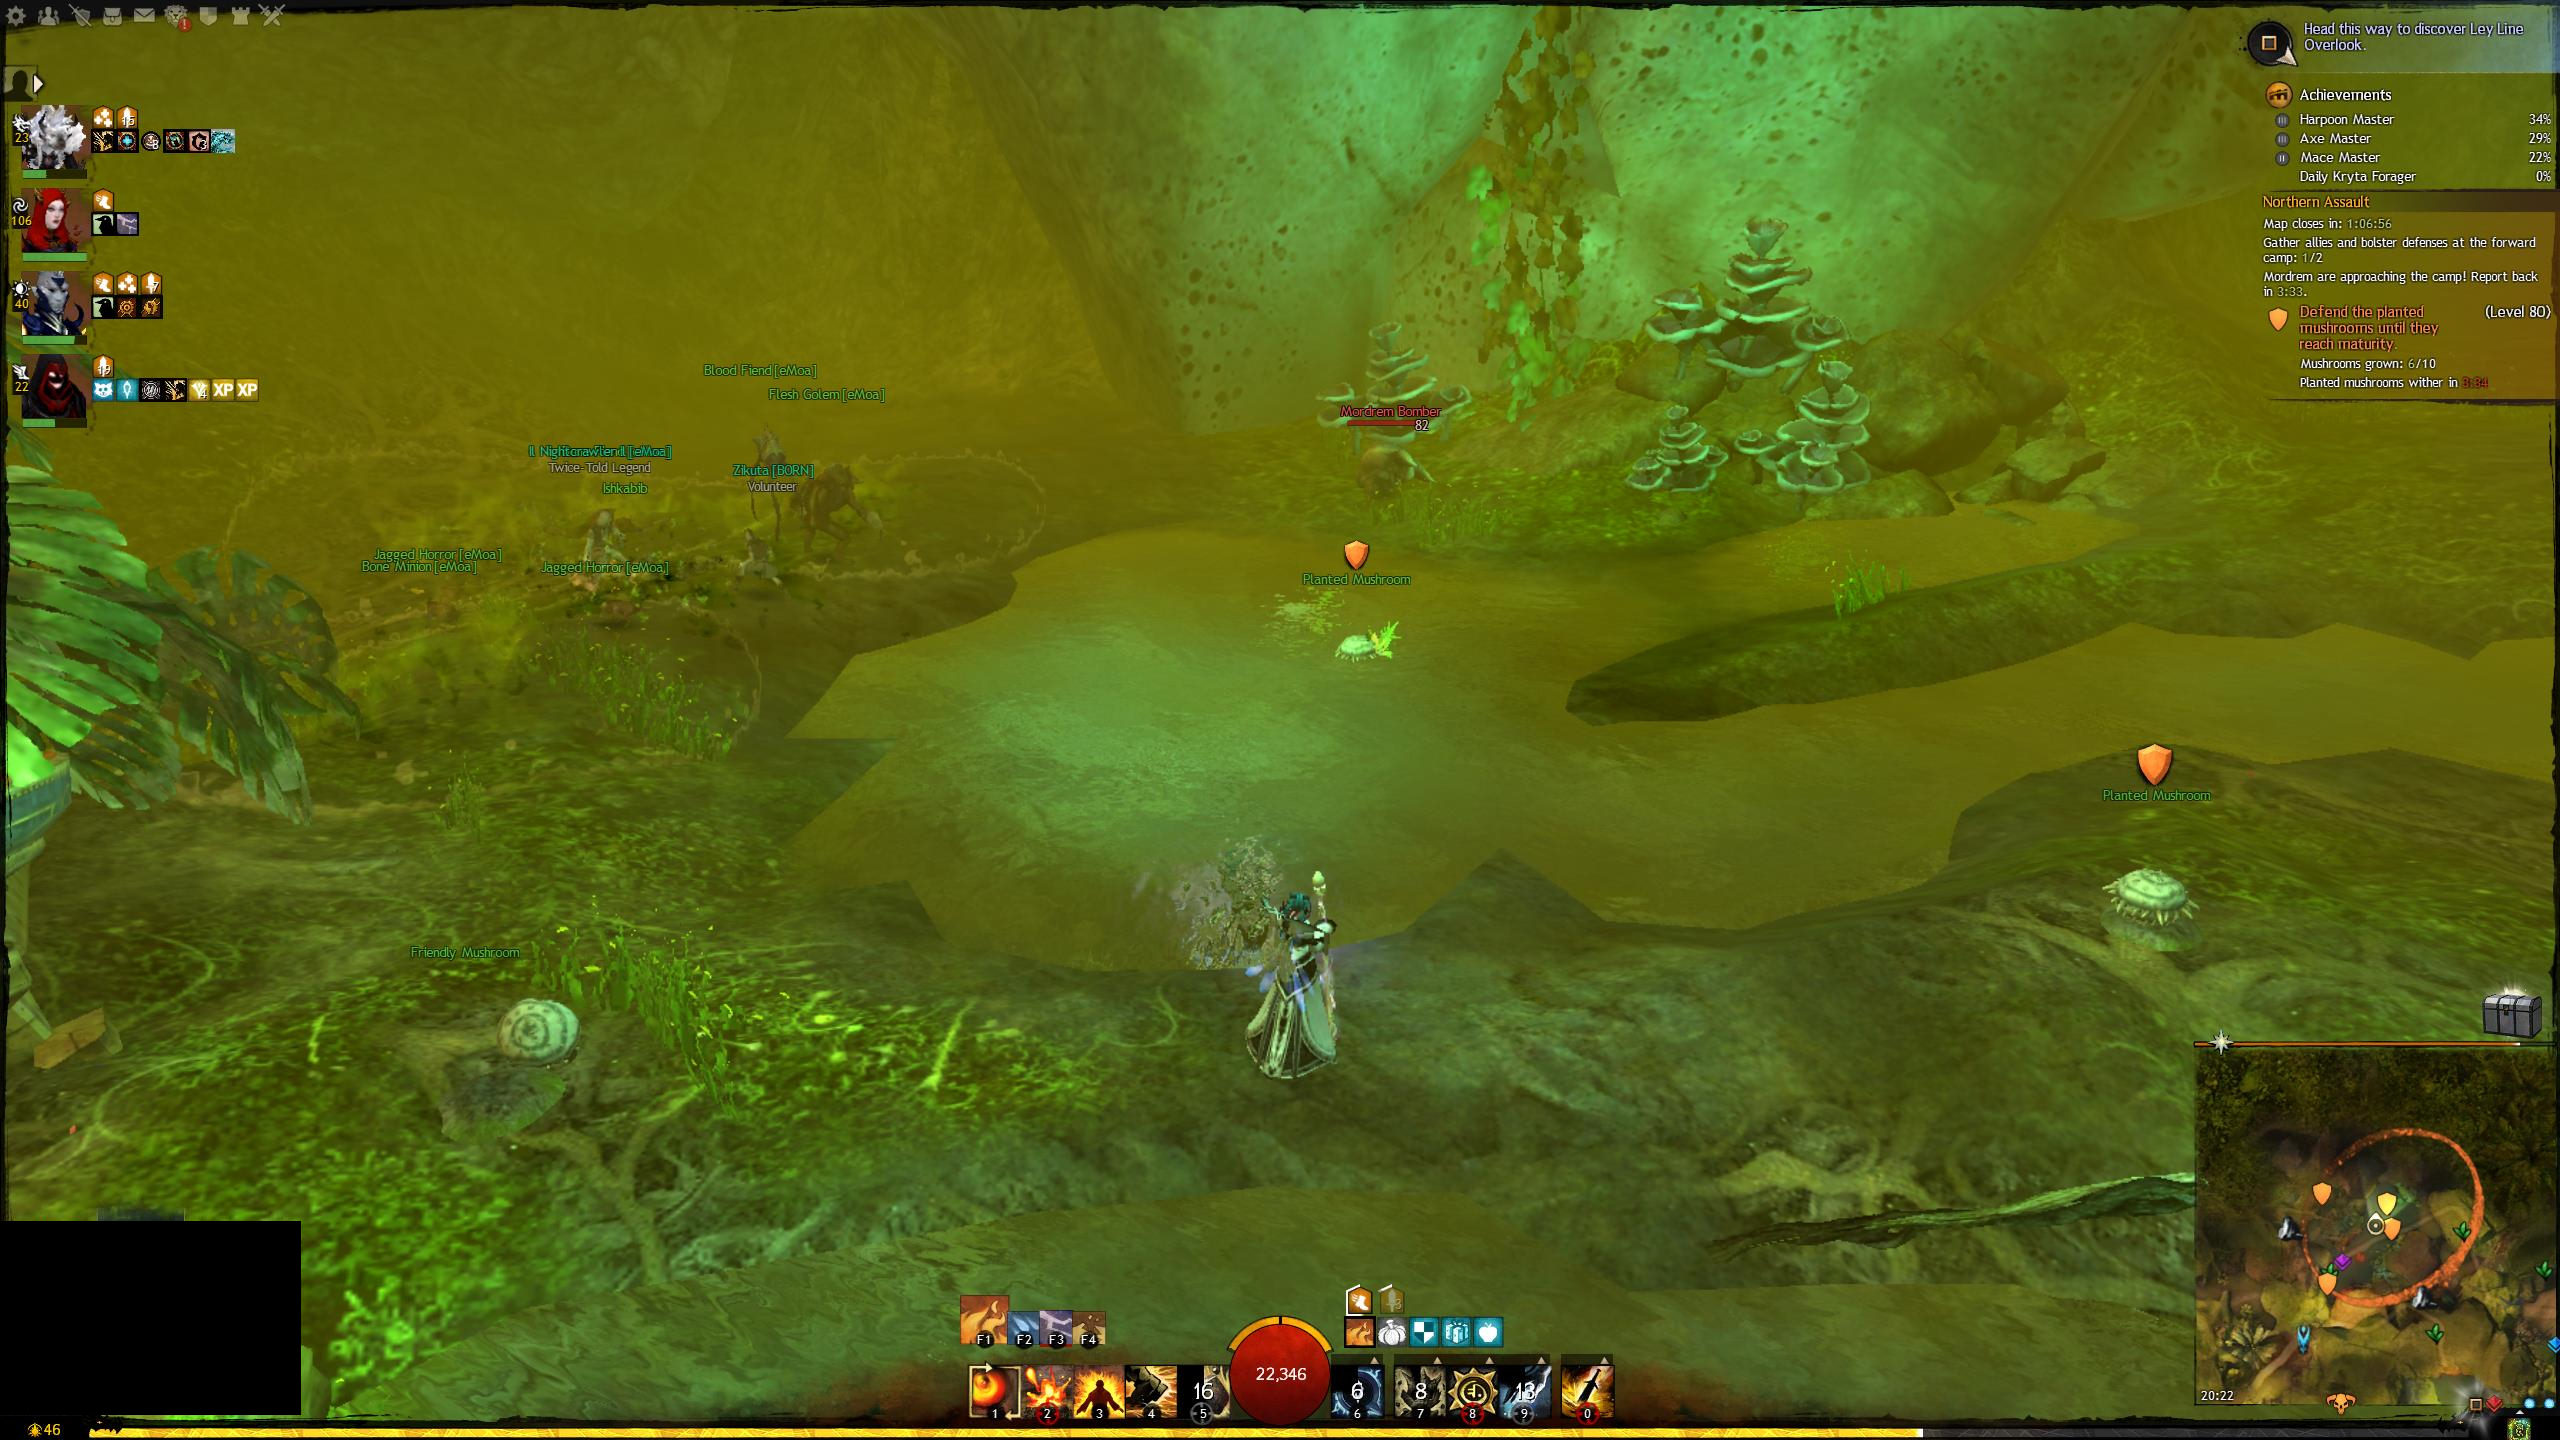
Defend the planted mushrooms until they reach maturity
You will need poison mastery to do this event. There is a cave somewhat north of where the pact stopped to set up camp. In it are a number of allied mushrooms. Their health bars are essentially progress bars. Keep enemies off them while they mature. Return to camp when done.
The escort will resume once both missions are done, or if the mini-timer expires (whichever comes first).
Northern escort continued
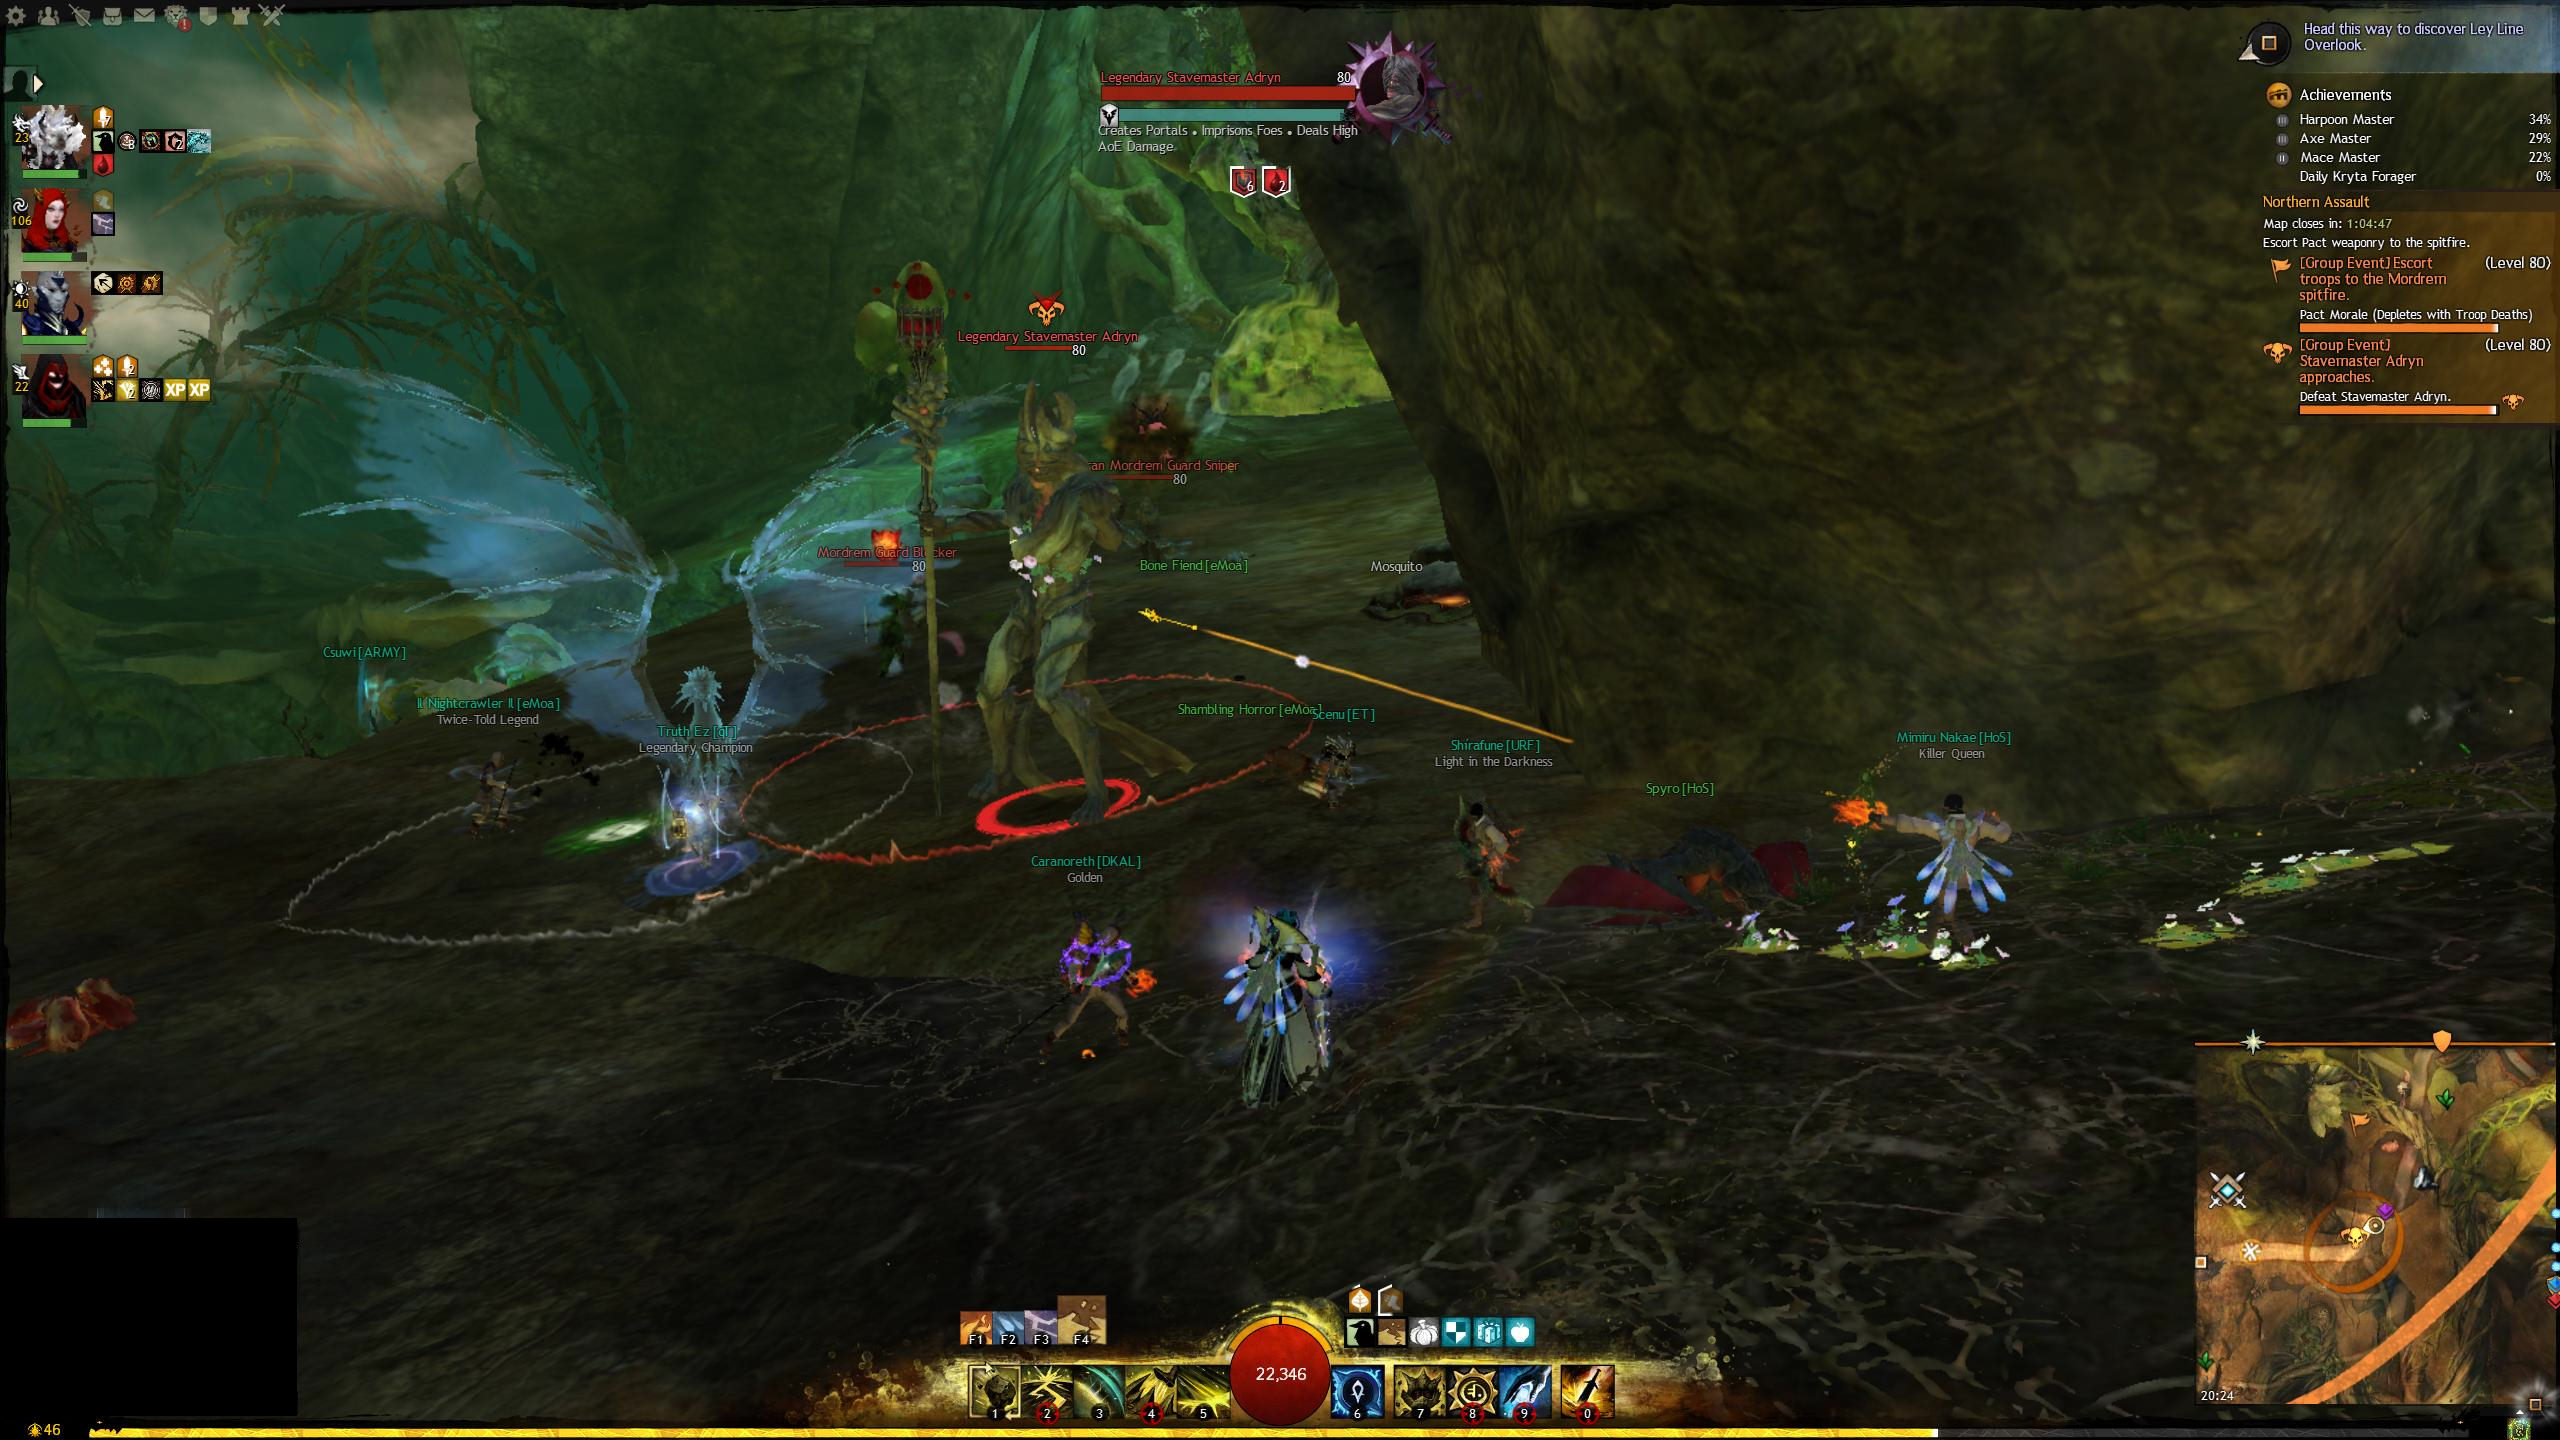
During the time you were doing the events, Legendary Stavemaster Adryn would have been moving towards the pact escort. You'll probably engage just after the events. He does a large amount of AoE damage and has a really funky portal skill, which is like a whirlpool that spins you around.
To combat him, use crowd control skills to break his defiance bar then DPS.
As you proceed along the escort, you will encounter more wolves and another thornheart which you will need to defeat. If you're ever in a situation where the thornheart and other events are going on, always focus the thornheart.
Soon after, you will arrive at the next spitfire. Like before, DPS the spitfire but this time there are Preservers spawning. Preservers will heal the spitfire and are a priority target. If you see them spawn, bust down their breakbars using crowd control and DPS them before continuing on the spitfire.
After the spitfire is defeated there will be a couple more events.
Help Gammalon Vineripper destroy the brambles and clear a path to the Exalted
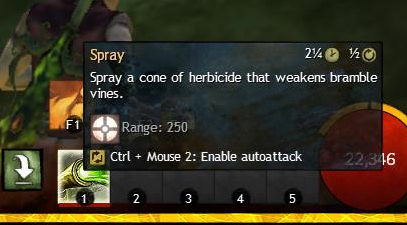
Follow Gammalon until you reach a vine wall. Defeat the vinetenders who keep the walls health topped up then use the the special "Bramble Begone" spray the NPC drops in a box nearby on the vines. Get through a few sets of vines to reach the Exalted.
To get to this event drop down the hole behind the anvil near the waypoint. Follow Spleecta around destroying incoming enemies. You will reach capture points that you need to take control of. Capture all four points and the event is complete.
Stavemaster Adryn would have respawned. If you're quick, you can wrap up the events before he arrives at the pact camp. If not, then he ends up intermingling with the events, which can be troublesome.
Shortly after the pact start moving again, another Thornheart will appear. Focus the thornheart even if Adryn is still not defeated.
Eventually, you will reach the northern blighting tower and that's the end of the northern escort. The next thing to do is the northern tower. At this point, your commander will start preparing for this by splitting the group. 10 People will follow a second tag, the rest will stick to the commander like glue. Continue reading the Tower section for information on what happens next.
I had a go on this the other night, got the ogre lane to like 0.01% health left. Interesting how the use of CC can be detrimental in this event.
Would be good to figure out a general event guide too - as often you'll want to spawn a new map and complete the pre-events quickly (for ogres its mainly just escorting a key ogre places) before the main meta itself. Tangled depths is also quite the labyrinth.
Just completed it myself. The 10 people fighting the boss + zerg circle is by far the easiest way. Biggest problem I've seen with pugs thusfar is "we need more at X" and then everyone on the map goes to X leaving a problem back where they left....
According to their thread, the run round in a circle method seems to work better than the '5 to a pod - keep it down scaled' method (which is obviously flakey as it relies on pugs not wandering into you...) Also someone clearly stated that sync kill isn't needed - you just have to make sure no pods come back up until all 3 towers eventually fall.
So with HoT there's a bunch of map meta events that play out in a way similar to Triple Trouble that we can attempt. One that particularly interests me is Dragon Stand, it's effectively a map dedicated to a boss.
The zerg splits into 3 lanes, fights through hoardes of enemies and then are met with a tower boss - this is where real coordination is required, I've never completed it as random people lack coordination.
It details how others have successfully done it, posting here for future reference. Any more discussion/info on how we can nail this please make it known
Another possible event idea, although a bit more hardcore and possibly more suited for daytime weekends after teq/wurm etc:
Arah P4 dungeon racing! Players split into teams (pulled from a random generator) and line up at the start of arah. Then its a case of seeing who makes it to the end fastest (or at all) P4 arah is usually an interesting one as it's one of the longer/trickier dungeon paths in the game. Requires that all participants actually have at least a few hours of free time ahead of them to participate.
Slightly tamer version is to do regular dungeon runs.