


1
Dragon's Stand / Takami's Dragon Stand Event Guide
« on: November 15, 2015, 03:36:32 PM »
Overview
This guide is a work in progress
Dragon's Stand is a map that's essentially dedicated to an event chain meta. It requires a modicum of organisation, but map/event familiarity is all you really need. You will need Heart of Thorns to play this content.
The general flow of the map has three escorts traverse the map, doing events along the way until they reach three towers. Each tower must fall at the same time and then there is a final boss. The best way to read this guide is to pick a route (north/central/south) and read the sections pertinent to that for the pre events, escort phase and tower, before the final boss.
Mastery Requirements
Mandatory Requirement:
Updraft (Gliding 2)
You optionally need:
Bouncing Mushrooms (Itzel Lore 1 - Helps you get places)
Itzel Poison Lore (Itzel Lore 4)
Leyline Gliding (Gliding 6 - Required for one of the loot phase locations)
General Event Progression
There are several stages the event progresses through categorised as so:
The main escort / pre events of this map split in three directions. The general route follows the arrows as below.

View Full Size Image
Before the event starts, commanders will form three groups to do the pre events and the main escort. They'll also ensure that there is a split of people with poison mastery so that all three routes can do events that are in poison areas (over time, this'll become less necessary as people gain their masteries, just be mindful to not jump into a poison event if you lack the mastery or you'll taste a LOT of pain). The escort and pre-events are on a timer, with the escort phase having a total of 2 hours to complete, so the guild will jump into the map as the timer resets.
Pre-Events
Each route have their own pre-events
Northern - Glide up to gather mordrem vine pods and return them to Briallen
From the NPC, simply glide on up to the platform above, grab a vine pod and return it back to Briallen the collector.
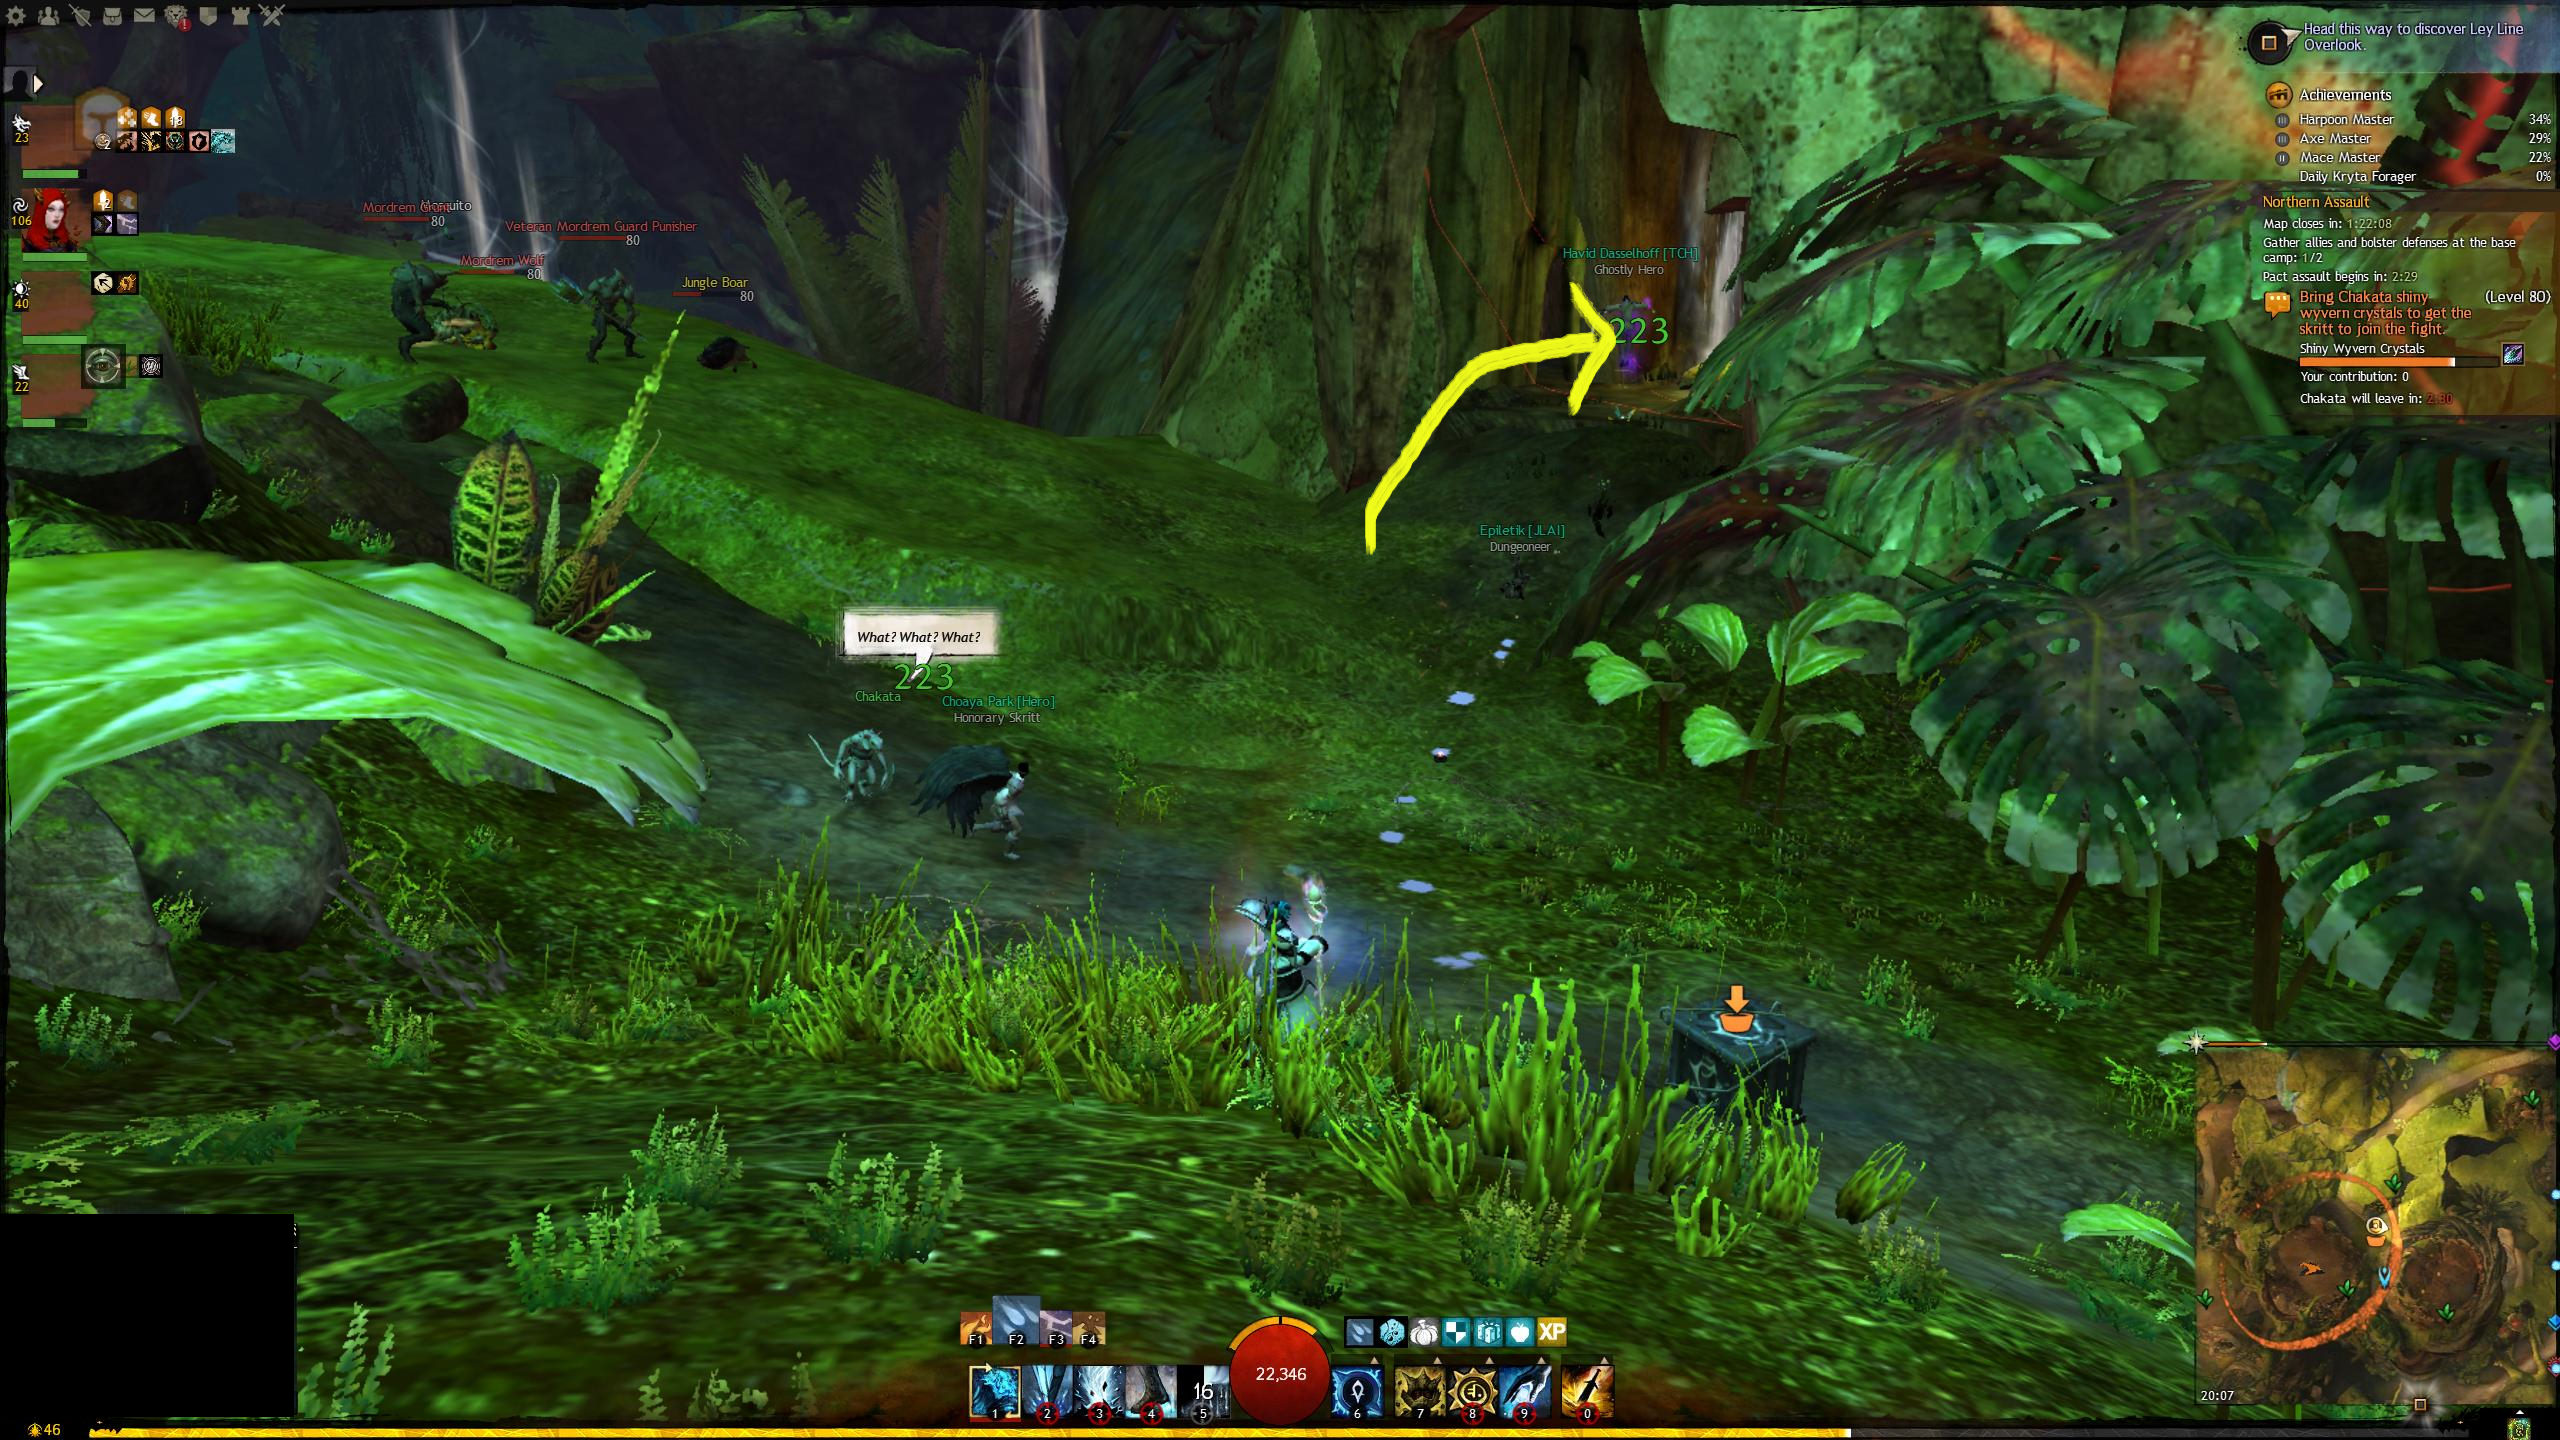
Northern - Bring Chakata shiny wyvern crystals to get the skritt to join the fight
Jump up the bouncing mushrooms in the tree nearby to Chakata and the collection crate. When at the top, glide across to a platform where you can find shiny wyvern crystals. Grab one and drop down to deliver it to the collection crate.
Central - Retrieve engine parts to keep the canons online
How to get there from Pact Base Camp Waypoint:
When you get to the collector, simply use updraft on the vent to get to the ledge above to get the parts they're after.

View Full Size Image
MORE COMING SOON
Escorts
North Escort
For this part of the meta, we are simply escorting NPC's through the northern part of the map. There's a few events that we stop off to do mid-way, as well as some bosses that we will encounter during escort phases.
Thornheart
Almost immediately after the escort begins, a thornheart will spawn to the right. You'll encounter this boss several times across the entire escort. It should always be a priority over any other boss in the area. Use crowd control skills to break the defiance bar and simply DPS the thornheart to take it down.

View Full Size Image
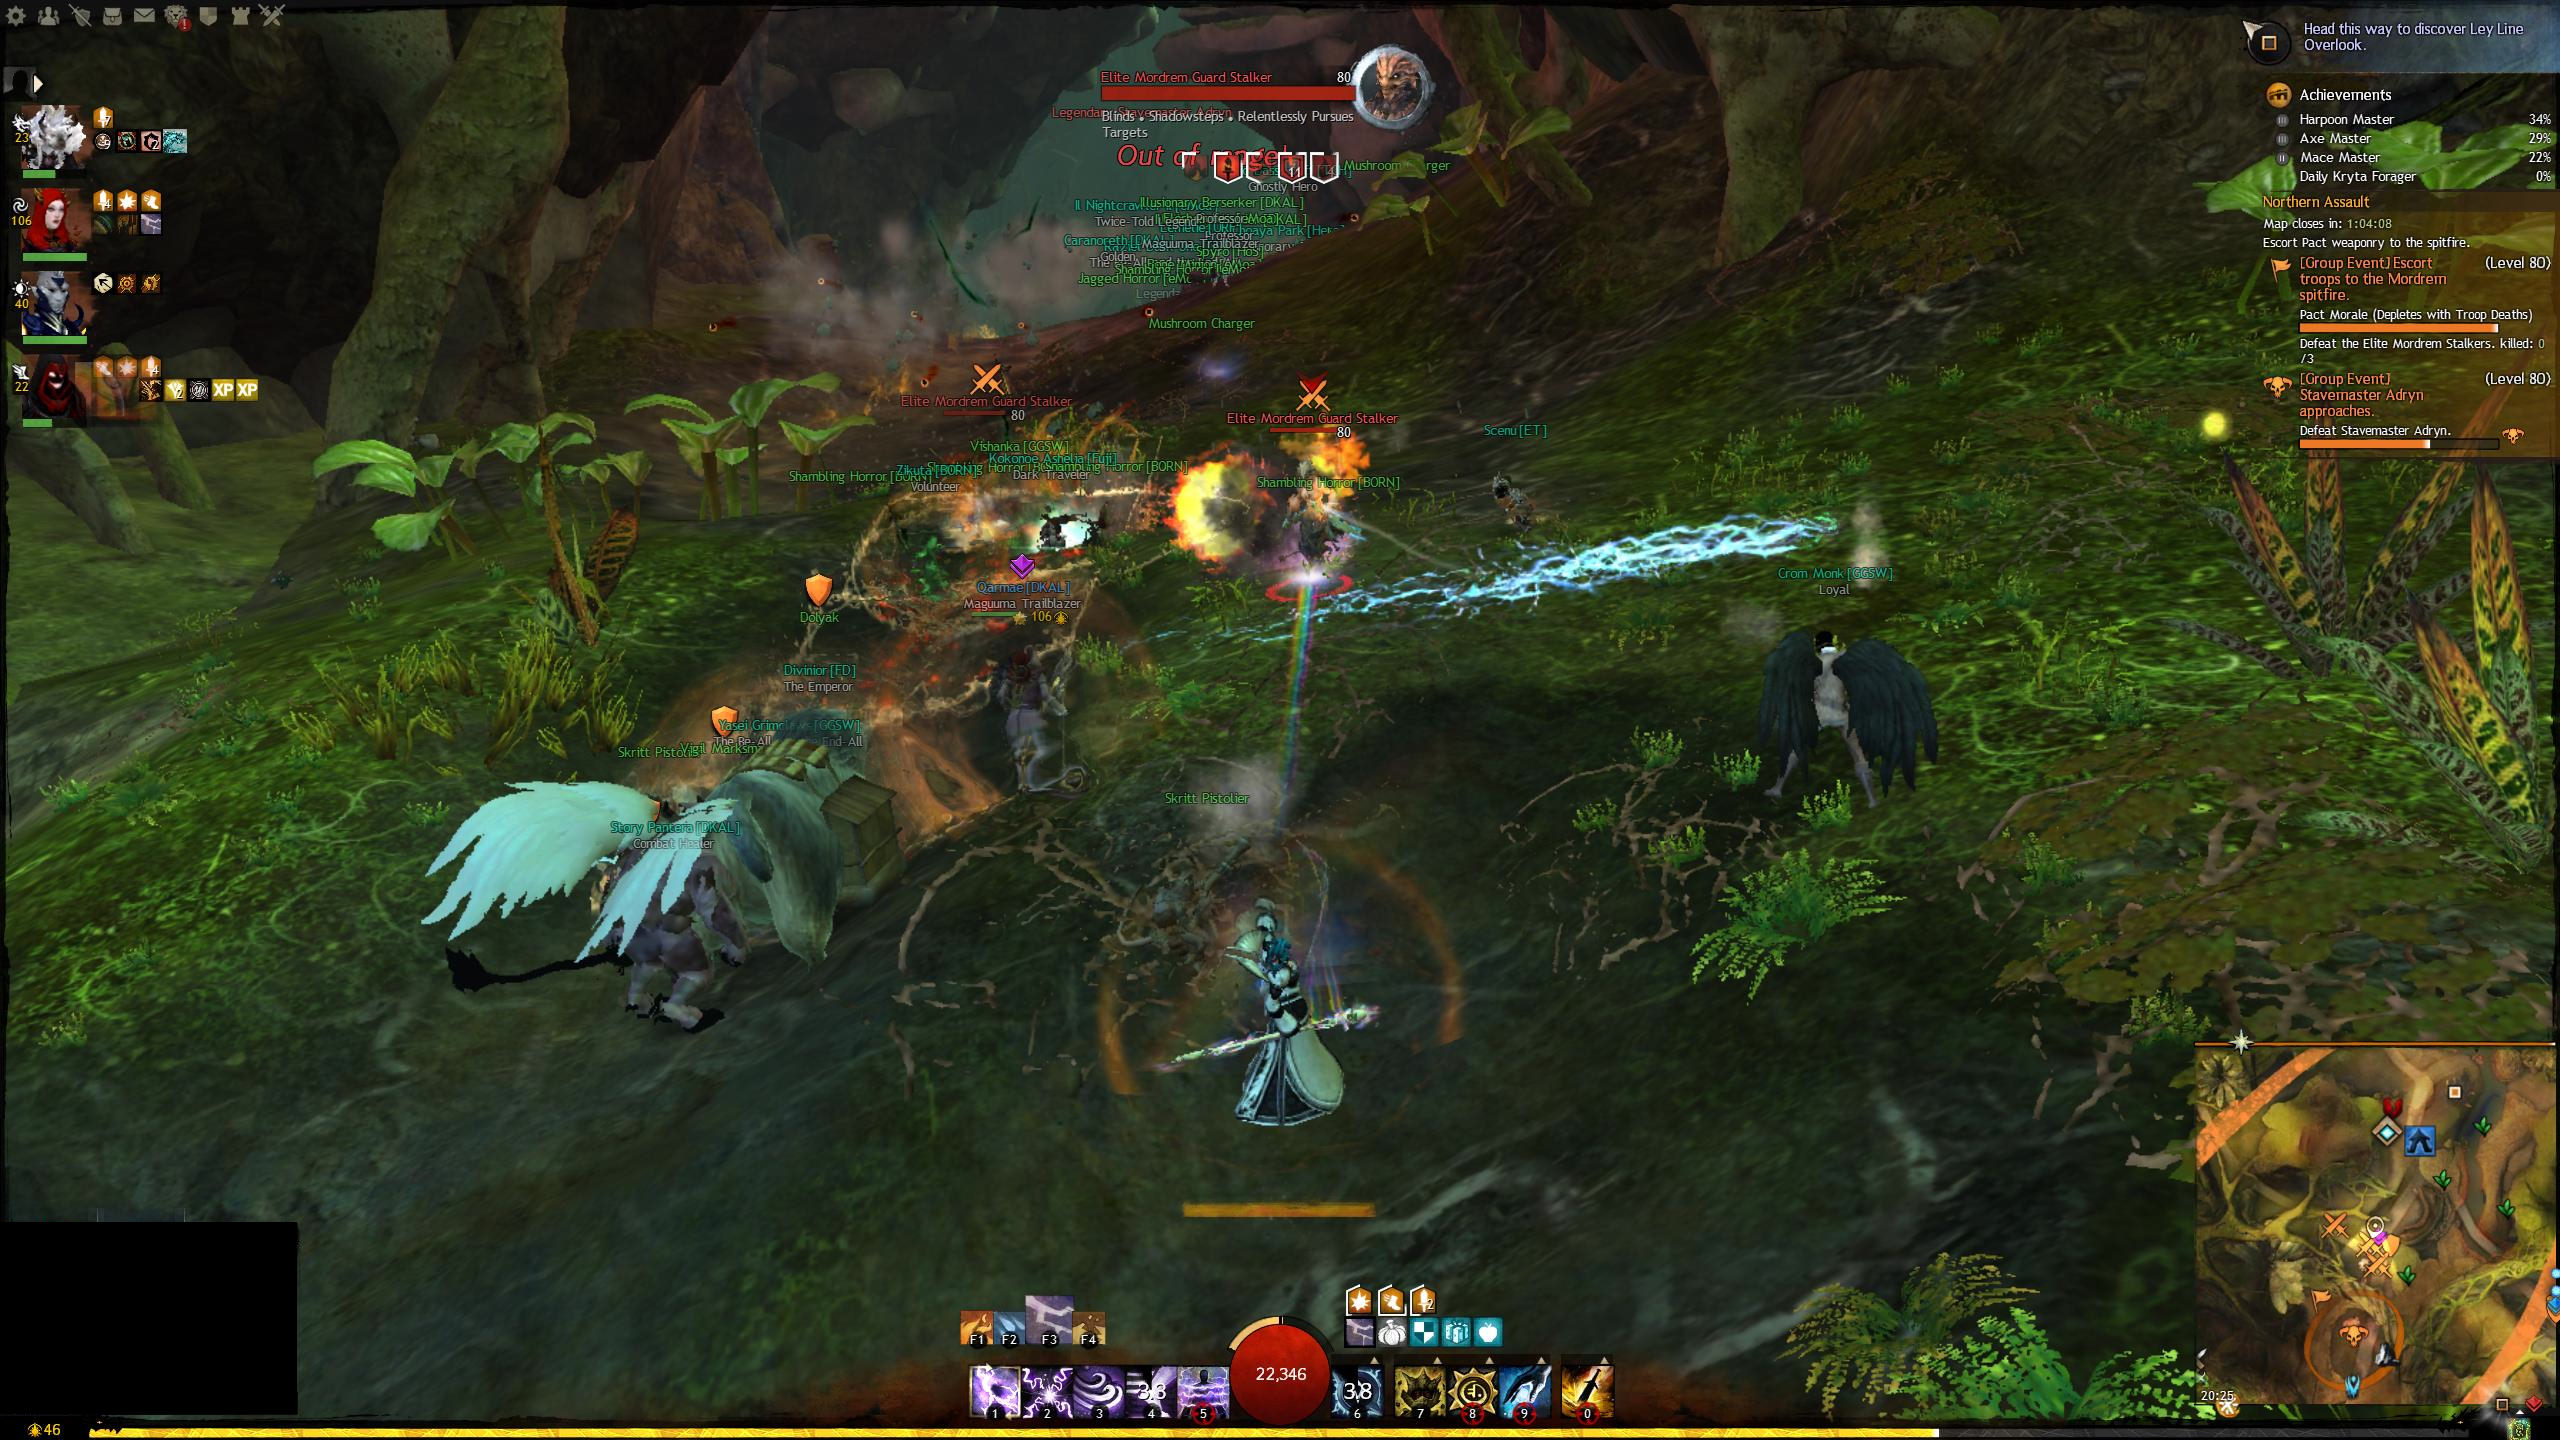
After the thornheart, the pact will advance for a short while and then the event will update to Defeat the Elite Mordrem Stalkers.

View Full Size Image
Simply DPS and continue. You'll be interrupted again to dispatch a couple of dino riders then shortly after, you will arrive at the Spitfire.
View Full Size Image
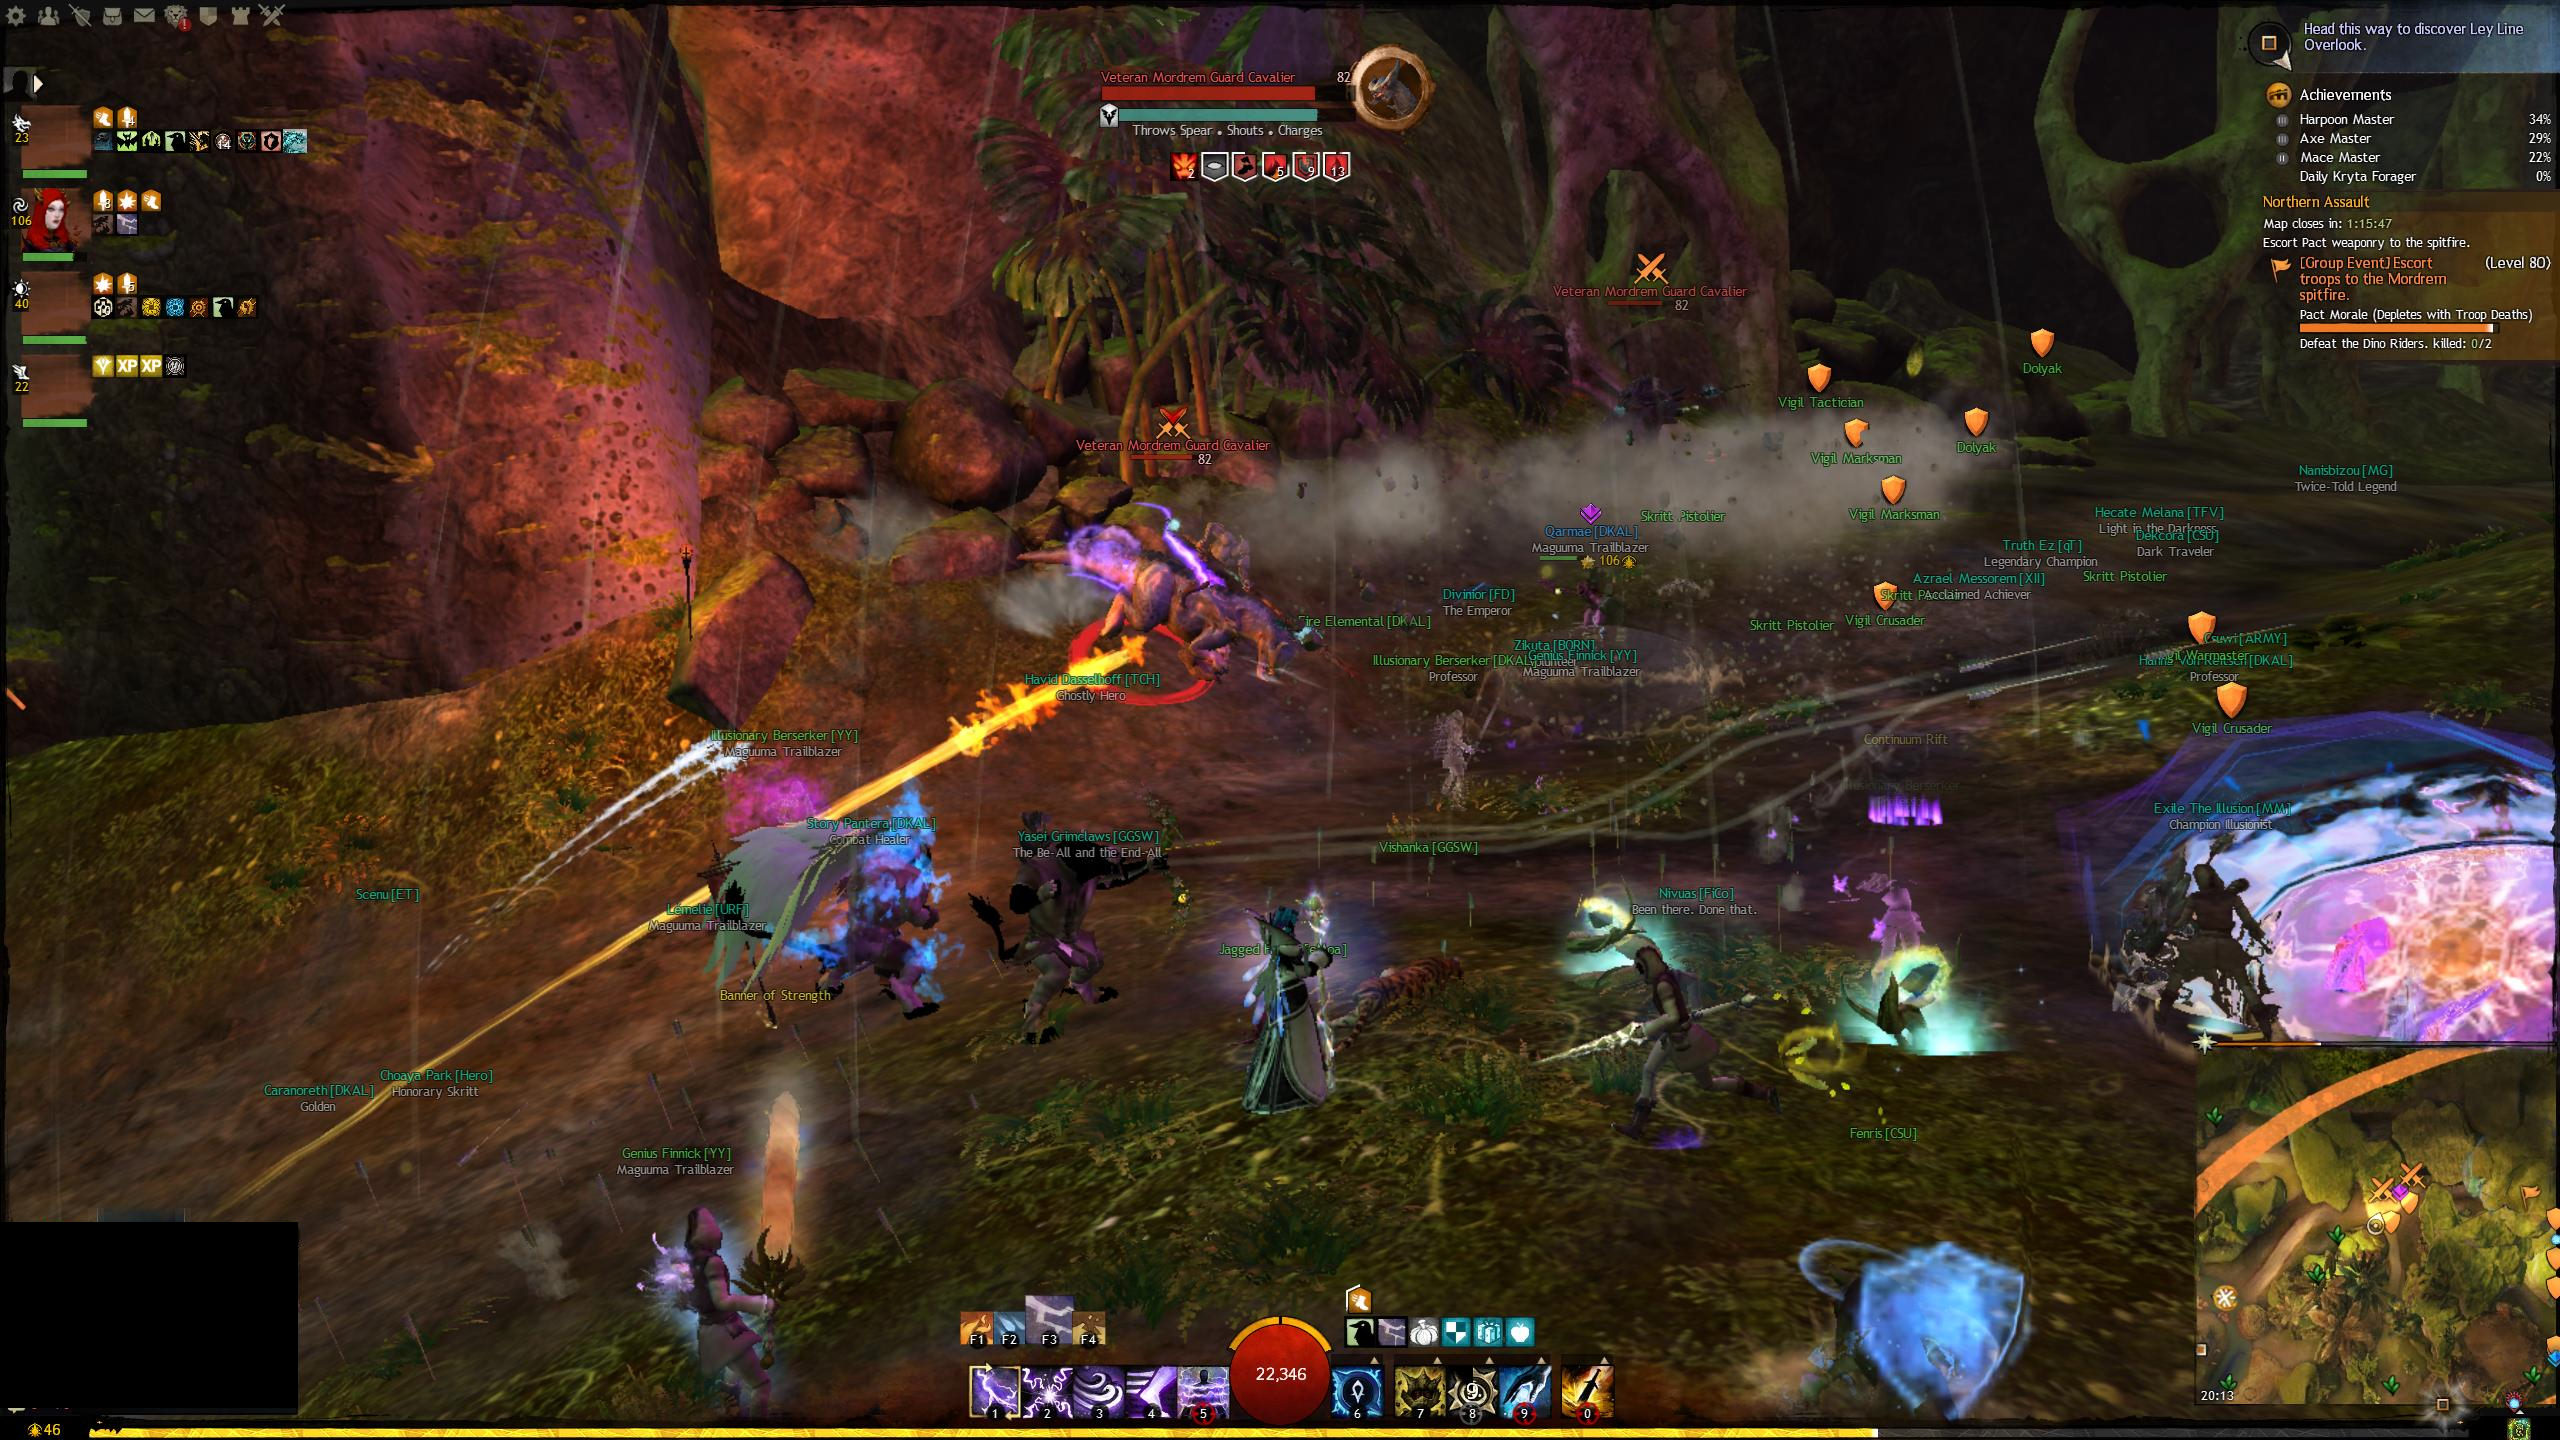
Mordrem Spitfire
The Mordrem Spitfire will initially be shielded, when the shield goes down you can start dealing DPS. Almost immediately two Vinetenders will spawn and continue respawning throughout the event. Split and take these out and then continue DPS on the Spitfire. The vinetenders restore the shield, so you'll need to take them down to deal damage to the spitfire.
Once the spitfire has been taken down, there will be two events to do, there is a mini timer of 7 minutes to do these events.
Bring meat from the dino nests to build a pile to attract wyverns
A short way north of the collector are some nests with meat in them. The meat is a bundle that you can take back to the collector, it does have a collection time when you grab it which is interruptible. Clear enemies or otherwise keep them away while you collect the meat.

View Full Size Image
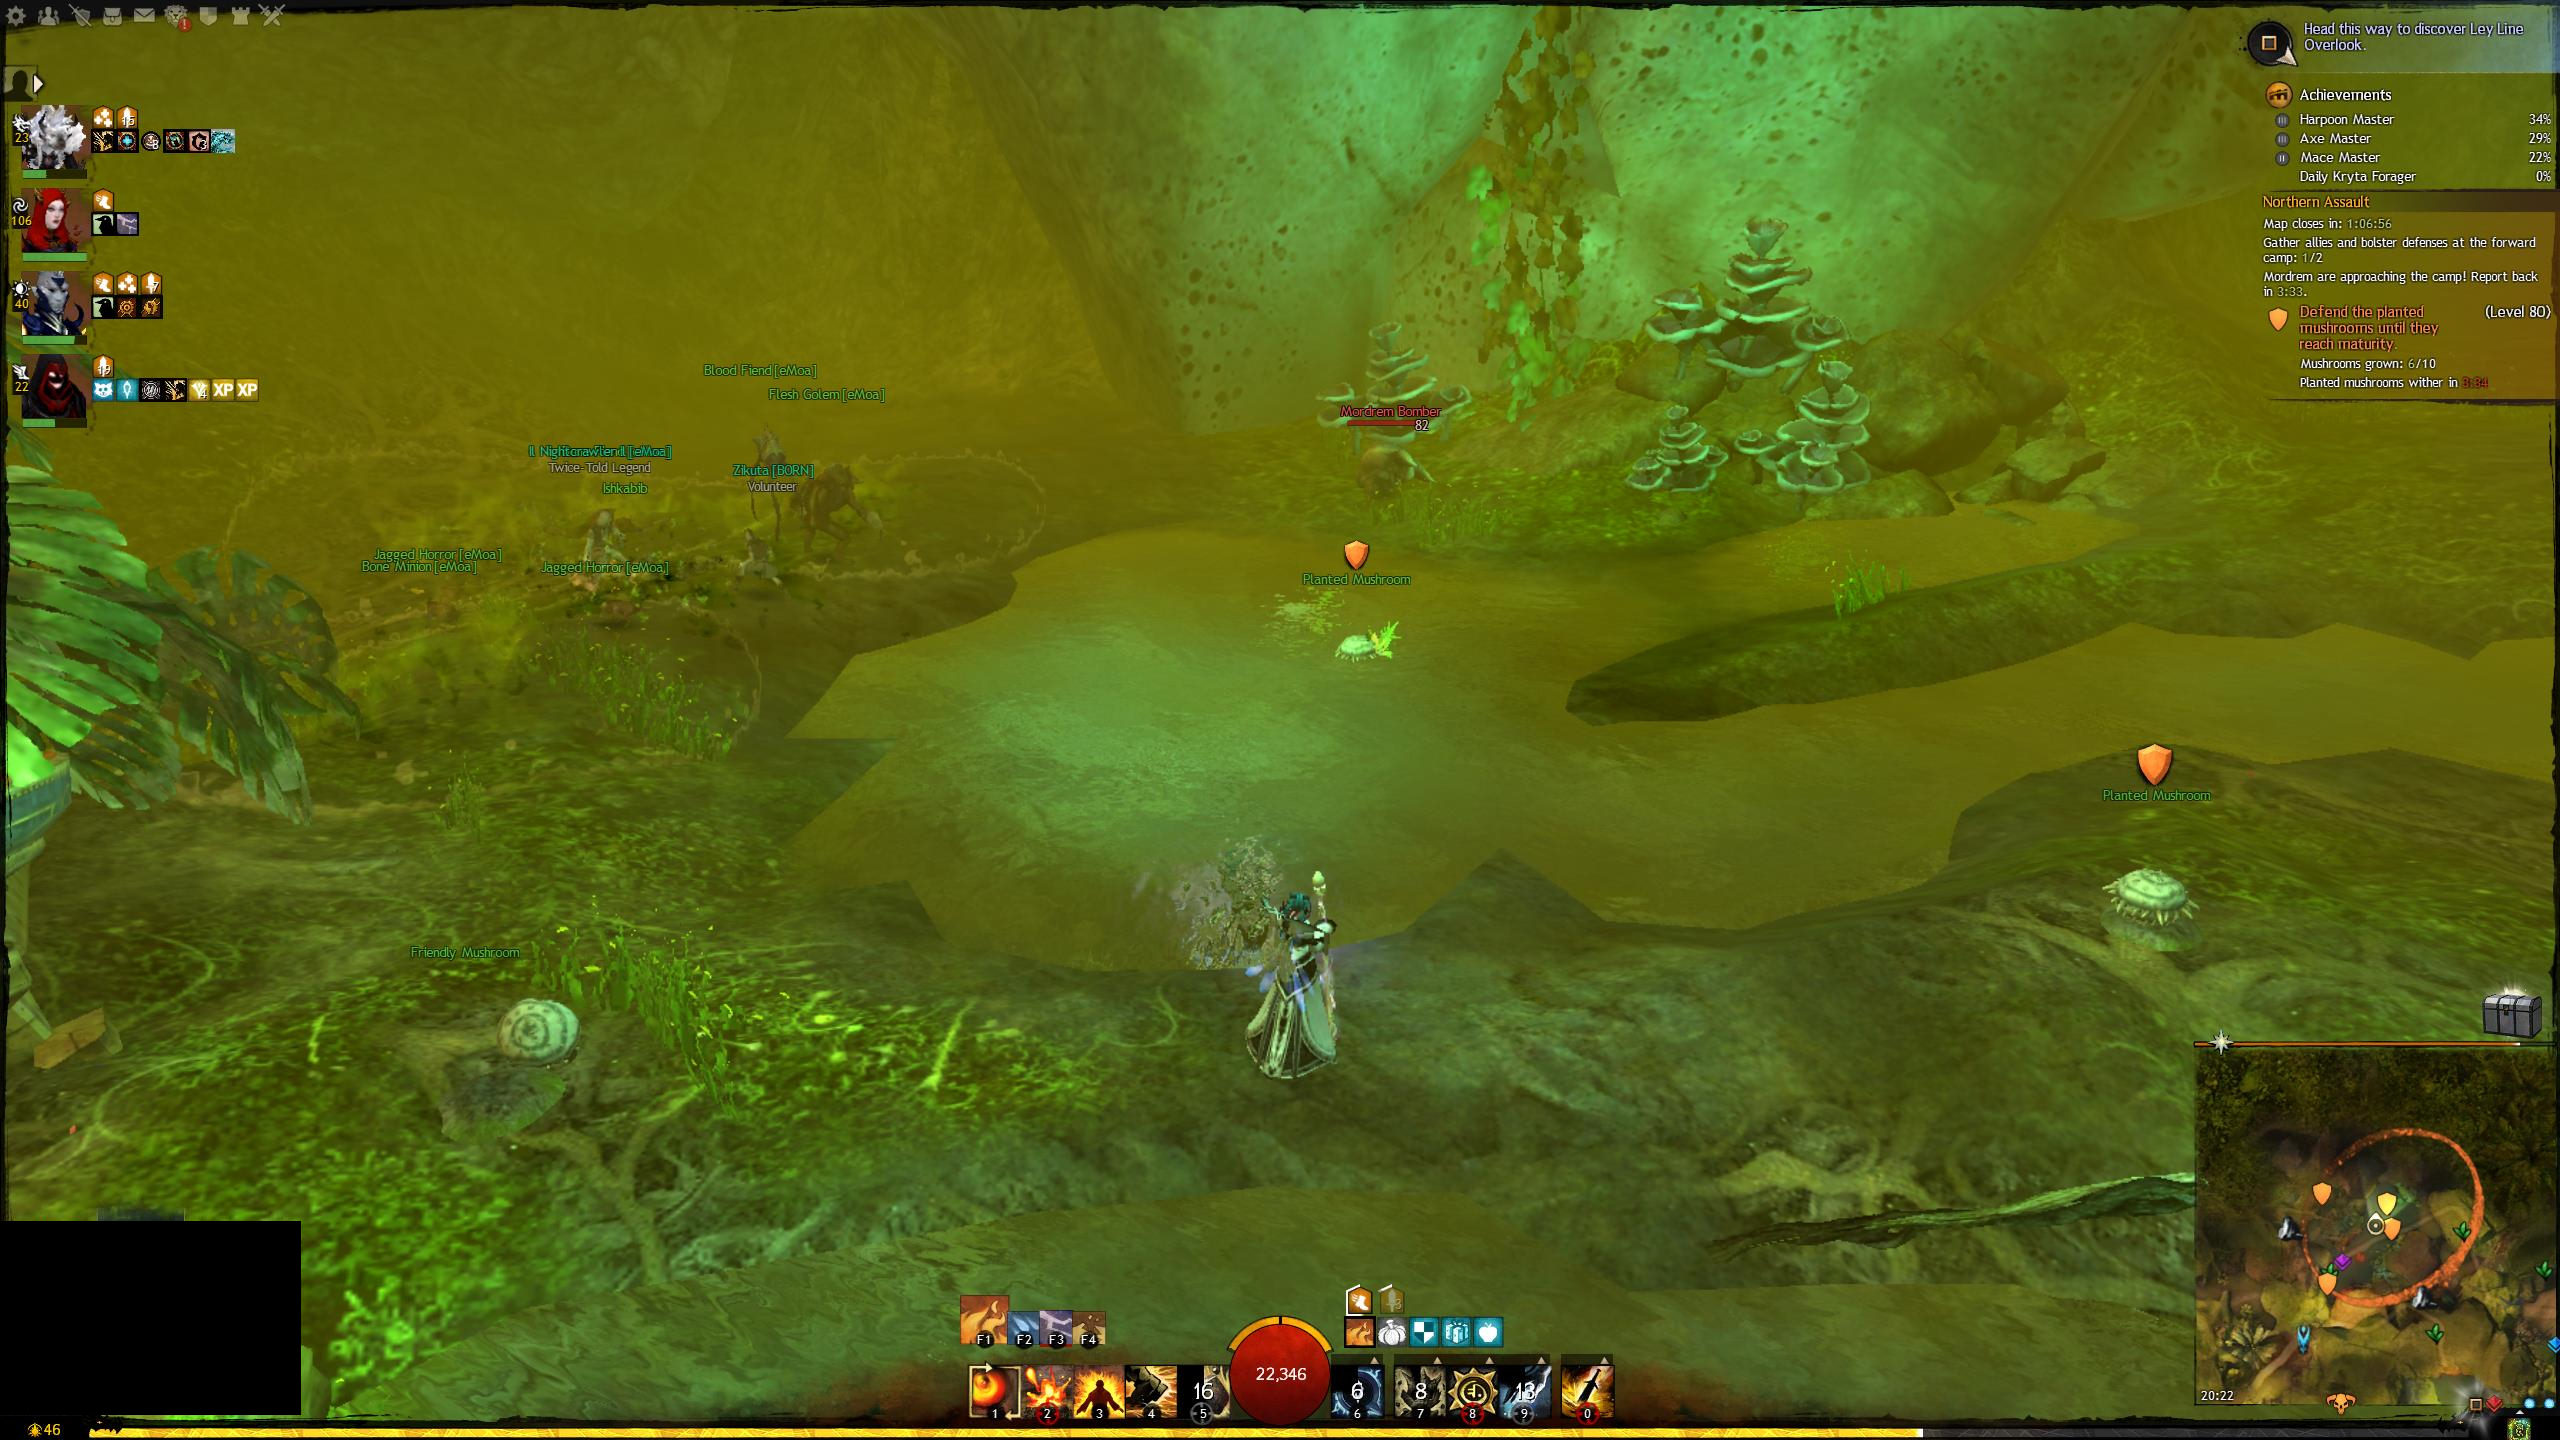
Defend the planted mushrooms until they reach maturity
You will need poison mastery to do this event. There is a cave somewhat north of where the pact stopped to set up camp. In it are a number of allied mushrooms. Their health bars are essentially progress bars. Keep enemies off them while they mature. Return to camp when done.
View Full Size Image
The escort will resume once both missions are done, or if the mini-timer expires (whichever comes first).
Northern escort continued
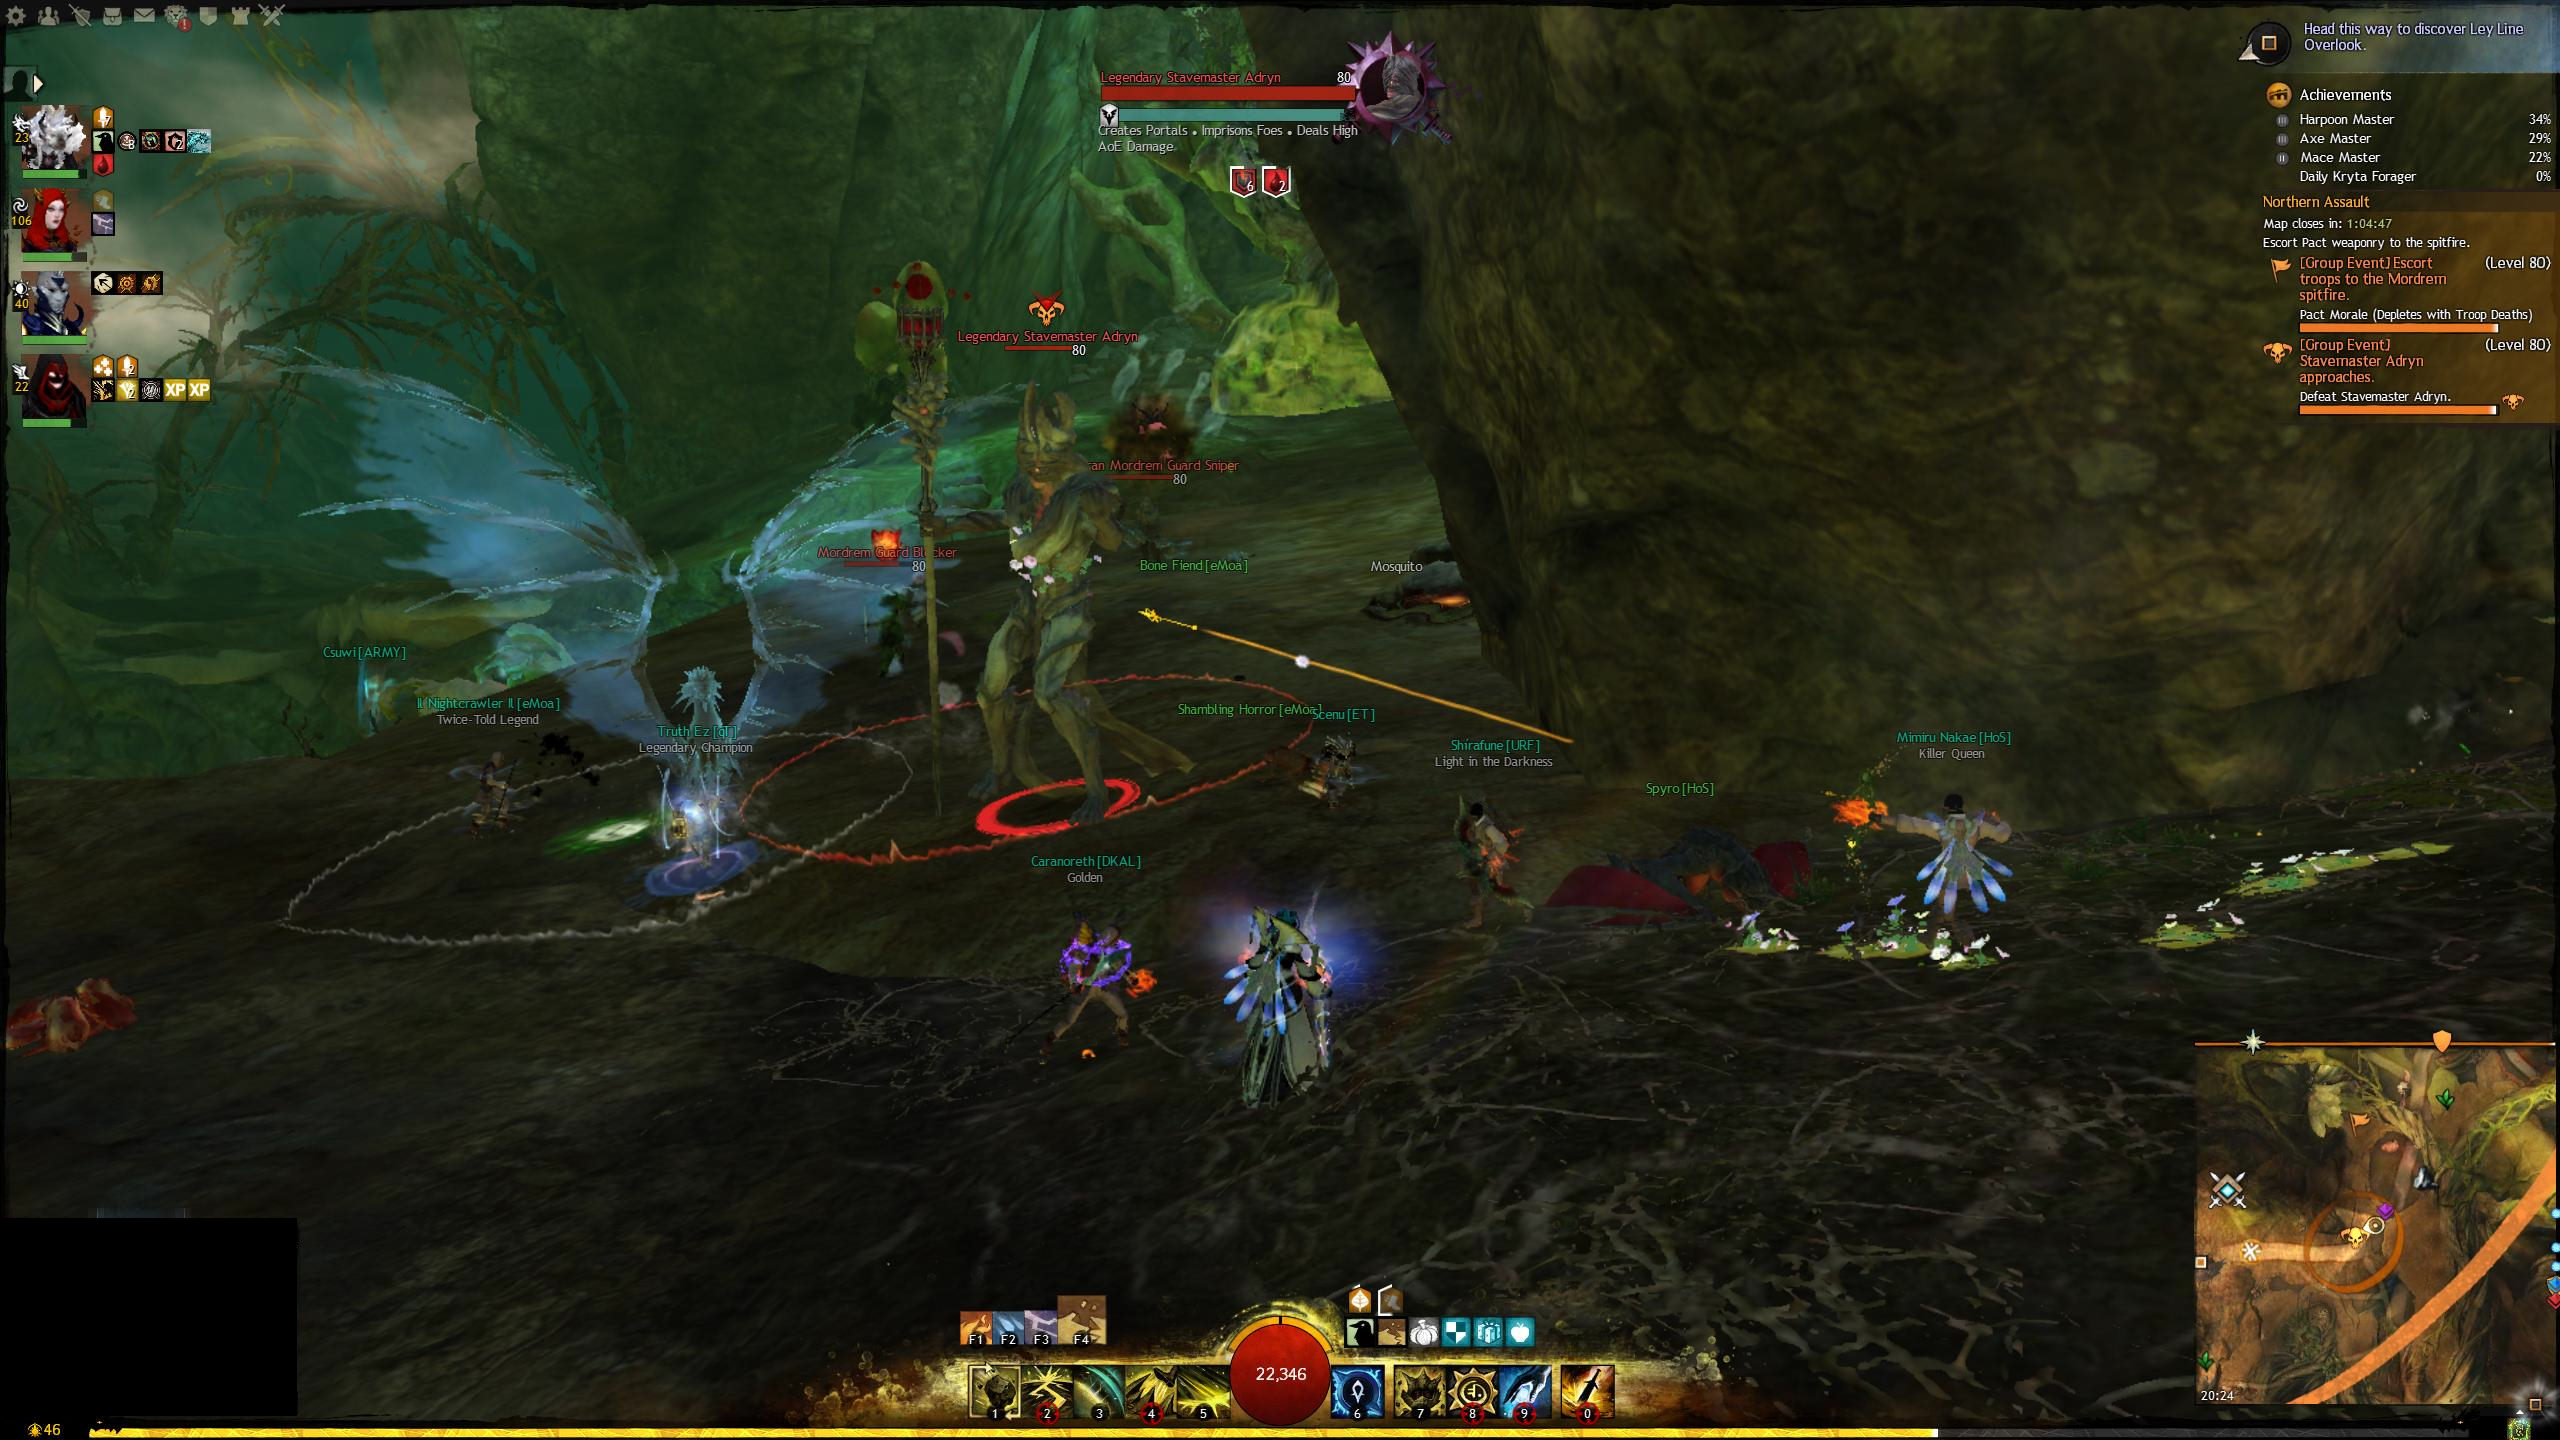
During the time you were doing the events, Legendary Stavemaster Adryn would have been moving towards the pact escort. You'll probably engage just after the events. He does a large amount of AoE damage and has a really funky portal skill, which is like a whirlpool that spins you around.
To combat him, use crowd control skills to break his defiance bar then DPS.
View Full Size Image
As you proceed along the escort, you will encounter more wolves and another thornheart which you will need to defeat. If you're ever in a situation where the thornheart and other events are going on, always focus the thornheart.
Soon after, you will arrive at the next spitfire. Like before, DPS the spitfire but this time there are Preservers spawning. Preservers will heal the spitfire and are a priority target. If you see them spawn, bust down their breakbars using crowd control and DPS them before continuing on the spitfire.

View Full Size Image
After the spitfire is defeated there will be a couple more events.
Help Gammalon Vineripper destroy the brambles and clear a path to the Exalted
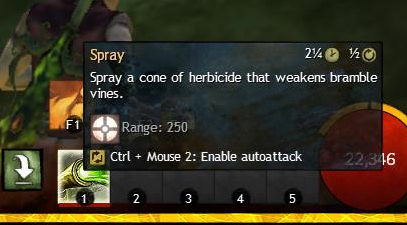
Follow Gammalon until you reach a vine wall. Defeat the vinetenders who keep the walls health topped up then use the the special "Bramble Begone" spray the NPC drops in a box nearby on the vines. Get through a few sets of vines to reach the Exalted.
View Full Size Image
Help Spleecta turn the Exalted machine back on
To get to this event drop down the hole behind the anvil near the waypoint.
Follow Spleecta around destroying incoming enemies. You will reach capture points that you need to take control of. Capture all four points and the event is complete.
Escort continues
Stavemaster Adryn would have respawned. If you're quick, you can wrap up the events before he arrives at the pact camp. If not, then he ends up intermingling with the events, which can be troublesome.
Shortly after the pact start moving again, another Thornheart will appear. Focus the thornheart even if Adryn is still not defeated.

View Full Size Image
Eventually, you will reach the northern blighting tower and that's the end of the northern escort. The next thing to do is the northern tower. At this point, your commander will start preparing for this by splitting the group. 10 People will follow a second tag, the rest will stick to the commander like glue. Continue reading the Tower section for information on what happens next.
This guide is a work in progress
Dragon's Stand is a map that's essentially dedicated to an event chain meta. It requires a modicum of organisation, but map/event familiarity is all you really need. You will need Heart of Thorns to play this content.
The general flow of the map has three escorts traverse the map, doing events along the way until they reach three towers. Each tower must fall at the same time and then there is a final boss. The best way to read this guide is to pick a route (north/central/south) and read the sections pertinent to that for the pre events, escort phase and tower, before the final boss.
Mastery Requirements
Mandatory Requirement:
Updraft (Gliding 2)
You optionally need:
Bouncing Mushrooms (Itzel Lore 1 - Helps you get places)
Itzel Poison Lore (Itzel Lore 4)
Leyline Gliding (Gliding 6 - Required for one of the loot phase locations)
General Event Progression
There are several stages the event progresses through categorised as so:
- Preparation
- Pre-events (before the main event starts)
- Pact Escort
- Tower Bosses
- Dragon Boss Phase
- Loooooooot
The main escort / pre events of this map split in three directions. The general route follows the arrows as below.
View Full Size Image
Before the event starts, commanders will form three groups to do the pre events and the main escort. They'll also ensure that there is a split of people with poison mastery so that all three routes can do events that are in poison areas (over time, this'll become less necessary as people gain their masteries, just be mindful to not jump into a poison event if you lack the mastery or you'll taste a LOT of pain). The escort and pre-events are on a timer, with the escort phase having a total of 2 hours to complete, so the guild will jump into the map as the timer resets.
Pre-Events
Each route have their own pre-events
Northern - Glide up to gather mordrem vine pods and return them to Briallen
From the NPC, simply glide on up to the platform above, grab a vine pod and return it back to Briallen the collector.
 View Full Size Image |  View Full Size Image |
Northern - Bring Chakata shiny wyvern crystals to get the skritt to join the fight
Jump up the bouncing mushrooms in the tree nearby to Chakata and the collection crate. When at the top, glide across to a platform where you can find shiny wyvern crystals. Grab one and drop down to deliver it to the collection crate.
 View Full Size Image | 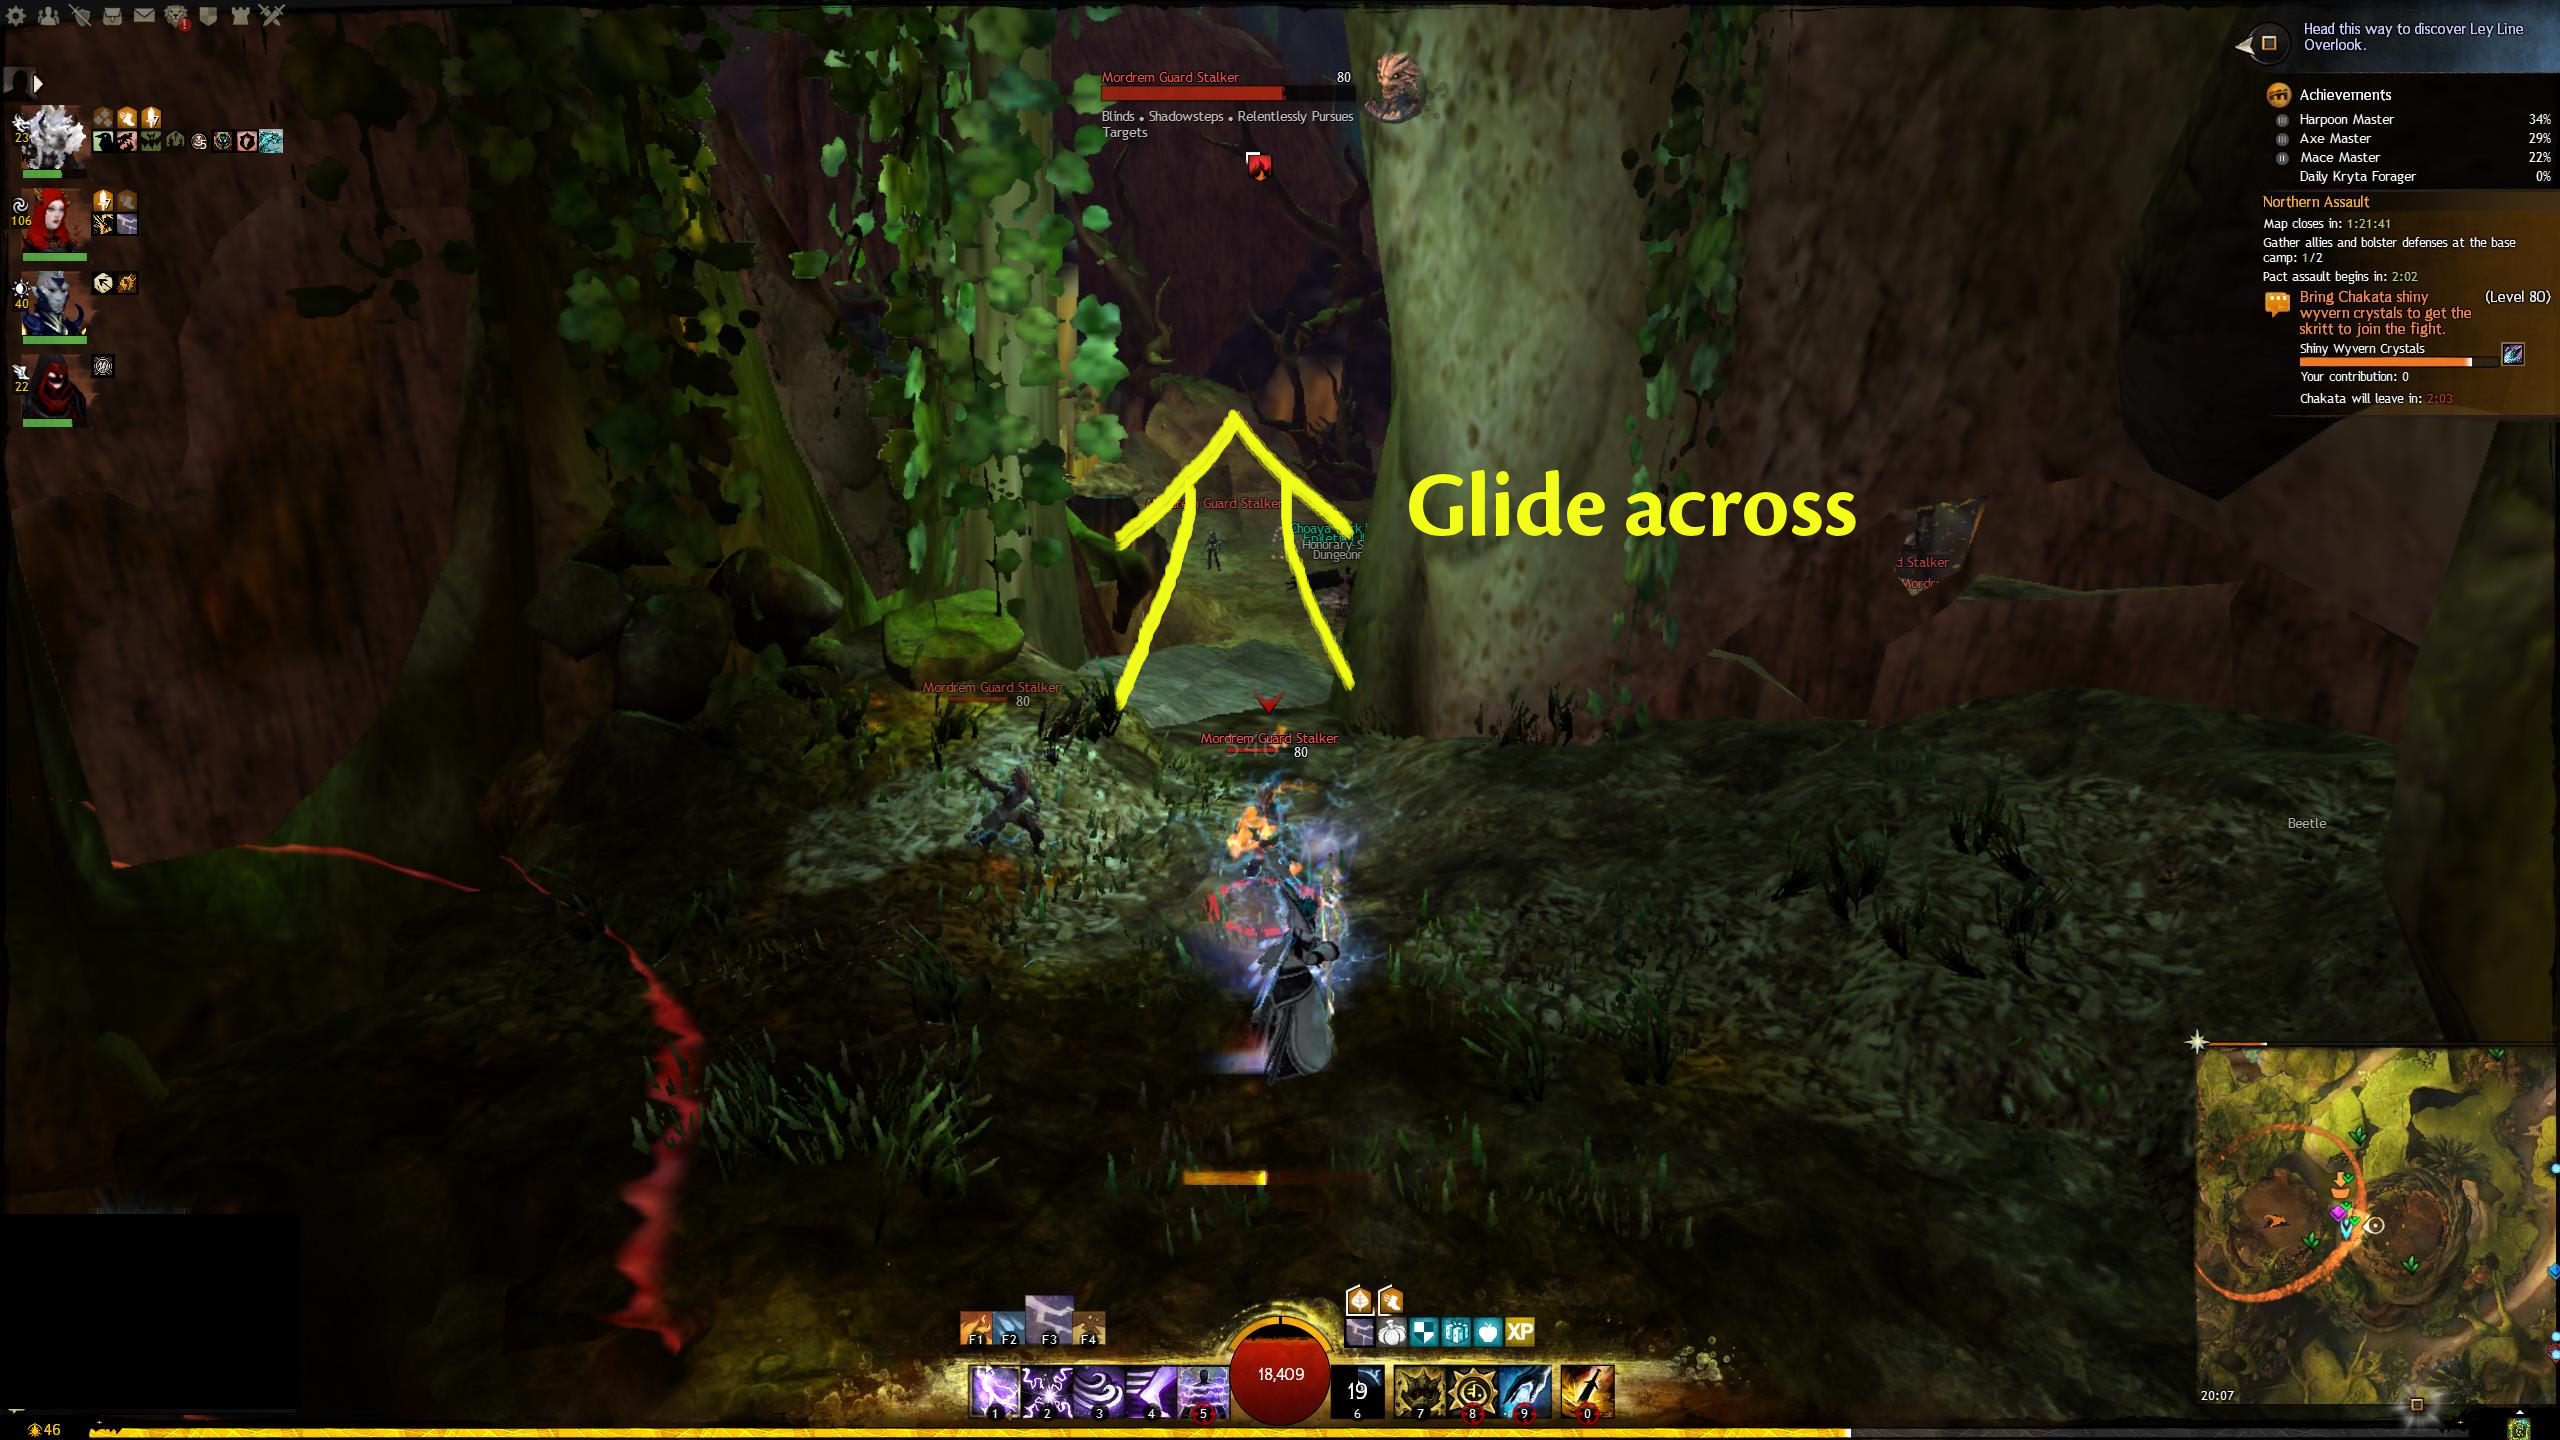 View Full Size Image | 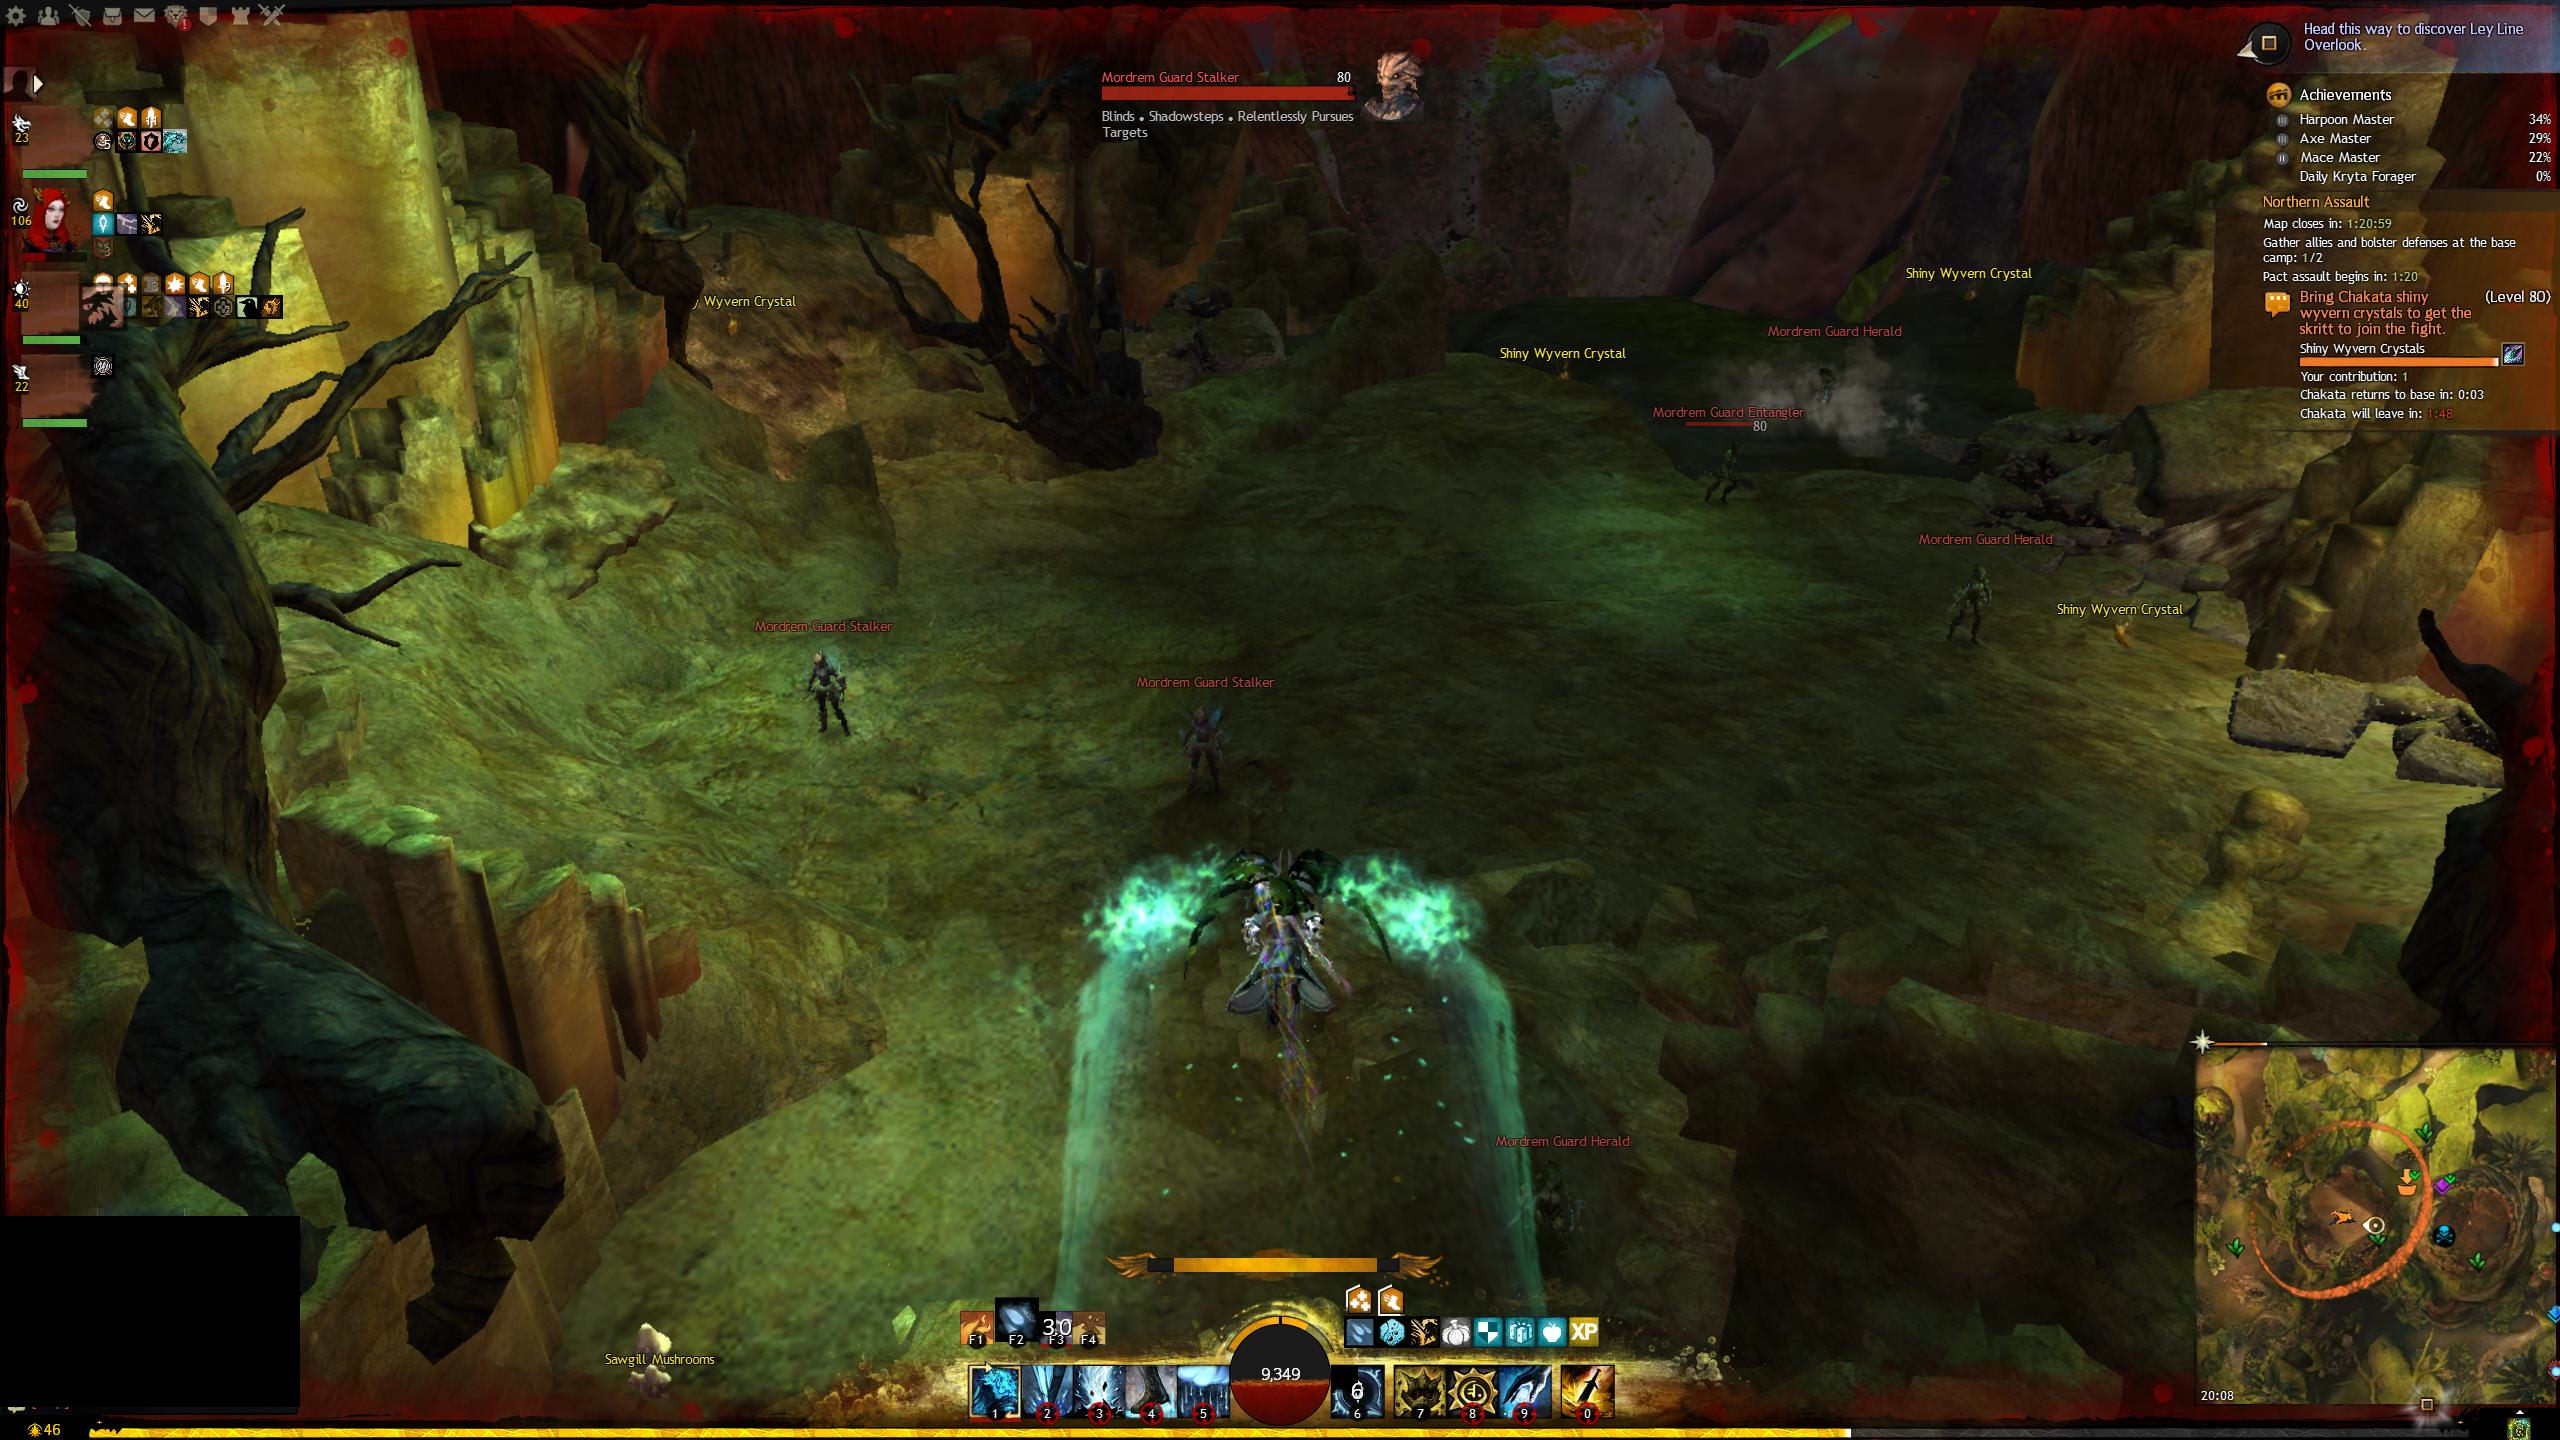 View Full Size Image |
Central - Retrieve engine parts to keep the canons online
How to get there from Pact Base Camp Waypoint:
When you get to the collector, simply use updraft on the vent to get to the ledge above to get the parts they're after.
View Full Size Image
MORE COMING SOON
Escorts
North Escort
For this part of the meta, we are simply escorting NPC's through the northern part of the map. There's a few events that we stop off to do mid-way, as well as some bosses that we will encounter during escort phases.
Thornheart
Almost immediately after the escort begins, a thornheart will spawn to the right. You'll encounter this boss several times across the entire escort. It should always be a priority over any other boss in the area. Use crowd control skills to break the defiance bar and simply DPS the thornheart to take it down.
View Full Size Image
After the thornheart, the pact will advance for a short while and then the event will update to Defeat the Elite Mordrem Stalkers.
View Full Size Image
Simply DPS and continue. You'll be interrupted again to dispatch a couple of dino riders then shortly after, you will arrive at the Spitfire.
View Full Size Image
Mordrem Spitfire
The Mordrem Spitfire will initially be shielded, when the shield goes down you can start dealing DPS. Almost immediately two Vinetenders will spawn and continue respawning throughout the event. Split and take these out and then continue DPS on the Spitfire. The vinetenders restore the shield, so you'll need to take them down to deal damage to the spitfire.
 View Full Size Image | 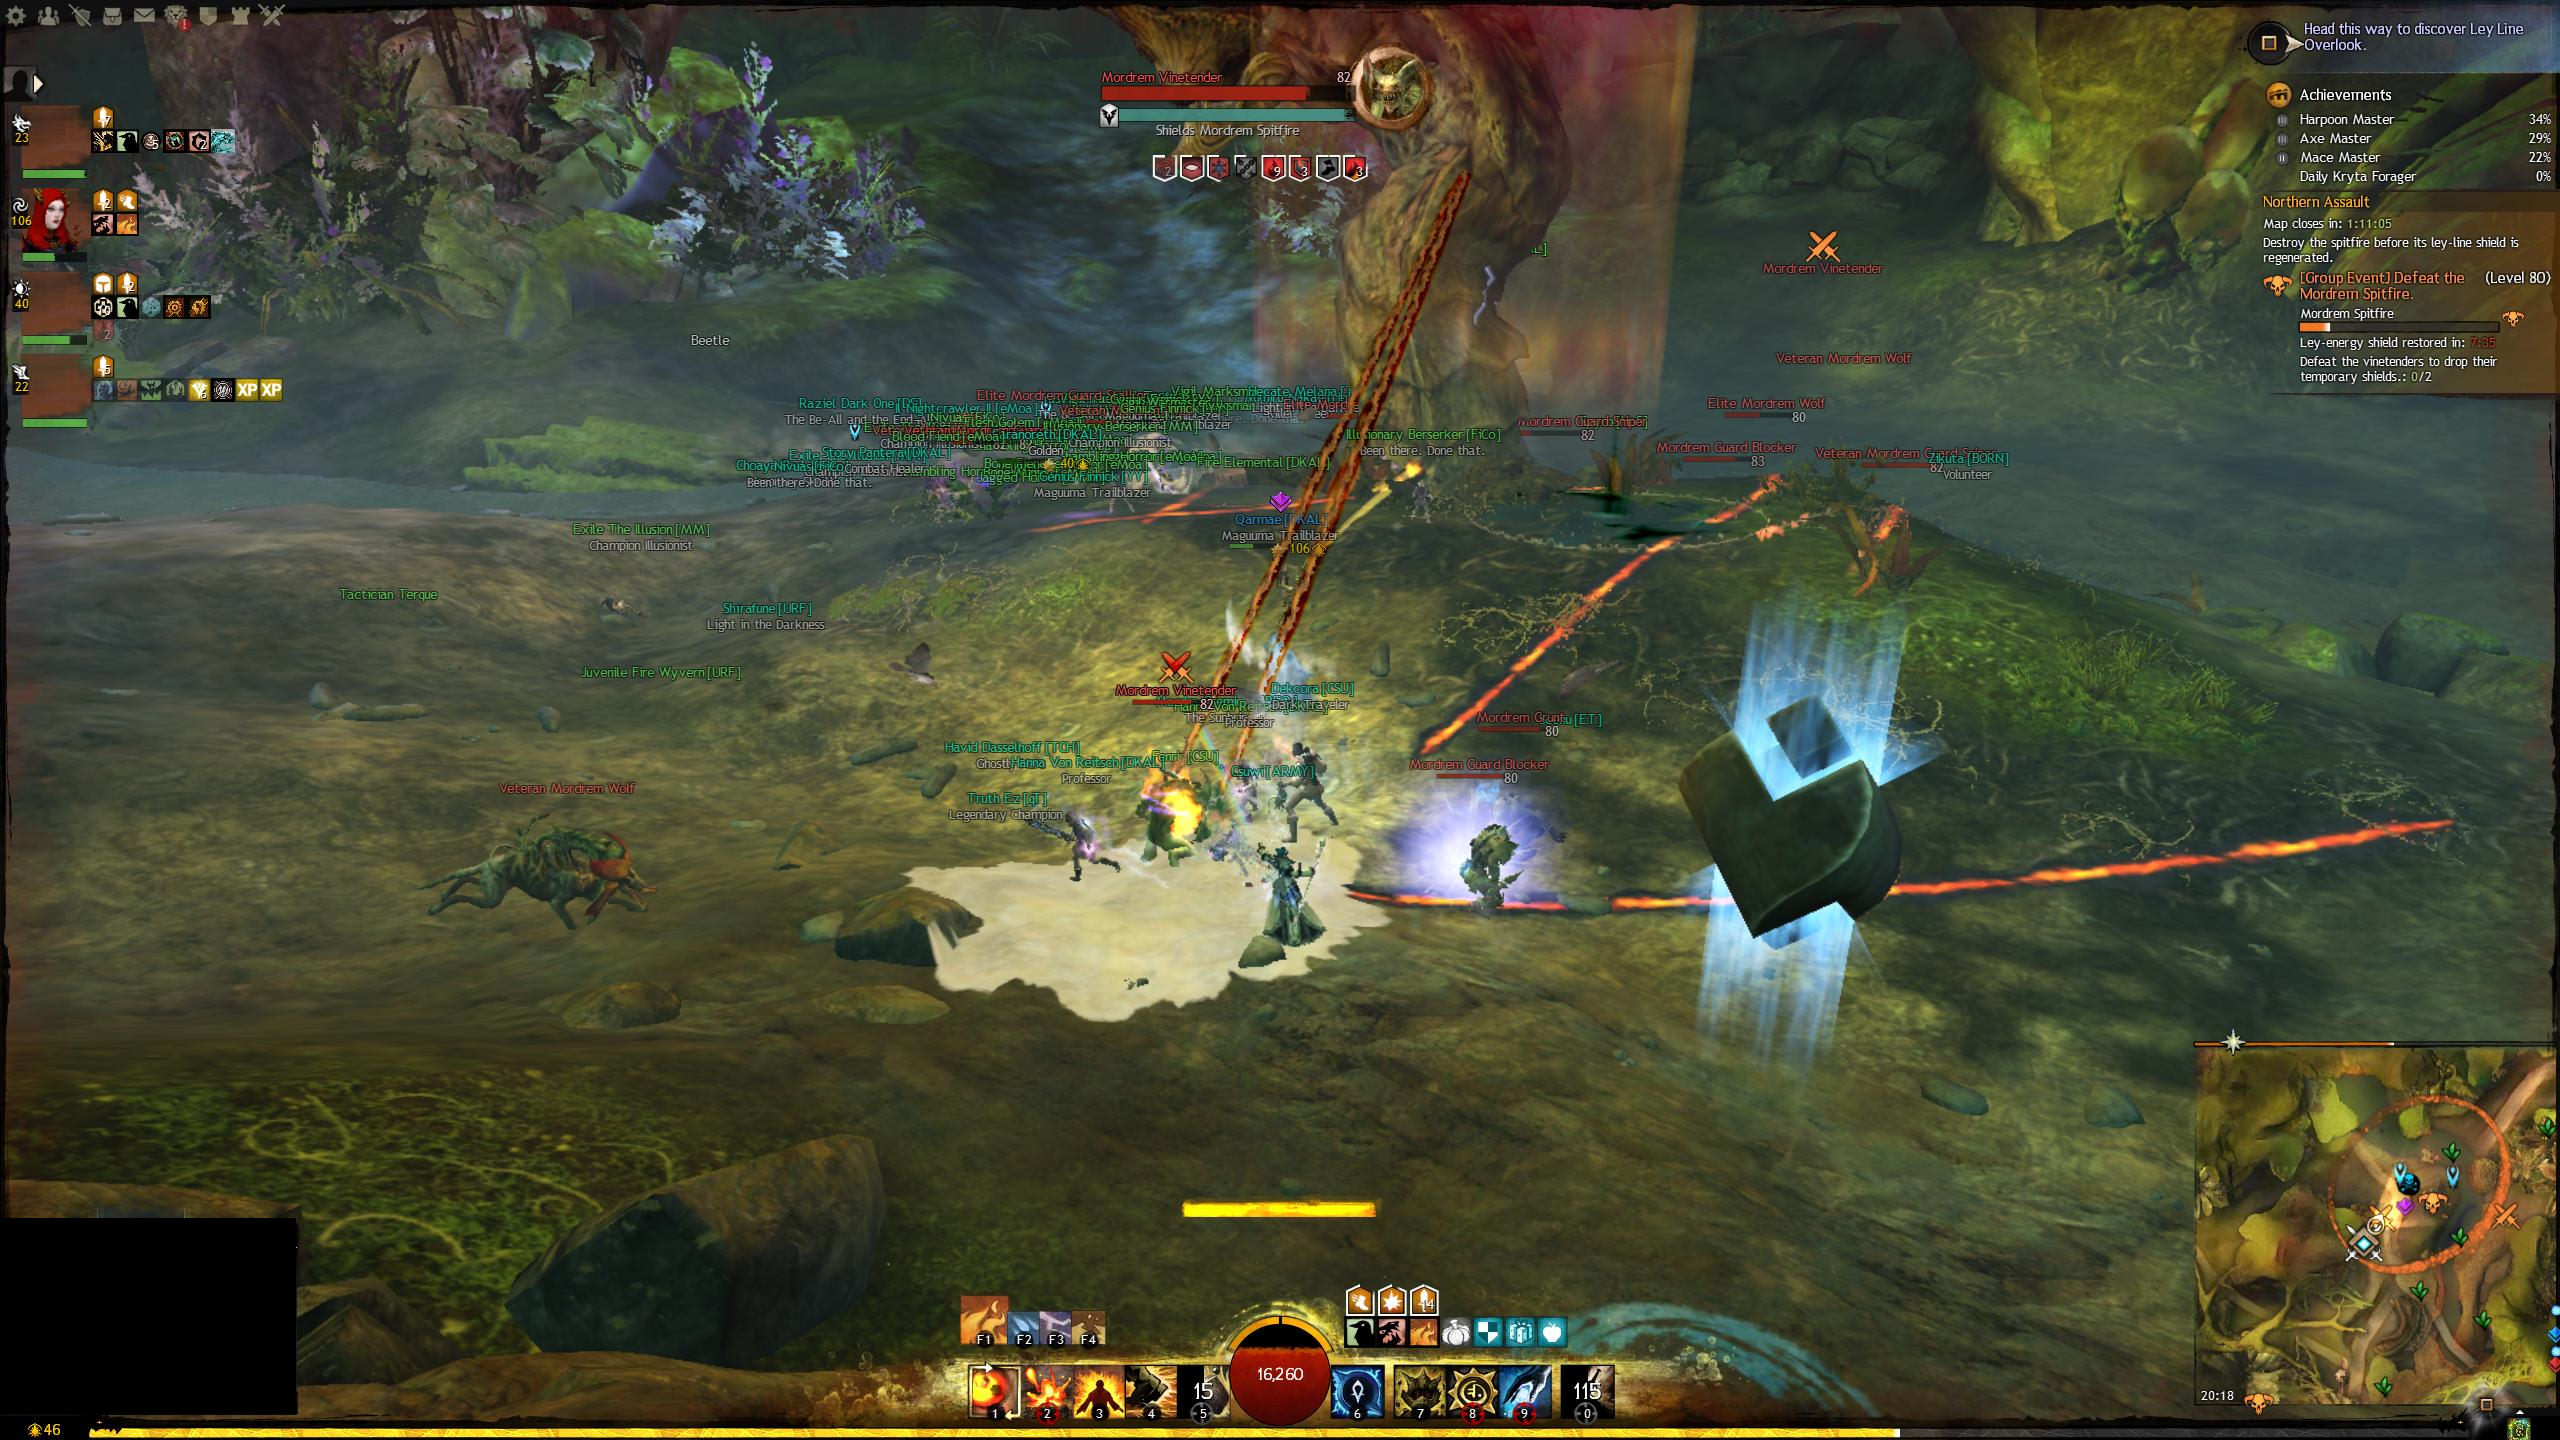 View Full Size Image |
Once the spitfire has been taken down, there will be two events to do, there is a mini timer of 7 minutes to do these events.
Bring meat from the dino nests to build a pile to attract wyverns
A short way north of the collector are some nests with meat in them. The meat is a bundle that you can take back to the collector, it does have a collection time when you grab it which is interruptible. Clear enemies or otherwise keep them away while you collect the meat.
View Full Size Image
Defend the planted mushrooms until they reach maturity
You will need poison mastery to do this event. There is a cave somewhat north of where the pact stopped to set up camp. In it are a number of allied mushrooms. Their health bars are essentially progress bars. Keep enemies off them while they mature. Return to camp when done.
View Full Size Image
The escort will resume once both missions are done, or if the mini-timer expires (whichever comes first).
Northern escort continued
During the time you were doing the events, Legendary Stavemaster Adryn would have been moving towards the pact escort. You'll probably engage just after the events. He does a large amount of AoE damage and has a really funky portal skill, which is like a whirlpool that spins you around.
To combat him, use crowd control skills to break his defiance bar then DPS.
View Full Size Image
As you proceed along the escort, you will encounter more wolves and another thornheart which you will need to defeat. If you're ever in a situation where the thornheart and other events are going on, always focus the thornheart.
 View Full Size Image |  View Full Size Image |
Soon after, you will arrive at the next spitfire. Like before, DPS the spitfire but this time there are Preservers spawning. Preservers will heal the spitfire and are a priority target. If you see them spawn, bust down their breakbars using crowd control and DPS them before continuing on the spitfire.
View Full Size Image
After the spitfire is defeated there will be a couple more events.
Help Gammalon Vineripper destroy the brambles and clear a path to the Exalted
Follow Gammalon until you reach a vine wall. Defeat the vinetenders who keep the walls health topped up then use the the special "Bramble Begone" spray the NPC drops in a box nearby on the vines. Get through a few sets of vines to reach the Exalted.
 View Full Size Image |  View Full Size Image |
View Full Size Image
Help Spleecta turn the Exalted machine back on
To get to this event drop down the hole behind the anvil near the waypoint.
Follow Spleecta around destroying incoming enemies. You will reach capture points that you need to take control of. Capture all four points and the event is complete.
 View Full Size Image |  View Full Size Image |
Escort continues
Stavemaster Adryn would have respawned. If you're quick, you can wrap up the events before he arrives at the pact camp. If not, then he ends up intermingling with the events, which can be troublesome.
Shortly after the pact start moving again, another Thornheart will appear. Focus the thornheart even if Adryn is still not defeated.
View Full Size Image
Eventually, you will reach the northern blighting tower and that's the end of the northern escort. The next thing to do is the northern tower. At this point, your commander will start preparing for this by splitting the group. 10 People will follow a second tag, the rest will stick to the commander like glue. Continue reading the Tower section for information on what happens next.
